“Do you want that with or without pixellation, sir?”

Introduction
Gigapixel AI is the ‘ugly duckling’ of the Topaz Labs suite of software programs, but it can be just as useful as Sharpen AI and DeNoise AI if you need to enlarge an image, say for printing.
With its ability to suppress noise and reduce blur, the program allows you to resize your images better than any other product on the market, including Lightroom or Photoshop, and it also has a variety of other features similar to those in Sharpen AI and DeNoise AI:
regular software updates to improve performance
three Resize Modes (Scale, Width and Height)
various options for each mode:
Scale: 0.5x, 2x, 4x, 6x and …x (ie custom)
Width: box for Max Width in pixels, inches or centimetres
Height: box for Max Height in pixels, inches or centimetres
four different algorithms to choose from:
“Standard: For images of all types. This uses the standard Gigapixel AI model, trained on thousands of images.”
“Architectural: For images with a lot of clear, crisp edges. This AI model is best for cityscapes, and even typographical imagery.”
“Compressed: For images that have a lot of noise. Best for old family photos, images downloaded from the internet, and photos taken on old cameras.”
“Art: Works best for digital cartoons, screenshots from animated movies and video games, and digital scans of paintings and drawings.”


Reduce Color Bleed toggle switch
Face Refinement toggle switch
automatic settings for Suppress Noise and Reduce Blur
Auto-update preview toggle switch
Crop button
Crop options
zoom (presets and manual entry)
batch processing for multiple images
Preview window
Preview toggle switch (to hide the image in the preview and main windows)
Original button to toggle between the sharpened and unsharpened image (in Single View)
tool tips where there is a ‘?’ icon
two different view options:
Single View
Side-by-side View

Getting started
The first thing you’ll have to do, obviously, is download the software. Topaz Labs has a suite of three main programs: Sharpen AI, DeNoise AI and Gigapixel AI.
You can buy them individually or as a set, but it’s probably worth taking advantage of the free trial first of all.
Both Sharpen AI and DeNoise AI offer sharpening and noise reduction, but, as the names suggest, they each have a different specialism. Gigapixel AI is used for increasing the file size of your images, and that’s handy if you’ve cropped in heavily and/or you don’t have enough pixels to play with.
As it happens, I’m an affiliate for Topaz Labs, so you can get 15% off any purchase by following this link and using the discount code nickdale15.
Once you’ve downloaded, installed and opened up the software, you’re ready to go.
You can either drag images directly into the main window or click the Browse button to find the image(s) you want.
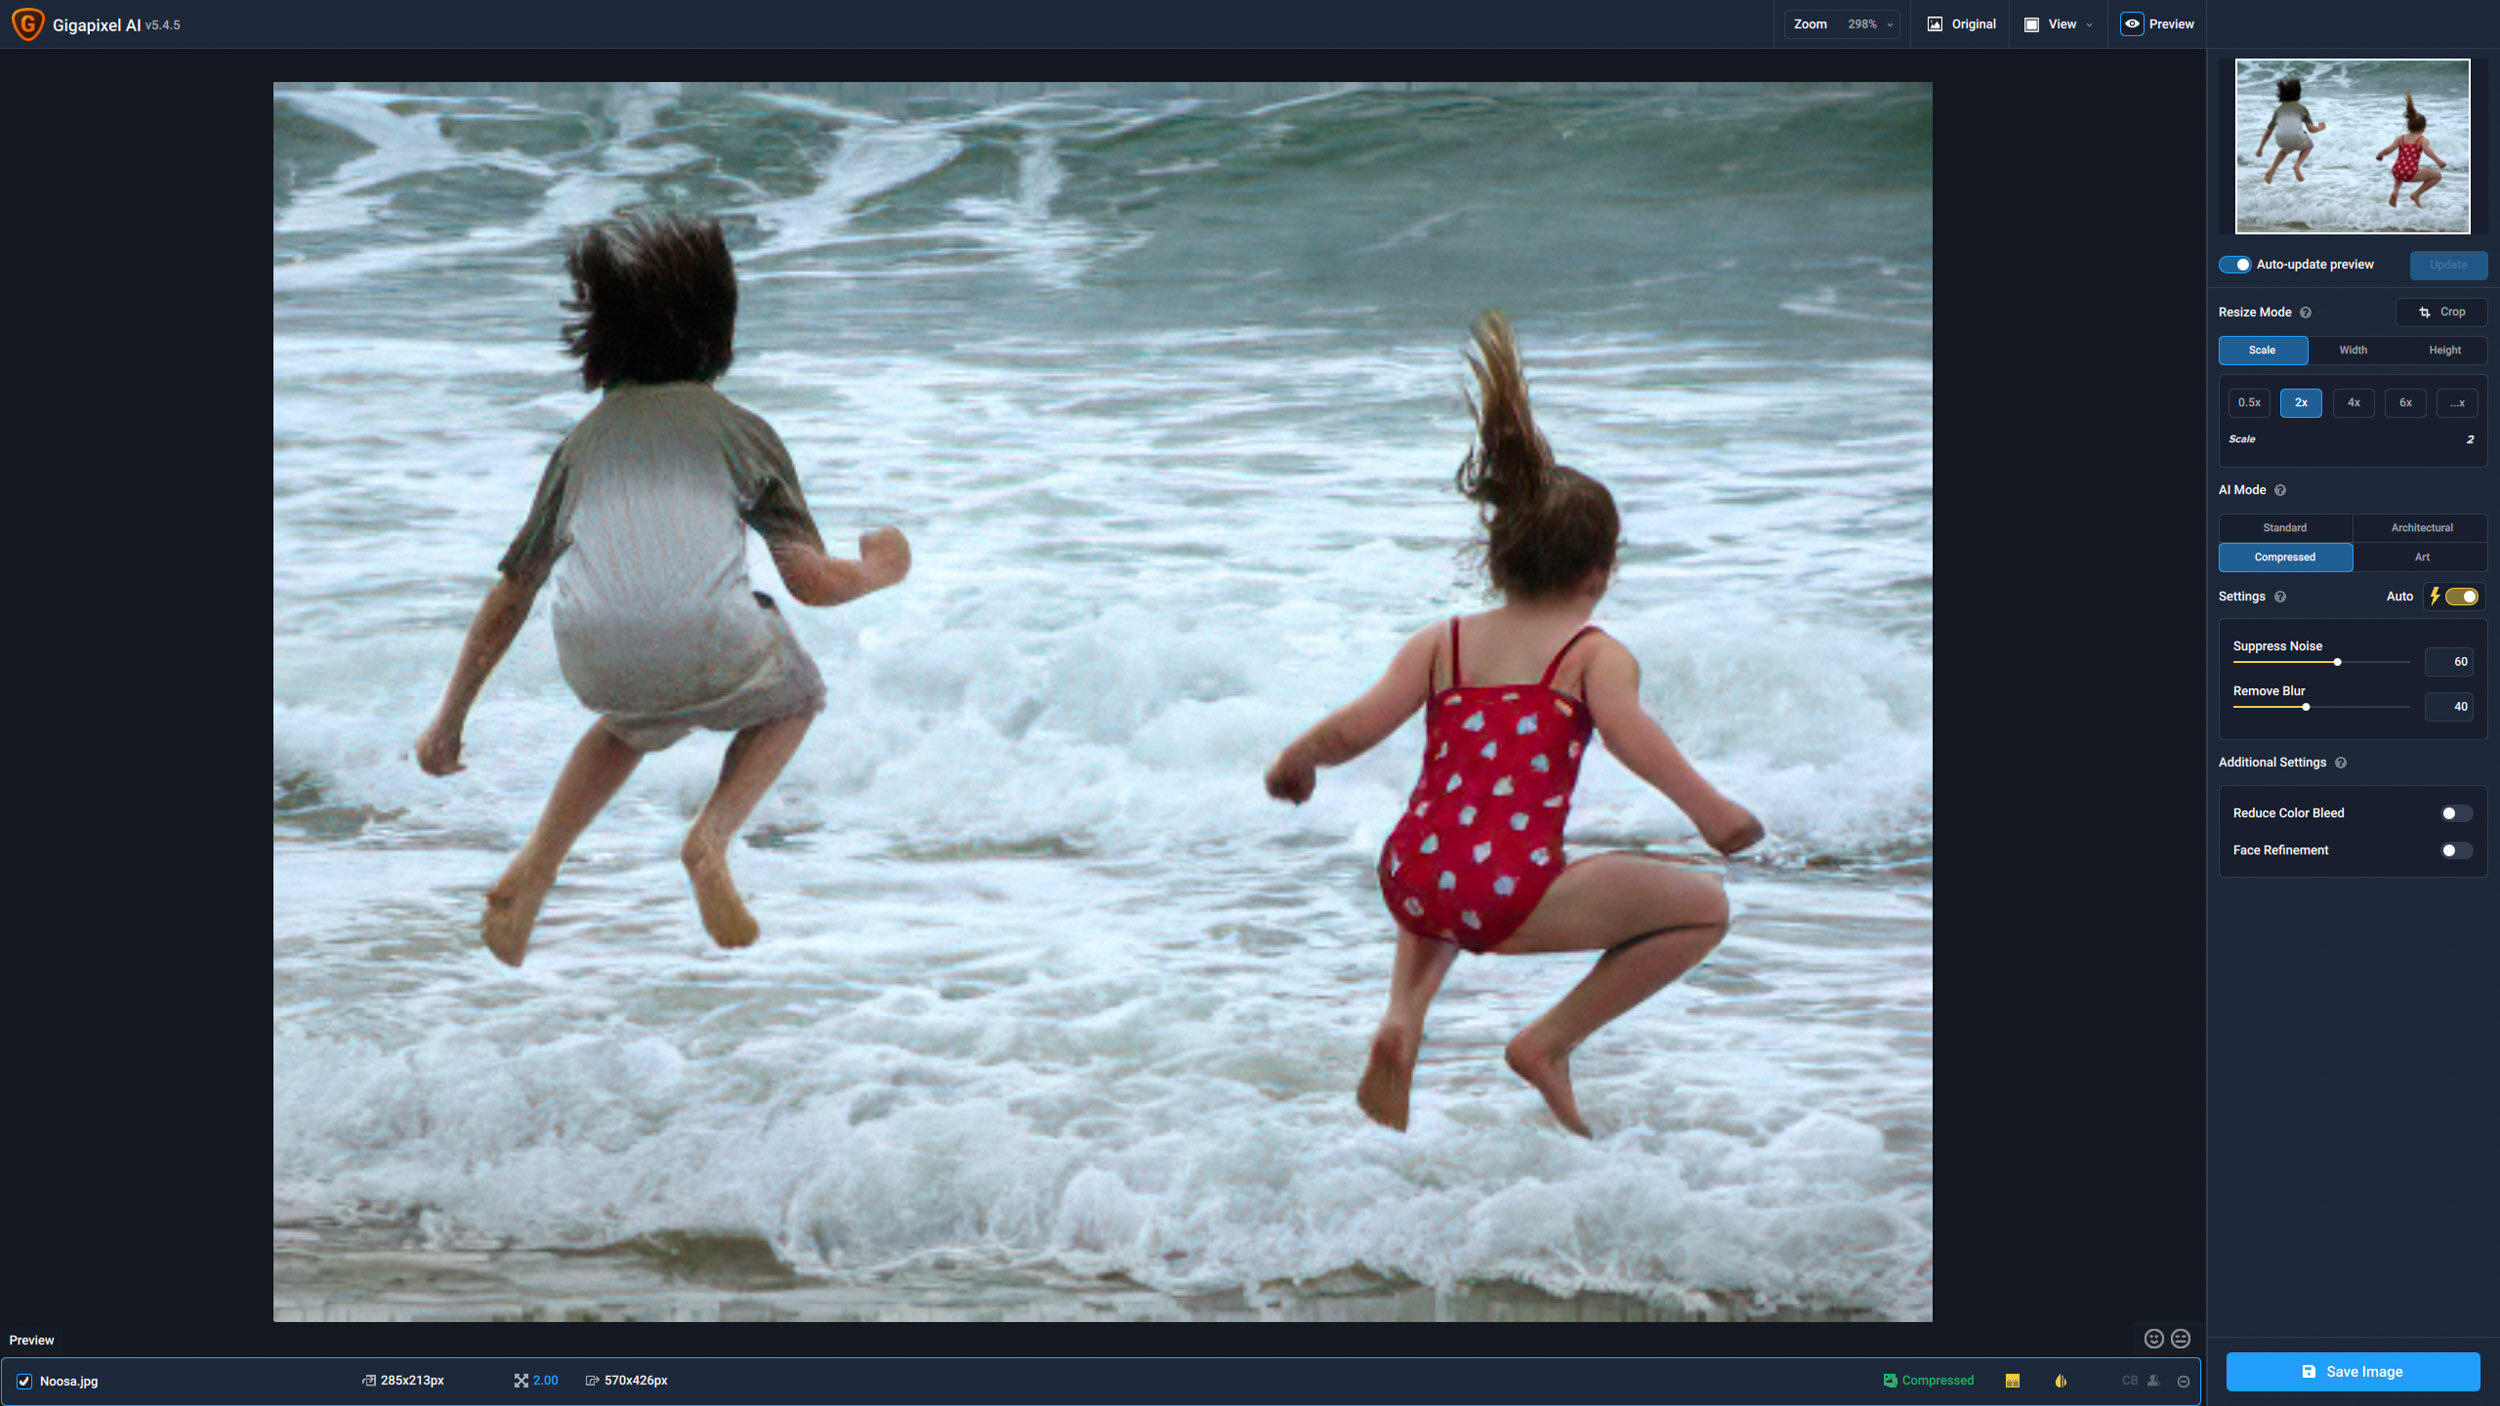
Gigapixel AI window
Alternatively, you can right-click on any image in Lightroom, select Edit In and pick Topaz Labs Gigapixel AI from the list. (The program is automatically added to this menu option when you install it.)
Edit in Topaz Labs Gigapixel AI from Lightroom
Edit in Topaz Labs Gigpixel AI - options
Workflow
Gigapixel AI has a simple interface, and it’s very easy to use.
What I tend to do is use as many of the automatic settings as possible and only play around with the manual sliders if I’m really not happy with the results.
Here’s my workflow.
Drag the first image into the main window.
Select the scale factor you want to try (using either the Scale, Width or Height buttons and options).
Crop the image if necessary using the Crop button. (This works almost as it does in Lightroom, and you can choose the Aspect Ratio that you want from a number of options: Free, Original Ratio, 1 : 1 (Square), 2 : 3 (4 : 6), 3 : 4 (6 : 8), 4 : 5 (8 : 10), 5 : 7, 8.5 : 11, 16 : 9 and 21 : 9.)
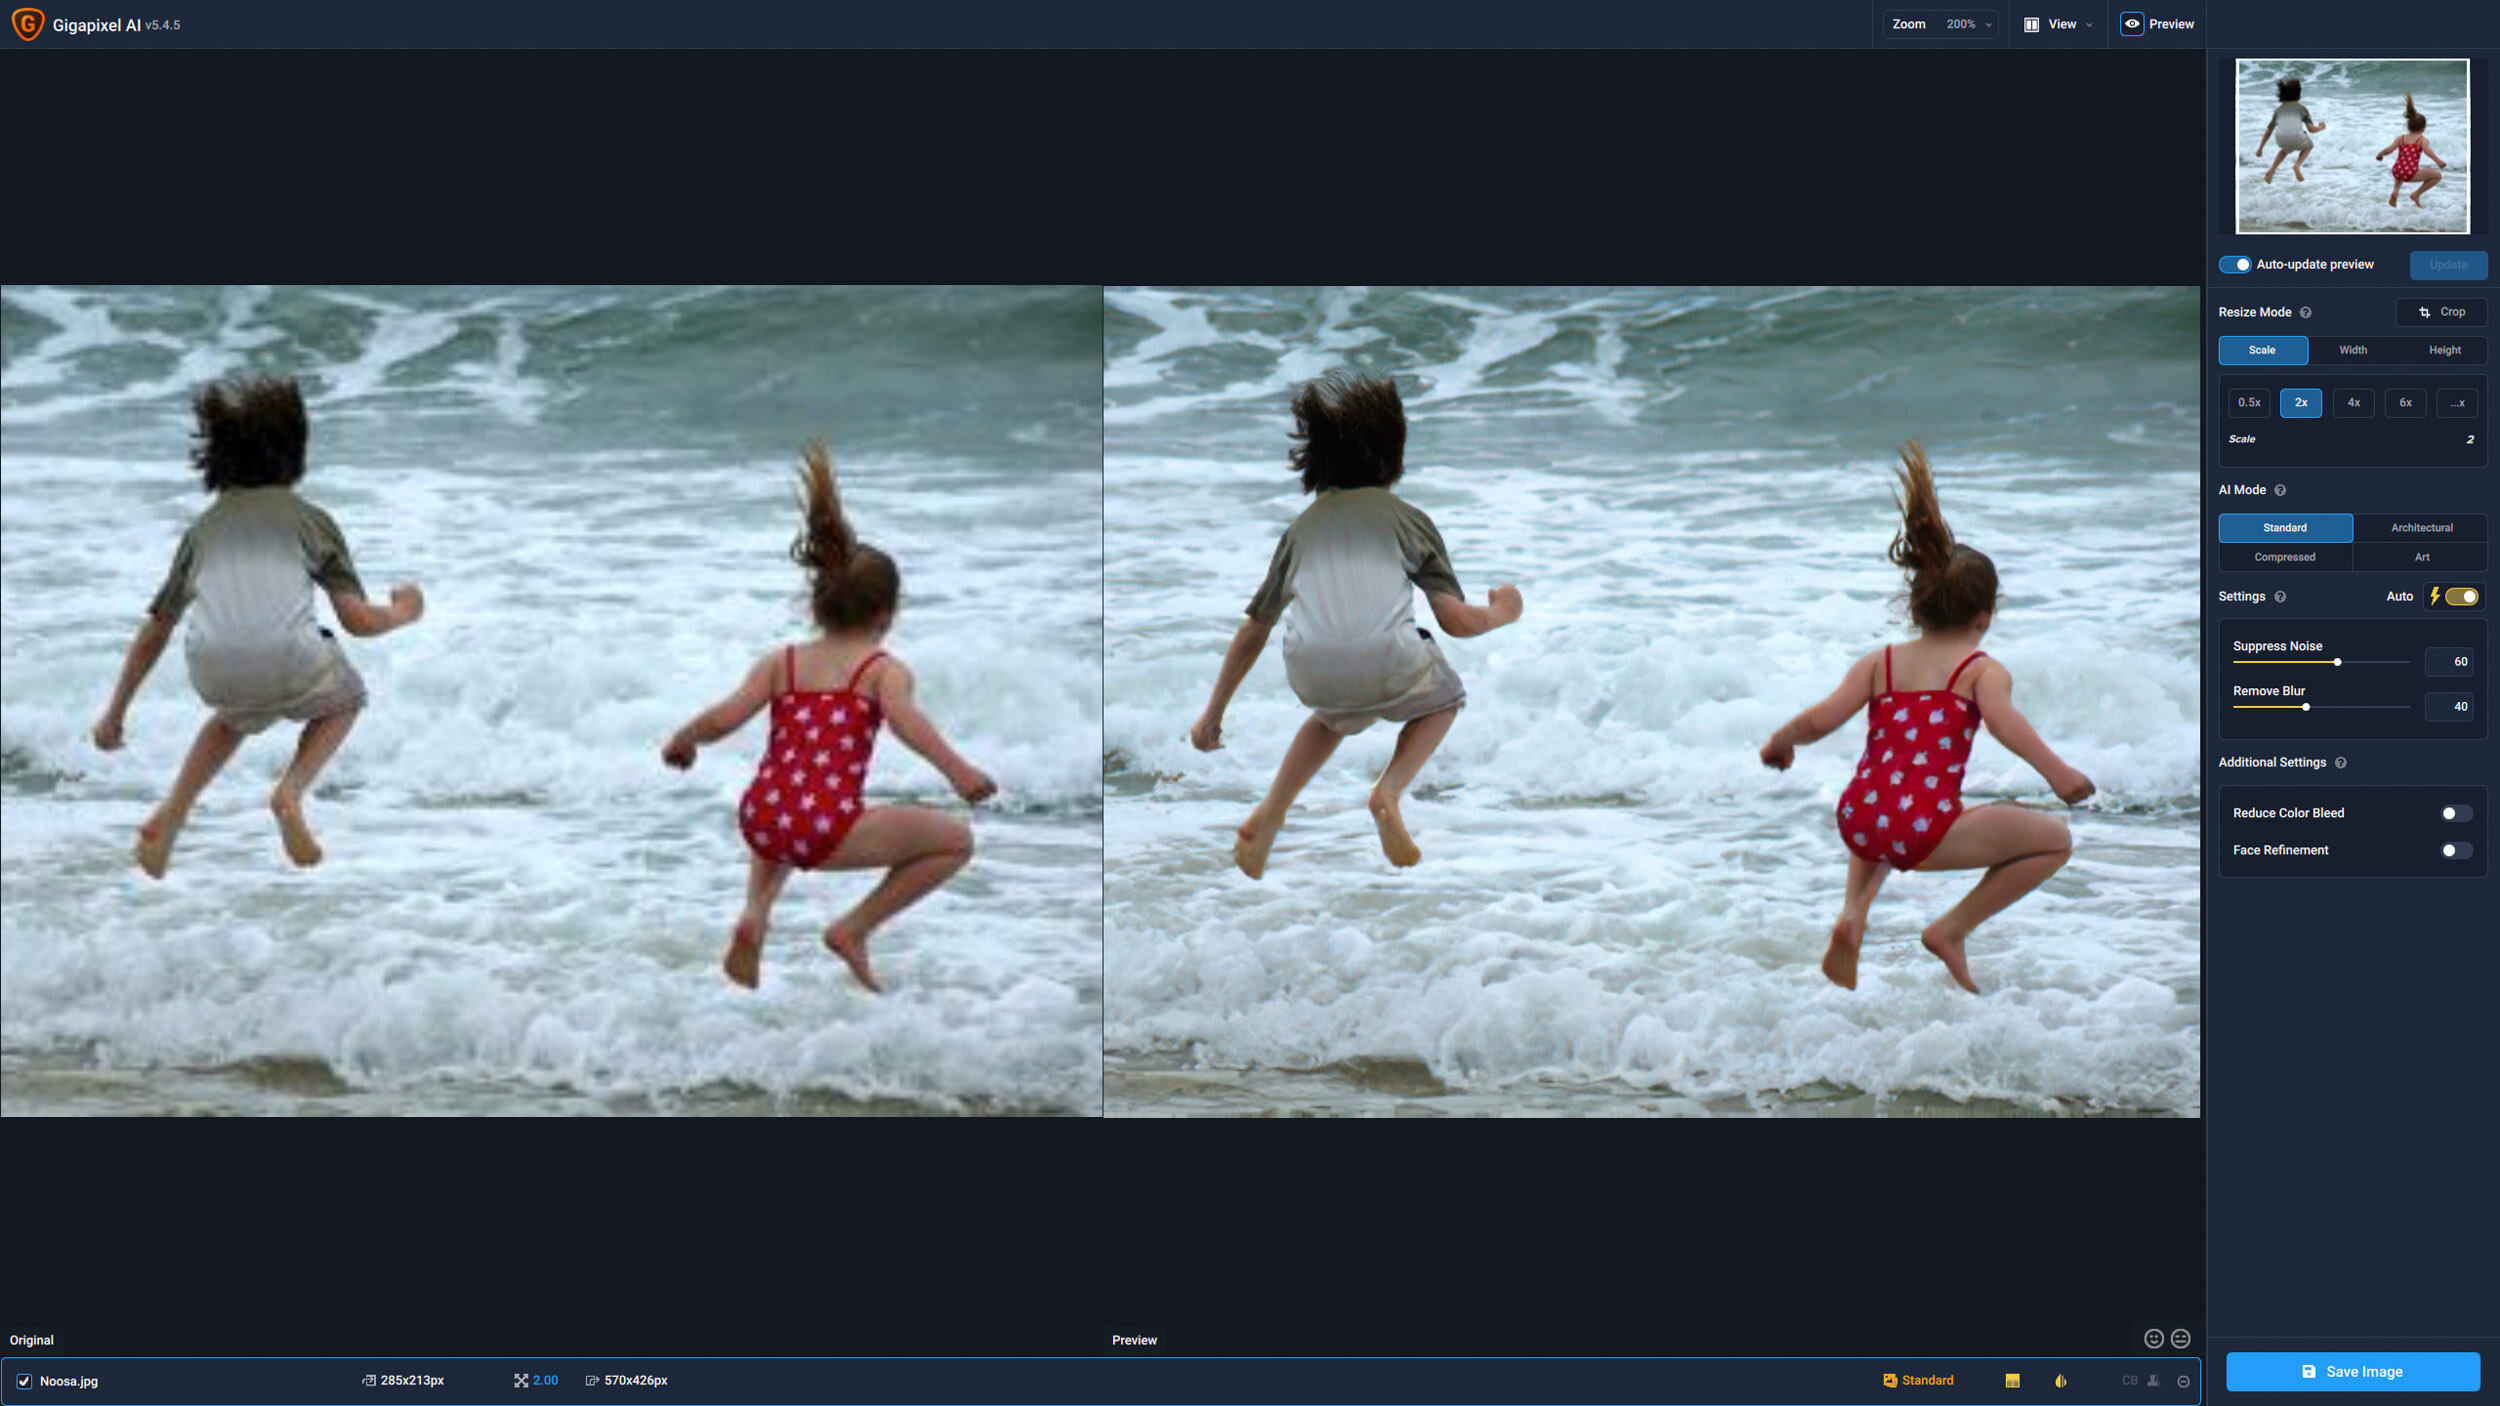
Click on View in the top menu bar and select Side-by-Side View (to show the original and the new version).
Click on Zoom in the top menu bar and select Zoom 100% (or simply hit Command+2 on the Mac or Control+2 on the PC).
Click on the eye of the subject in the preview window.
Click on each of the Standard, Architectural, Compressed and Art buttons in the right menu bar) and toggle the Settings to Auto, choosing whichever AI Mode you think works best.
At this point, you should have found the best combination of settings for your image. If you’re happy with the image, you can export it in any of a number of different formats:
Click on the Save Image button (or the Apply button if you’ve opened DeNoise AI from Lightroom.
Choose the appropriate options:
Image Format (Preserve source format, JPG, JPEG, TIF, TIFF, PNG or DNG)
Filename
Save directory (Source or Custom)
Click Save
Save Image As
Options
Manual sliders
If the image is not sharp enough or too noisy, then you have a few different options:
Play around with the Suppress Noise and Remove Blur sliders to see if you can manually improve the combination of sharpness and noise reduction.
Play around with the Reduce Color Bleed and Face Refinement toggle switches to see if you can get any further improvement.
It’s important to note that Gigapixel AI doesn’t always produce the perfect result, so you’ll sometimes have to make manual adjustments.
On a few occasions, DeNoise AI just won’t be able to rescue the image, so all you can do then is delete it and load the next one on your list.
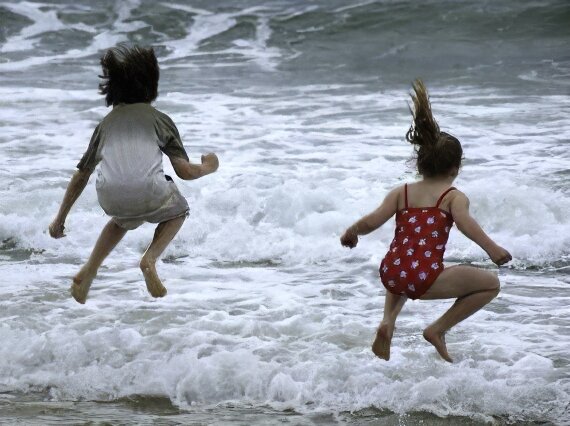
As you can see with the Before and After pictures at the top of this article, Gigapixel coped very well with removing the pixellation of the original image, which in this case was only a 45KB file measuring 285 x 213px and with a resolution of 72dpi.
However, the little girl is wearing a red swimsuit with white stars on it, and unfortunately the stars have turned into white blobs!
As somebody once said, “The impossible we do at once; the miraculous takes a little longer.”
View modes
In Sharpen AI and DeNoise AI, I find the Comparison View the quickest and most useful way of working out which method to use, but that isn’t available in Gigapixel AI.
All you can do is choose Side-by-Side View, but that’s fine.
It’s also quite cool to try out Single View and just press and hold the Original button to see the difference between the ‘before’ and ‘after’ versions.
Performance
DeNoise AI and particularly Sharpen AI used to take a long, long time to save files, but the latest version of Gigapixel (v3.0.3) worked almost instantaneously on the file I used for this article.
You can speed things up even further by making a couple of changes in Preferences (Command + , on the Mac or under Topaz Gigapixel AI in the main menu):
Under Performance, use the toggle switch to Enable discrete GPU.
Under Allowed Memory Consumption, choose High.
Bulk editing
If you have a lot of files to get through, then you also have the option of bulk editing them.
All you need to do is check that your default settings are correct and then drag all the files into the main window from Finder or File Explorer.
This is obviously quite a convenient time-saving option if you have a lot of images to get through, but I’m never really in that position, so I don’t feel the need.
And besides, I want to make sure that every single image is perfect, and I don’t trust the software to do that…yet!
Watch out!
Gigapixel AI is a very good product, but it helps if you know its limitations and how you can get the best out of it.
Here are a few hints and tips:
For best results, work on the uncropped image. All the Topaz Labs programs work best when they have the maximum number of pixels to play with. Most of the time, it doesn’t really matter, but I recommend cropping the image in Gigapixel AI rather than Lightroom.
Don’t do any noise reduction in Lightroom. It’s just not necessary.
If you end up using DeNoise AI and Sharpen AI before Gigapixel AI, then make sure you do the noise reduction before the sharpening in order to avoid ‘sharpening the noise’. In Lightroom, it doesn’t matter if you add noise reduction before you sharpen because the software ‘knows what it’s doing’. However, Sharpen AI and DeNoise AI are separate programs, so that doesn’t apply if you use both of them on the same image. Again, this is not a big deal most of the time, and of course both programs have sliders for noise reduction and sharpening, but it’s something to bear in mind if, for instance, you want to produce a large format print.
Use DNG or TIFF as your default file format. DeNoise AI can’t save images in manufacturer-specific RAW formats such as .NEF for Nikon users. If you open a .NEF file and choose Preserve source format, you’ll just end up with a generic DNG RAW file.
Don’t go too far! It’s very easy to become obsessed with noise reduction or sharpness and think that you’ve ‘succeeded’ if everything’s beautifully smooth or tack-sharp. Just remember that your images still have to look natural - especially if you’re a wildlife photographer like me - so you might have to dial it back a little bit sometimes.
Save the enlarged image into a different folder. If you choose the Source directory, then Gigapixel AI can’t replace the existing file it’s working on, so you’ll have to rename it manually afterwards. If you go to Preferences, you can choose Default filename prefix, Default filename suffix or Append processing mode as suffix from the Save Options. Personally, I just delete everything in the text boxes and deselect the other option, but the program then adds ‘ (1)’ to the filename instead. This is not a big deal, and it’s a bit like the restrictions on exporting from Lightroom, but it pays to get your workflow right if you’re working on a lot of images.
Set your default preferences for saving files in Lightroom and Gigapixel AI. Personally, I like to save images as TIFF files if I’m having them printed, but it’s totally up to you. Fortunately, you can set the appropriate defaults in both programs so that you’re not constantly having to change them for each image. (You can also switch off the Auto-update preview option using the toggle switch in the right-hand menu, but you shouldn’t have to after the latest release unless you have a very slow computer…!)
Lightroom Preferences
DeNoise AI Preferences
Conclusion
So there you have it.
Just to recap, I think Gigapixel AI can be very valuable if you want to print out a low-resolution image. We all have family photos taken with old cameras and wistfully think about putting them over the fireplace. Well, now’s your chance!
Try it out for yourself. If you like it, you can get 15% off any purchase by following this link and using the discount code nickdale15.
Good luck…!
If you’d like to order a framed print of one of my wildlife photographs, please visit the Prints page.
If you’d like to book a lesson or order an online photography course, please visit my Lessons and Courses pages.