
How to Shoot a Bear
Brooks Falls is one of the best places in the world for wildlife photography…
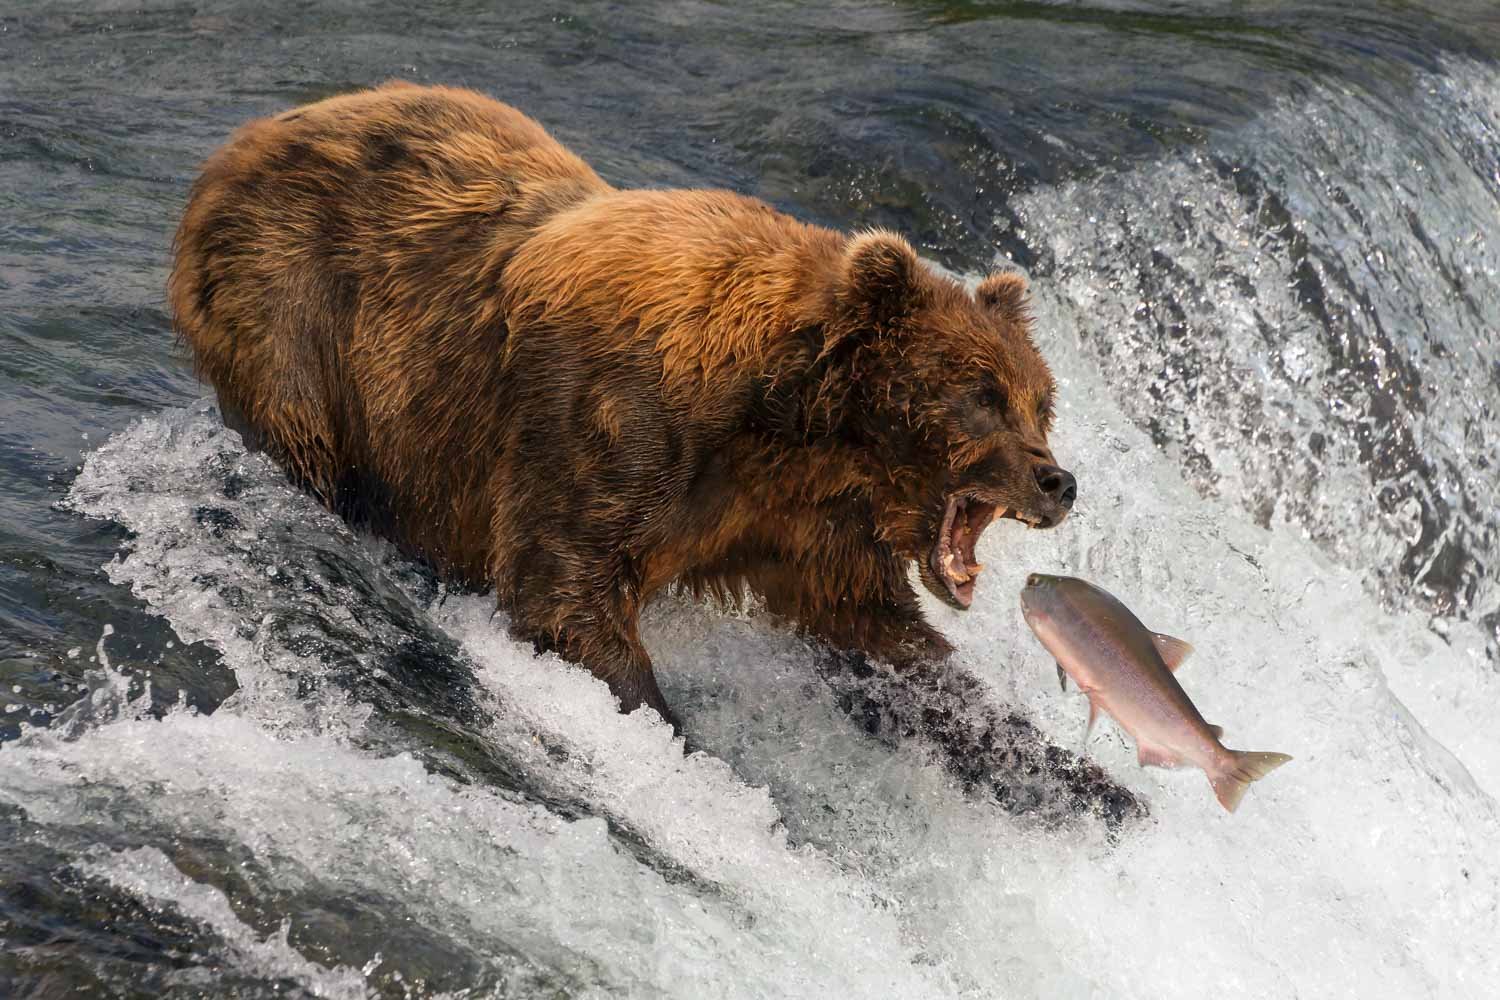
Bears catching salmon at Brooks Falls
Brooks Falls is a waterfall in Katmai National Park and Preserve in Alaska, and every July around a million salmon try to jump it in order to get back to their spawning grounds - and the brown bears are there to meet them!
I first heard about it long before I became a wildlife photographer.
I was visiting a friend of mine up in Golders Green, but he hadn’t arrived home yet, so I ended up chatting to his mother.
I politely asked her if she’d been anywhere nice on holiday, but I got a very different answer from the one I was expecting.
“Yes,” she said, “I’ve actually just come back from watching bears catching salmon in Alaska!”
That’ll teach me…!
When I started taking pictures for a living, I desperately wanted to visit Alaska myself, and I knew that Brooks Falls was the best place to go.
Thomas D Mangelsen took his iconic shot ‘Catch of the Day’ there in 1988.
It shows a brown bear standing with its mouth wide open on a waterfall. It’s trying to catch salmon swimming upstream to their spawning grounds, and there’s one just a few inches away from its jaws!
It’s a spectacular image, and I wanted to get my own chance to do something similar, but it was just too expensive.
Fortunately, I was finally able to afford the trip in July 2015.
It took 37 hours to get there, it cost me over £6,000 and I had to book months in advance and catch a floatplane to work every morning, but it was worth it in the end!
This photograph is probably the best I’ve ever taken, and it’s won various international awards over the last few years.
If you want to take pictures like this one, here are a few things you need to know.
Booking
The closest place to stay to Brooks Falls is Brooks Lodge (or the campsite nearby), but the falls are so famous and popular these days that you have to enter your name in a ballot in order to have the chance of winning a stay there.
By the time I got round to booking, there was only one night left at Brooks Lodge during the salmon run in late July, so I reserved my spot and hunted around for other places to stay for the rest of the week.
Fortunately, I found a hotel in the neighbouring town of King Salmon, but the downside was that I’d have to fly to Brooks Falls and back every day!
Getting there
I had to fly from London via Miami to Anchorage (Alaska) and then on to King Salmon, and it took forever!
After that, I had to take a floatplane every morning and evening.
That was actually quite fun, and when I give photography talks about my trip, I often ask for a quick show of hands: “How many of you have ever had to take a floatplane to work every morning?”
The best part about those flights in Beavers and Otters were the safety briefings, which only lasted as long as it took for the pilot to point out the lifejackets under our seats!
Bear School
Bears are obviously dangerous animals, so before you’re allowed out into the woods, you have to attend what they call Bear School. It’s a slideshow and talk led by one of the local guides that lets you know how to behave and what to do in an emergency. Brooks Falls doesn’t have any fences, so you need to know how to cope with bear sightings, and most of it is very counter-intuitive!
Here’s what the experts have to say:
If you see a bear and it starts to clack its teeth, stick out its lips or huff, then it is warning that you are too close and you should slowly back away.
You shouldn't run or make any sudden movements as this could startle the animal, triggering a chase response and you cannot outrun a bear.
Climbing a tree is also a bad idea as most bears will simply follow you.
If a bear charges at you, then your best chance against a grizzly is to stand your ground. Most charges are a bluff and usually the bear breaks off.
If you are carrying bear pepper spray, then now is the time to use it.
If the bear keeps coming then "play dead." Wait until the bear makes contact or the nano-second just before the bear makes contact. Drop to the ground; keep your pack on to protect your back. Lie on your stomach, face down and clasp your hands over the back of your neck with your elbows protecting the sides of your face.
When the bear leaves, you should stay on the ground for several minutes to make sure it has left the area and hasn't come back for a second look.
A defensive attack, when a bear is startled or is protecting its cubs, usually lasts no longer than a couple of minutes. (A defensive bear will keep its head low and ears laid back.)
If it goes on longer then you may be facing a predatory attack. (A predatory bear has its head up and ears erect.) In this case, you should start to fight back. Intimidate that bear: shout, hit it with a branch or rock, do whatever it takes to let the bear know you are not easy prey!
That all sounds a bit scary, doesn’t it…?!
In fact, I only came across a bear in camp once, and I simply retreated a few feet until I was hidden by the side of a building and then legged it as fast as I could!
That’s the only time in my life that I’ve ever run away from an animal…
Anyway, when the Bear School lecture finishes, you’re given a little ‘bear pin’ (or button) to wear at all times.
That allows you to walk to the falls in the morning and start taking pictures.
There are a number of locations accessible from the lodge, but the best is the one on the riverbank beside the waterfall itself, and that’s where I was when I took this shot.
Equipment
Brooks Falls is very well set up for photographers, so you don’t need that much equipment:
Camera(s)
Lenses
wide angle for scenes of the whole waterfall
telephotos of around 300mm for shots of an entire bear on the falls
longer lenses for close-ups or shots of distant subjects
Tripod (and remote release)
Accessories
lens cloth
spare batteries
spare memory cards
rain covers, dry cloth etc
There’s a wooden platform with room for three rows of photographers, and it’s only around 25 yards from the part of the waterfall where most of the bears end up standing. (That’s because it’s the lowest spot, so most of the fish try to jump it from there.)
That means you don’t need particularly long lenses: I took this shot with my 28-300mm f/3.5-5.6 Nikon lens, and I also had my Tamron 150-600mm f/5-6.3 with me for close-ups.
The only problem is that the ‘bleachers’ are so popular during the salmon run that the authorities ration the photographers to no more than an hour.
You can queue up again after your slot in order to wait for another one, but it’s not ideal when the weather is so unpredictable.
When it comes to your camera, the most important feature is the frame rate.
A salmon can travel a long way in a fraction of a second, so there’s a huge difference between 5fps and 15fps!
In those days, I had a Nikon D800 and D810 offering only 4fps and 5fps respectively, and that’s glacial compared to what’s available now (no pun intended!).
The other benefit of a fast frame rate is that you get more chances of a sharp image when you’re using a slow shutter speed.
It’s very difficult to keep the bear sharp when you’re taking a slow shutter speed shot of the falls, so it’s just a numbers game: the more pictures you take, the more likely you are to get a keeper.
Higher frame rates (and longer bursts) will give you a much better chance of success.
By the way, I only had one day of sunshine while I was there, and it was usually pretty cold even though it was supposed to be summertime, so make sure you take plenty of warm clothes!
Settings
There are two main types of shot that you’ll be taking:
Fast shutter speed action shots
Slow shutter speed shots (to blur the waterfall)
I took this shot at 1/1600 of a second because I wanted to freeze the action, but it’s also possible to use a slow shutter speed in order to blur the waterfall while still keeping the bear sharp.
Bears don’t move much while they’re waiting for a salmon to catch, so it’s possible to experiment with slow shutter speeds anywhere from 1/4 to 1/60 of a second.
The slower your shutter speed, the better the blur you’ll achieve with the waterfall but the more chance you’ll have of blurring the bears, which have an annoying habit of pawing the water every now and then!
Whether you use a fast or slow shutter speed, having a remote release is very handy.
It allows you to watch the action without having to keep your eye pressed to the viewfinder, and that’s a real bonus when you’re there for a whole hour at a time!
I took a few slow shutter speed shots while I was there, but I was so obsessed with getting my own version of Catch of the Day that I didn’t try it very often.
When I did, the bear wasn’t sharp, and I eventually gave up, but it’s worth a go in order to get something a little bit different.
I haven’t mentioned aperture, ISO or white balance because they’re not really that important.
I used f/9 for this shot so that the whole bear would be sharp, and it’s useful to have a little bit of depth of field because you never know exactly where the fish will end up!
If you’re just taking portraits of the bears (or their cubs), then you’d probably be better off shooting wide open - especially in bad weather when the light deteriorates dramatically and you want to keep a low ISO.
I generally use Manual mode with Auto ISO for all my wildlife shots (apart from slow pans), so the ISO is never a setting that I consciously choose, but I do use exposure compensation.
Exposure compensation is important when the light level of the subject doesn’t match the background in the majority of the frame.
There won’t be any sky in the shot if you’re taking pictures of bears catching salmon, so you might want to dial in up to a stop of negative exposure compensation.
By all means check on the back of your camera and play around with the exact amount, but that should help you get a more accurate exposure.
I try to set my white balance for the current conditions rather than relying on Auto, which can often be a little inaccurate.
Given the weather in Alaska, that meant I was almost always using the Cloudy setting!
Finally, I use the Nikon AF-C 3D setting and back button focusing for just about all my wildlife shots, and Brooks Falls was no exception.
Technique
Taking shots of bears at Brooks Falls is rather like being in the army: it’s 99% boredom and 1% panic!
The salmon run always takes place in the last couple of weeks in July, but it’s a little bit unpredictable, so you might easily find yourself waiting a long time for the salmon to jump.
I went in the final week of July, which was probably a week too late, and I only managed to get two shots of a salmon in mid-air while the bear had its mouth open.
That’s not a great return for a whole week’s effort!
However, it just goes to show the need for patience.
I know that’s not a technique, but it’s still a very important quality.
In terms of my approach, I always took pictures with my camera mounted on my tripod.
Beyond that, I experimented with the best way of catching the moment, sometimes looking through the viewfinder and using the shutter button to take pictures and sometimes standing up straight to look over the camera at the falls and using the remote release.
The problem with both methods was my reaction time: it was just too slow.
If I focused on the head of the bear and just waited for a salmon to enter the frame, I often missed the fish entirely or at best got only one shot of it - which meant it was usually in the wrong place!
Eventually, I learned to watch the surface of the water below the falls instead.
That meant taking a burst of shots as soon as I saw a salmon jump out of the water.
It wasn’t easy, but I got there in the end…!
If you’d like to order a framed print of one of my wildlife photographs, please visit the Prints page.
If you’d like to book a lesson or order an online photography course, please visit my Lessons and Courses pages.