
Shutter Speeds for Action Shots
Time is on your side…
On a wing and a prayer
Choosing the right shutter speed for action shots is very important: too fast, and the animal will appear frozen; too slow, and you’ll end up with a blurry mess!
Here’s a quick guide to recommended shutter speed settings for different subjects and types of shot together with a few illustrative examples.
Introduction
In general, the slower the shutter speed, the more chance you’ll get blur in the shot, whether from camera shake or the movement of your subject.
However, it all depends on the length of your lens.
A longer lens magnifies any camera shake, so the rule of thumb is that you should always choose a shutter speed that’s at least as fast as the inverse of your focal length.
In other words, if you’re using a 400mm lens, your shutter speed should be at least 1/400 of a second.
This is a reasonable guide, but it doesn’t take into account low light levels, the use of ‘creative blur’ to suggest movement and the fact that your shutter speed might not always be fast enough to ‘freeze’ the very rapid movement of a small bird, say, or a racing cheetah.
In setting your shutter speed, then, you have to take into account a number of different factors:
the focal length of your lens
whether you’re handholding or using a tripod or beanbag
what type of shot you’re taking, eg slow pan or portrait
how fast your subject is moving
how bright the scene is.
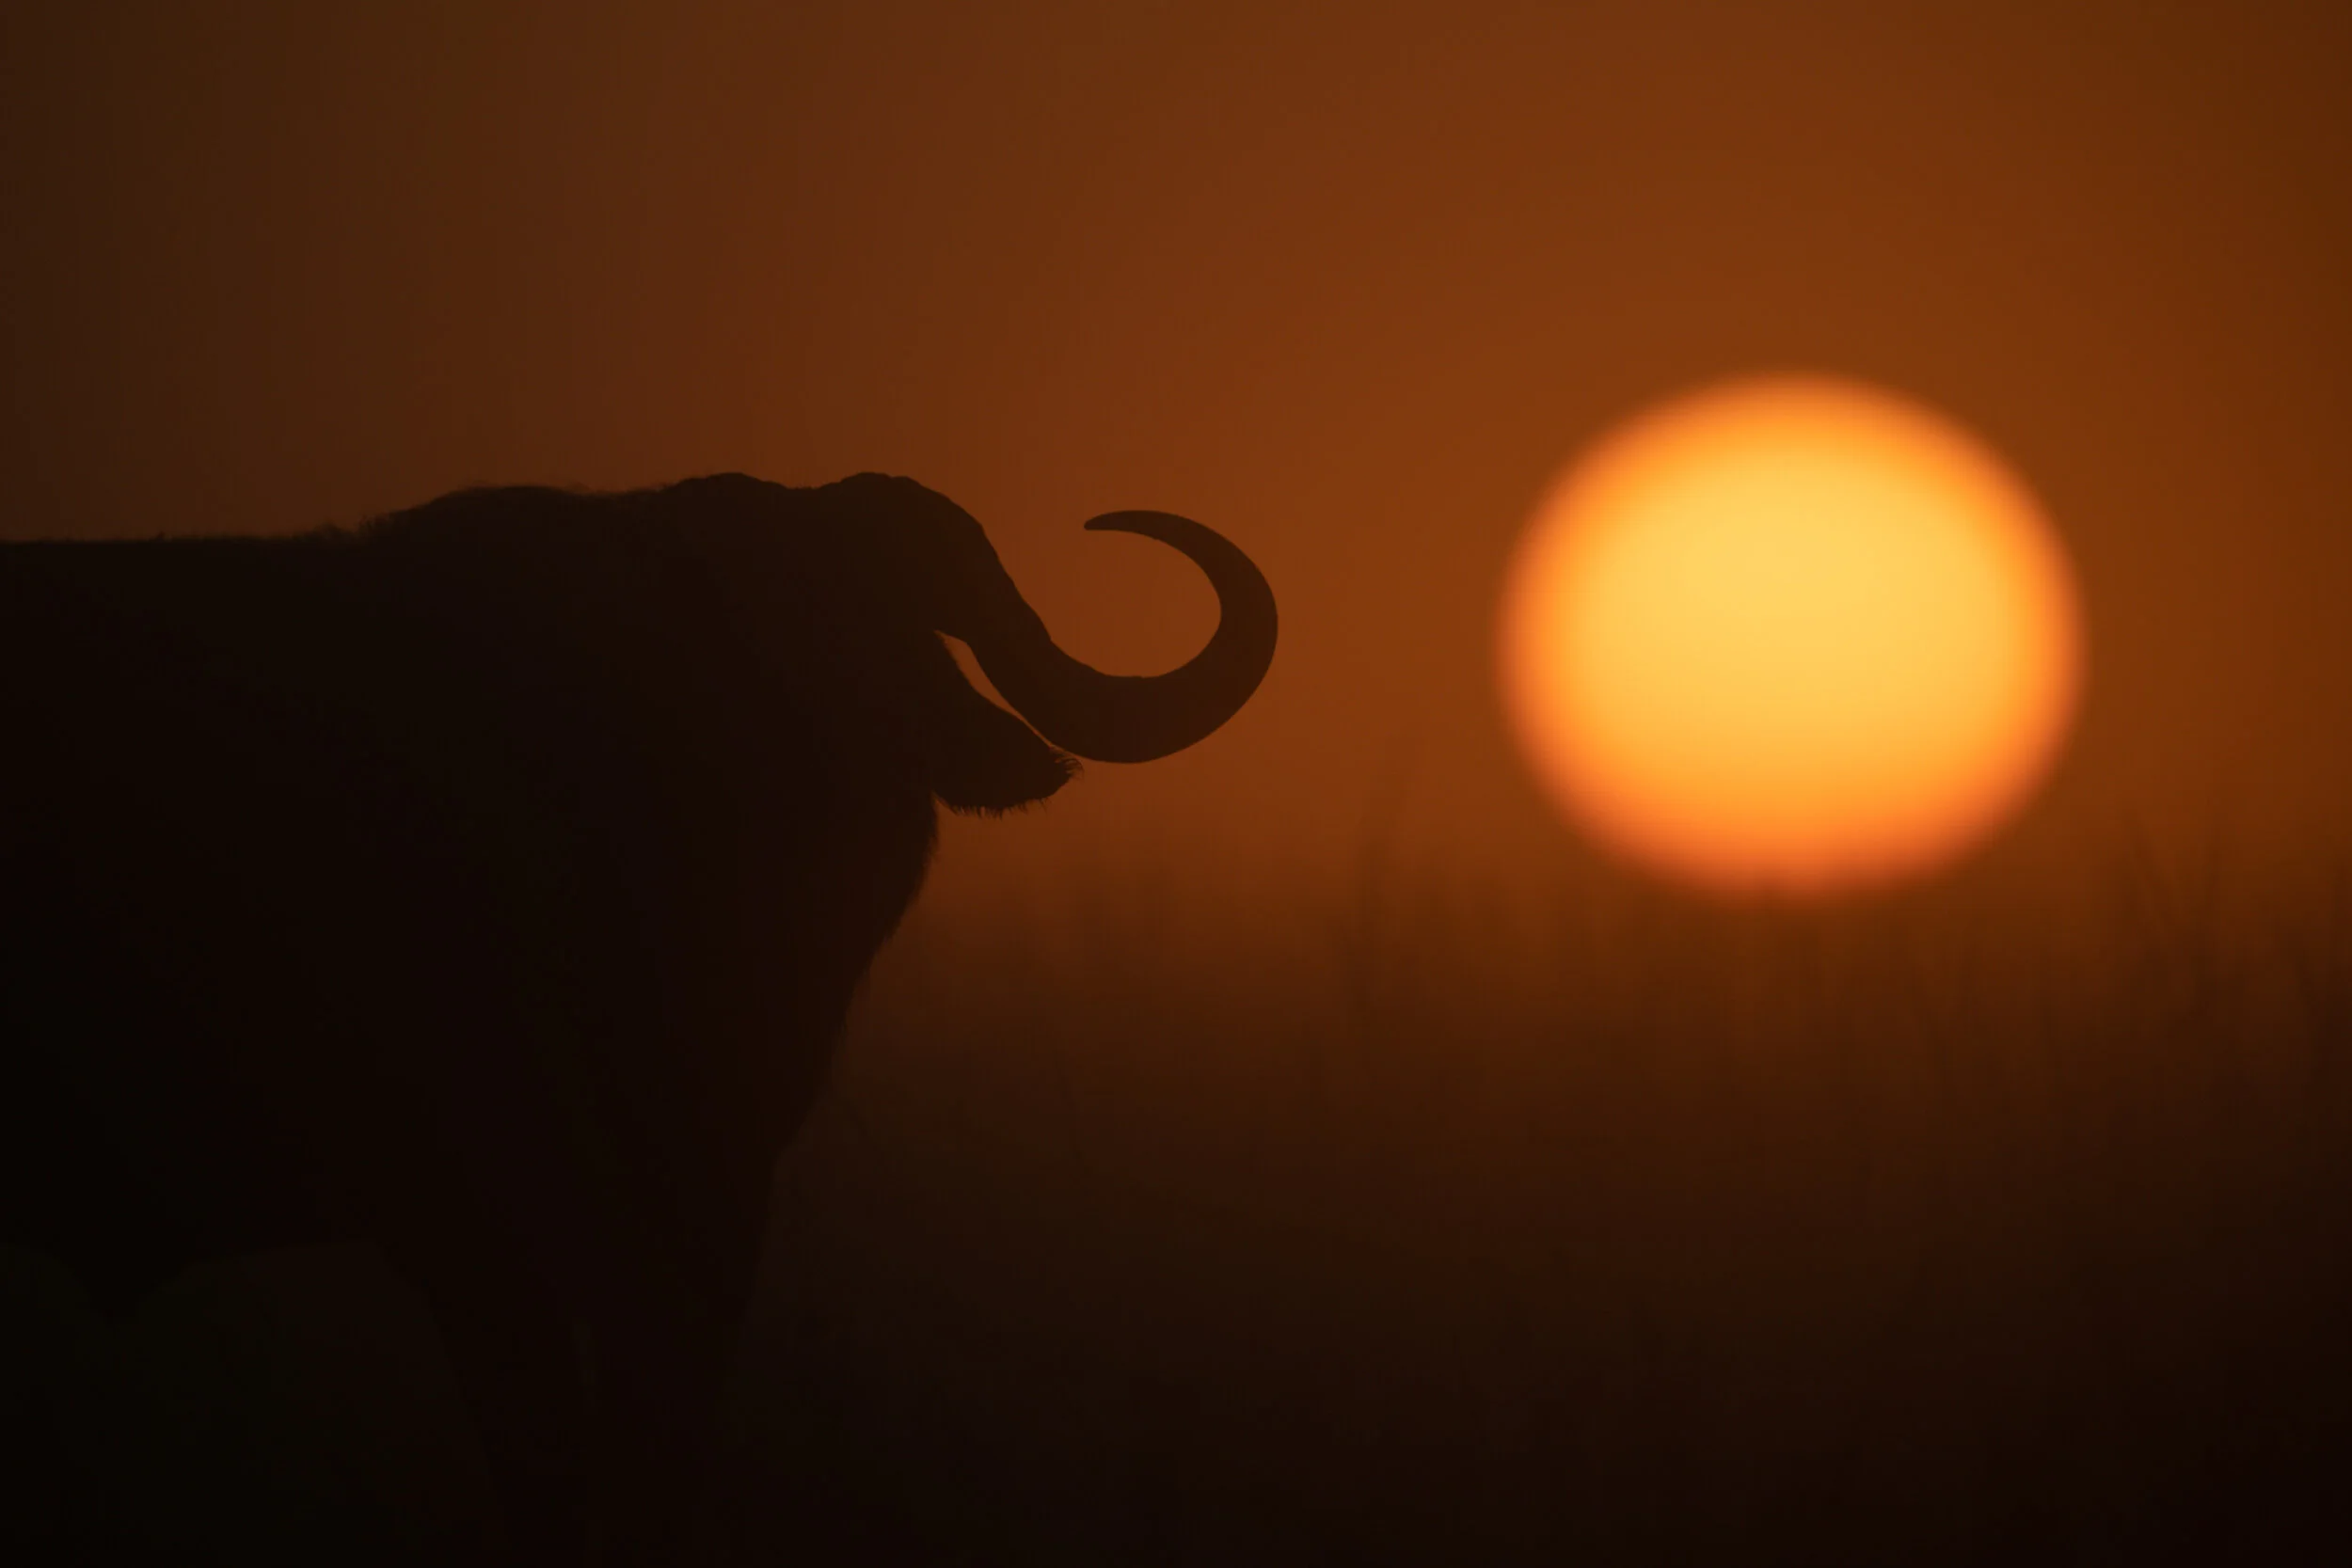
Slow (1/100 of a second or longer)
Some people don’t want to use slow shutter speeds because of the risk of getting blurred images, but they do have a number of advantages:
They let in more light, which reduces noise, allows you to take pictures in low light and means you have more flexibility with your aperture and ISO settings.
They can create a sense of energy and movement through the use of motion blur.
They allow you to experiment with camera techniques such as the slow pan, the zoom pan or the focus pull.
Low light
If light levels are low, then you might have a slow shutter speed ‘forced’ on you.
One solution is to take slow pan shots, which don’t require a high shutter speed and therefore allow you to set a much lower ISO.
However, if you don’t want to do that, then you’ll probably end up with a tricky trade-off between shutter speed, aperture and ISO.
In order to arrive at the optimal settings, you just have to ask yourself which is the more manageable risk:
the risk of blur with a slower shutter speed
the risk of reduced depth of field with a wider aperture
the risk of noise with a higher ISO.
Those decisions are never easy, but you can give yourself a better chance of a good, sharp shot with a slower shutter speed by making sure your position is as stable as possible and taking a burst of images at slower and slower speeds.
When you’re taking shots at 1/1000 of a second, basic camera technique is far less important, so you can ‘get away with’ a lot, but you don’t have that sort of leeway with slow shutter speeds, so you need to get into a few good habits:
Use a tripod or beanbag if you can.
Brace your camera against your forehead.
Pin both elbows firmly against your sides.
Cup the lens with your left hand, making sure your thumb is NOT underneath.
Take a deep breath and then let half of it out.
Squeeze the shutter gently.
Once you’ve done that, it’s just a numbers game: the more shots you take, the more chance you’ll have of getting a keeper, so take a burst of three to six shots on Continuous High rather than just one frame on Single Shot.
Finally, if your subject stays in the same position for long enough, you can work your way down to slower and slower shutter speeds.
First of all, take a burst at 1/1000 of a second, say, and then try 1/500, 1/250, 1/125 and so on.
This is best done in Manual mode with Auto ISO, but you could also trade off shutter speed against aperture if depth of field is more important than noise reduction.
You can do this by simply closing the aperture by a stop every time you step down the shutter speed, so 1/1000 of a second at f/8 might be followed by 1/500 at f/11 and then 1/250 at f/16, for example.
Creative techniques
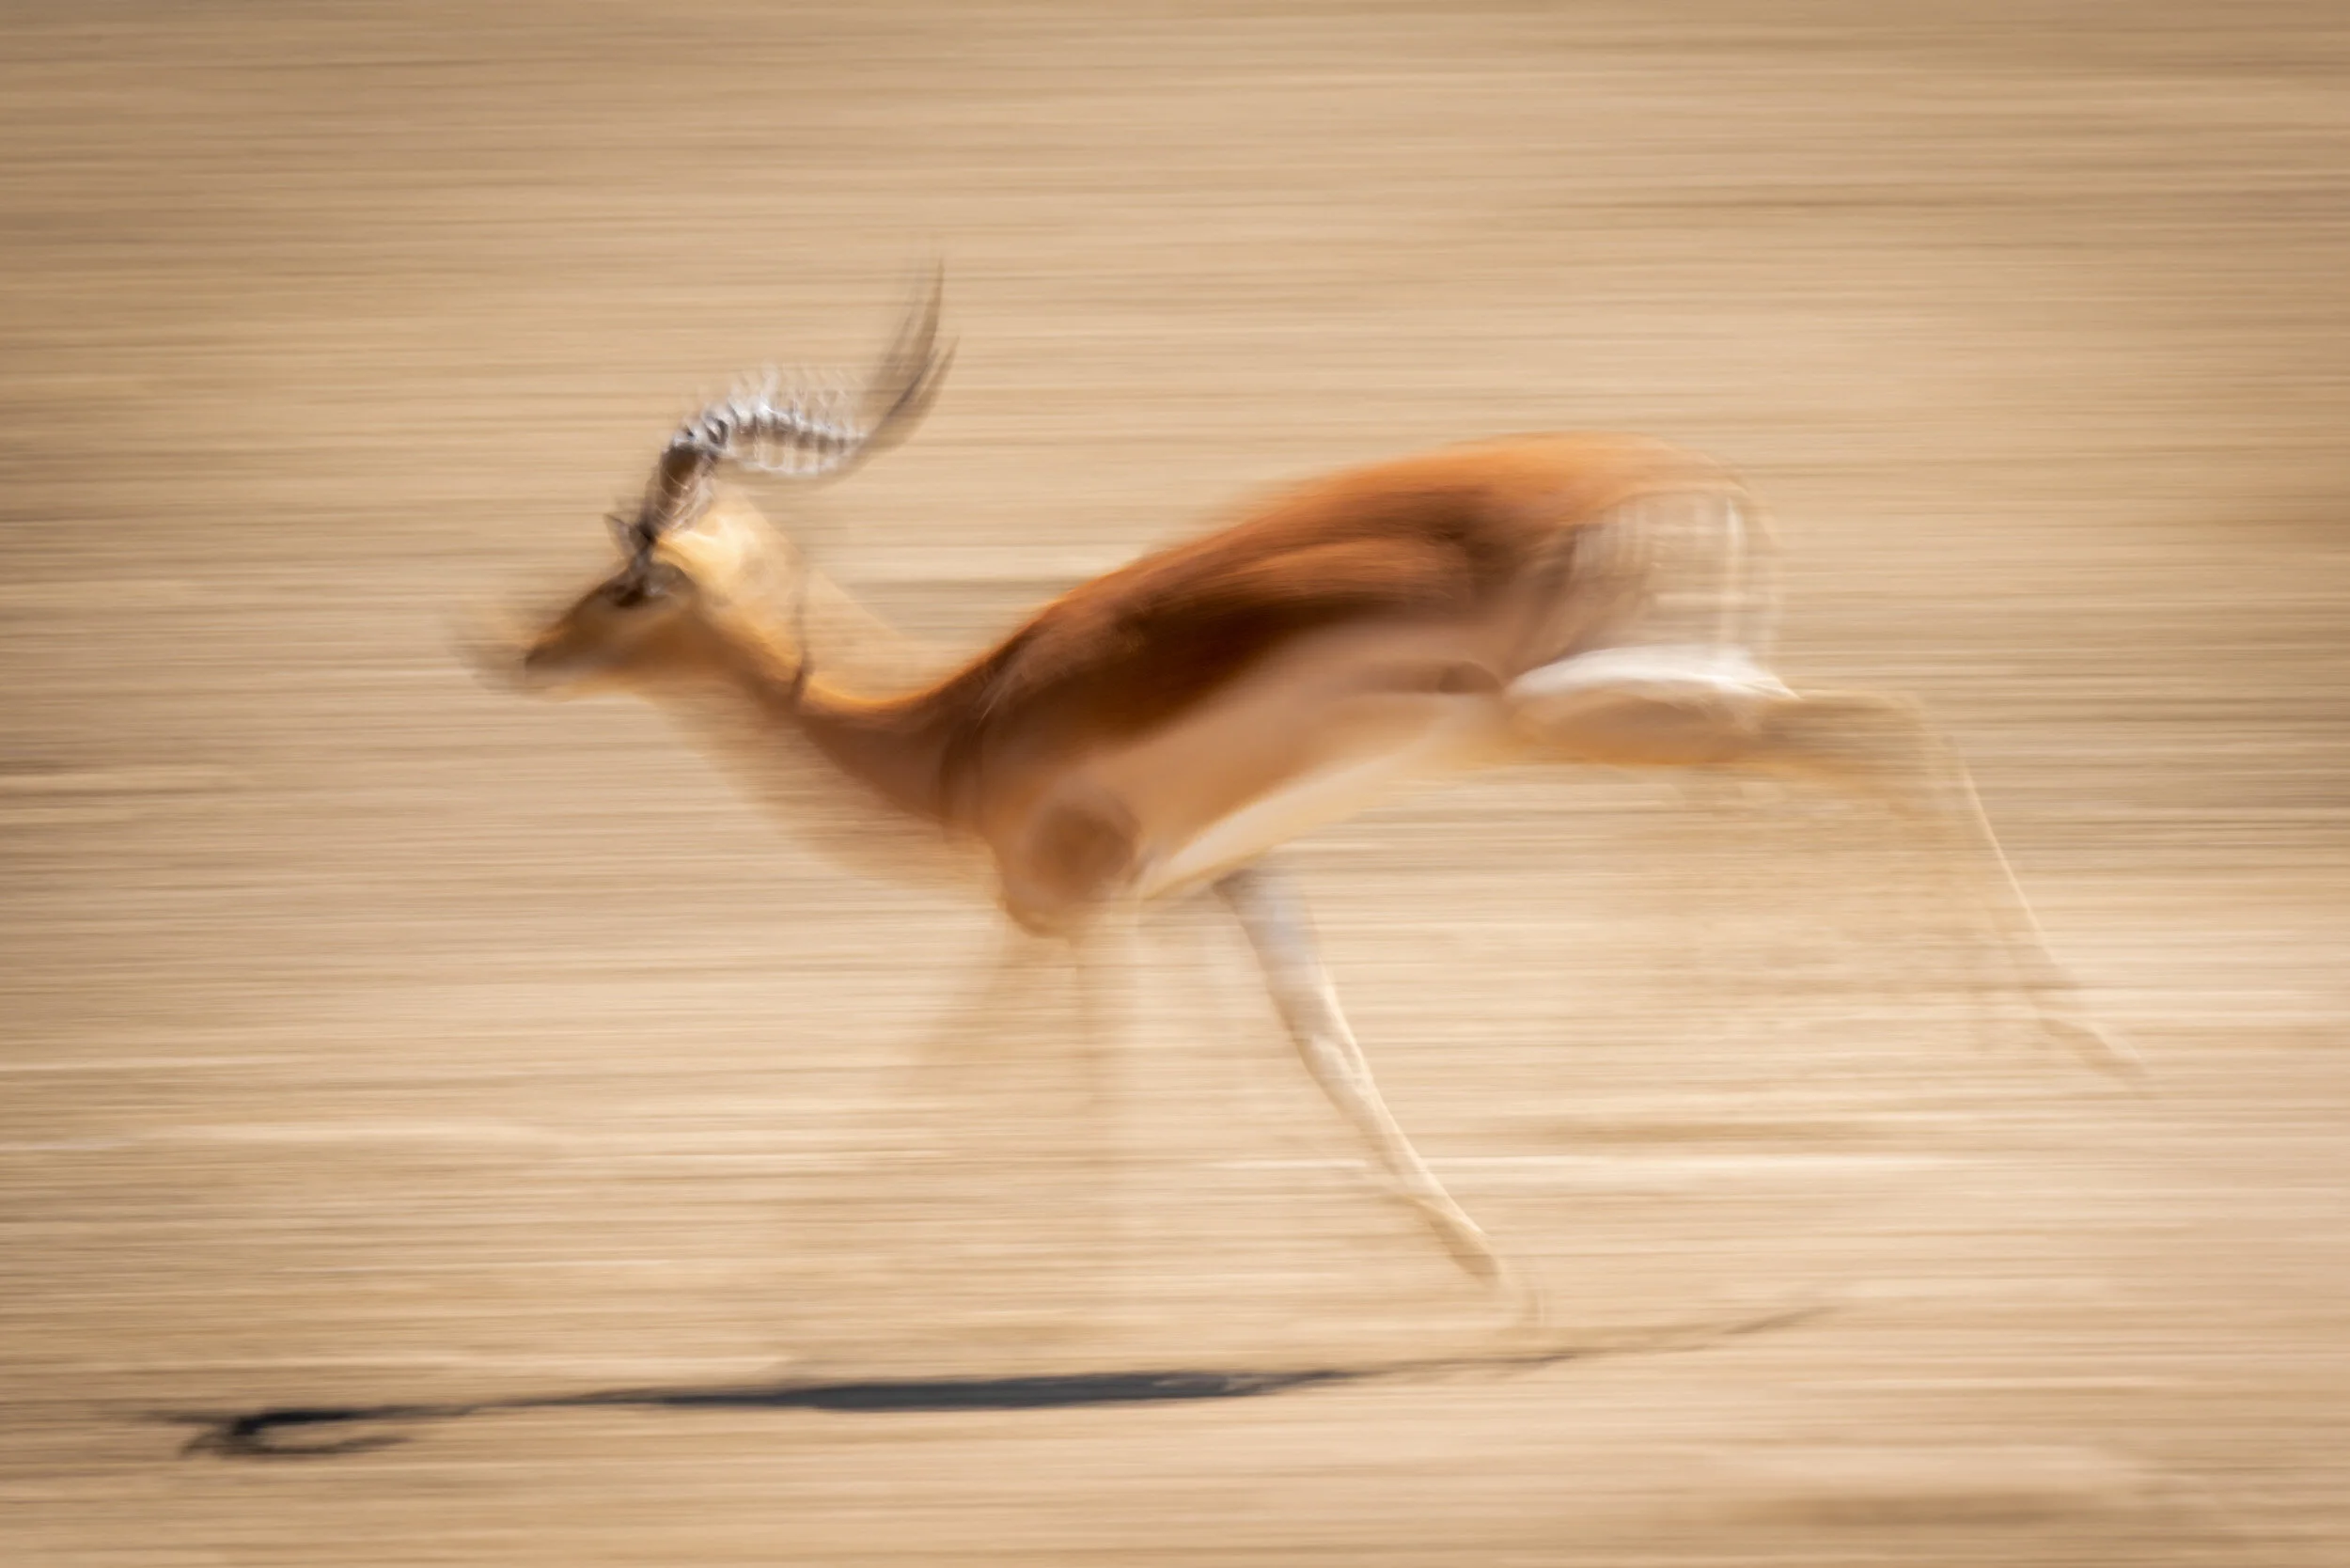
The slow pan is the most common use for slow shutter speeds in wildlife photography.
This is when you choose a slow shutter speed and then following a moving bird or animal in order to keep the head sharp while blurring its wings or legs together with the background.
I’ve written an in-depth article here, so I won’t go into too much detail here, but the shutter speed you use will depend on a number of different factors specific to the slow pan:
The faster the animal is moving, the faster your shutter speed should be.
The closer the animal is to moving directly across in front of you (ie at 90 degrees to your line of sight), the faster your shutter speed should be.
The smoother and ‘creamier’ you want the background to be, the slower your shutter speed should be.
The further away the animal, the slower your shutter speed should be.
The wider your lens, the slower your shutter speed should be.
This is a lot to think about, so here’s a table of typical shutter speeds for a slow pan shot:
Elephant or rhino walking: 1/3 to 1/4 of a second
Leopard or cheetah walking: 1/8 to 1/13
Slow or large birds: 1/30 to 1/60
Cheetah running at full speed: 1/80 to 1/100
Small or fast birds: 1/100 to 1/250
And here are a few pictorial examples.
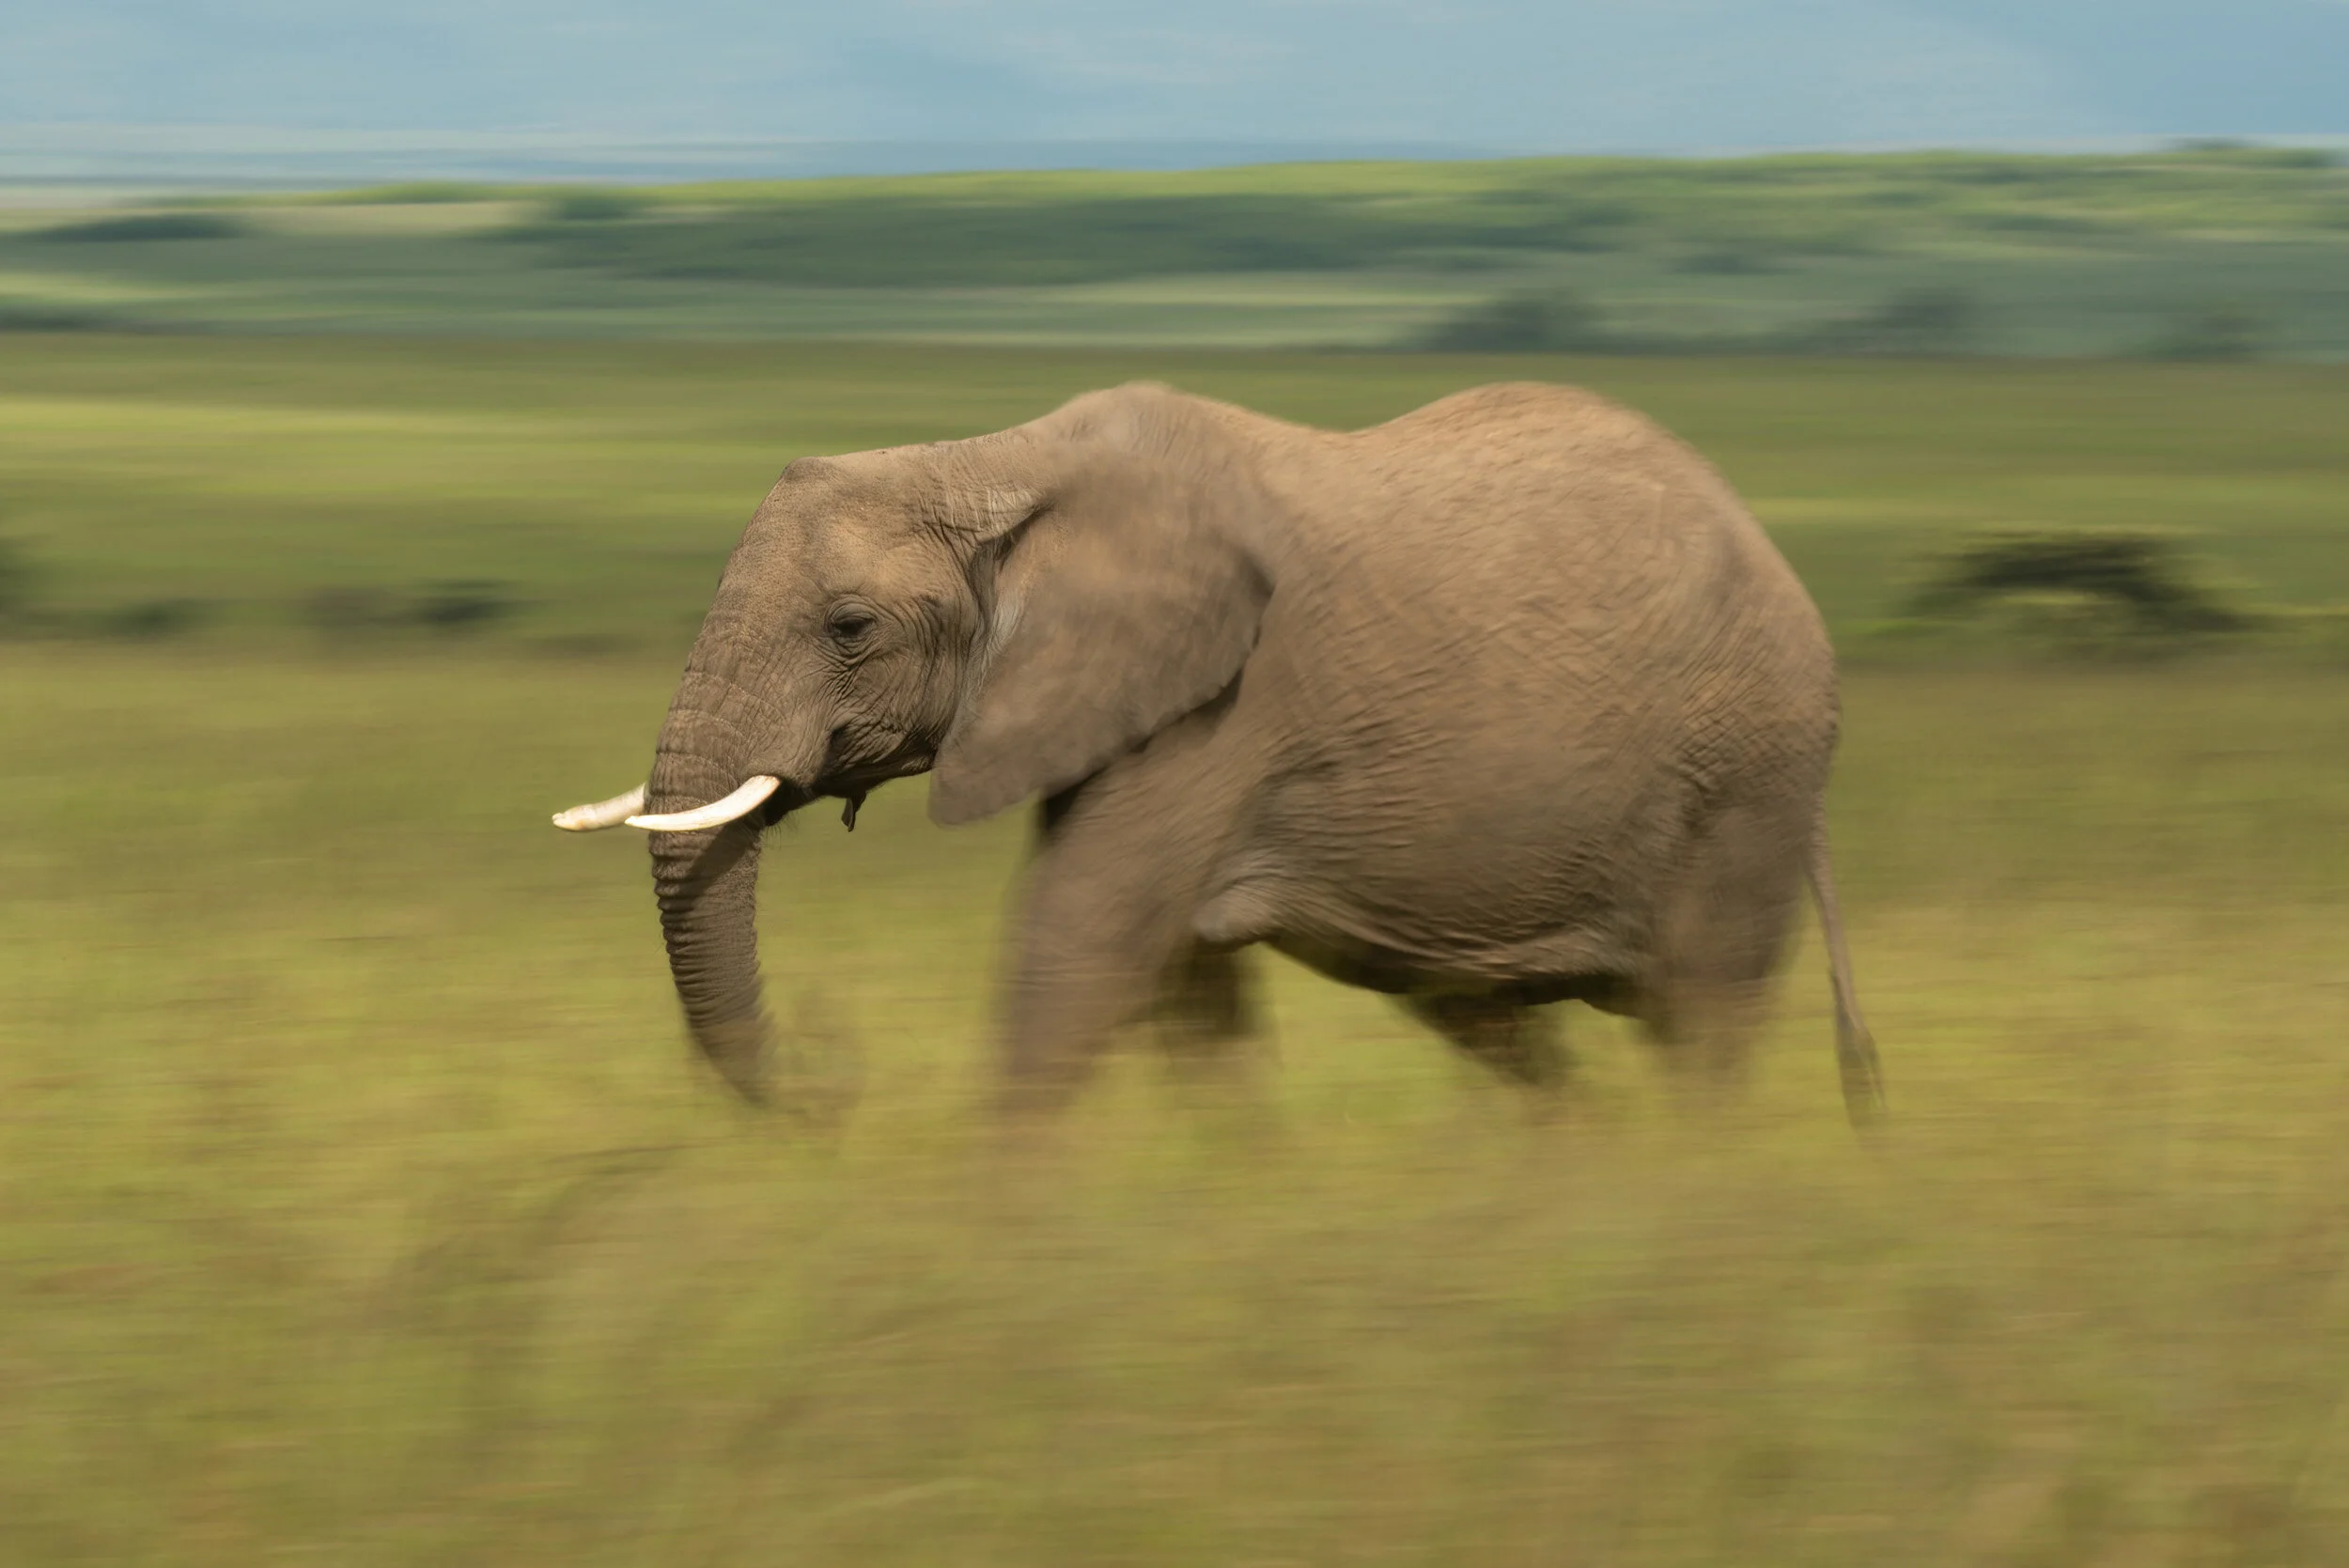
ISO 31, 400mm, f/45, 1/4
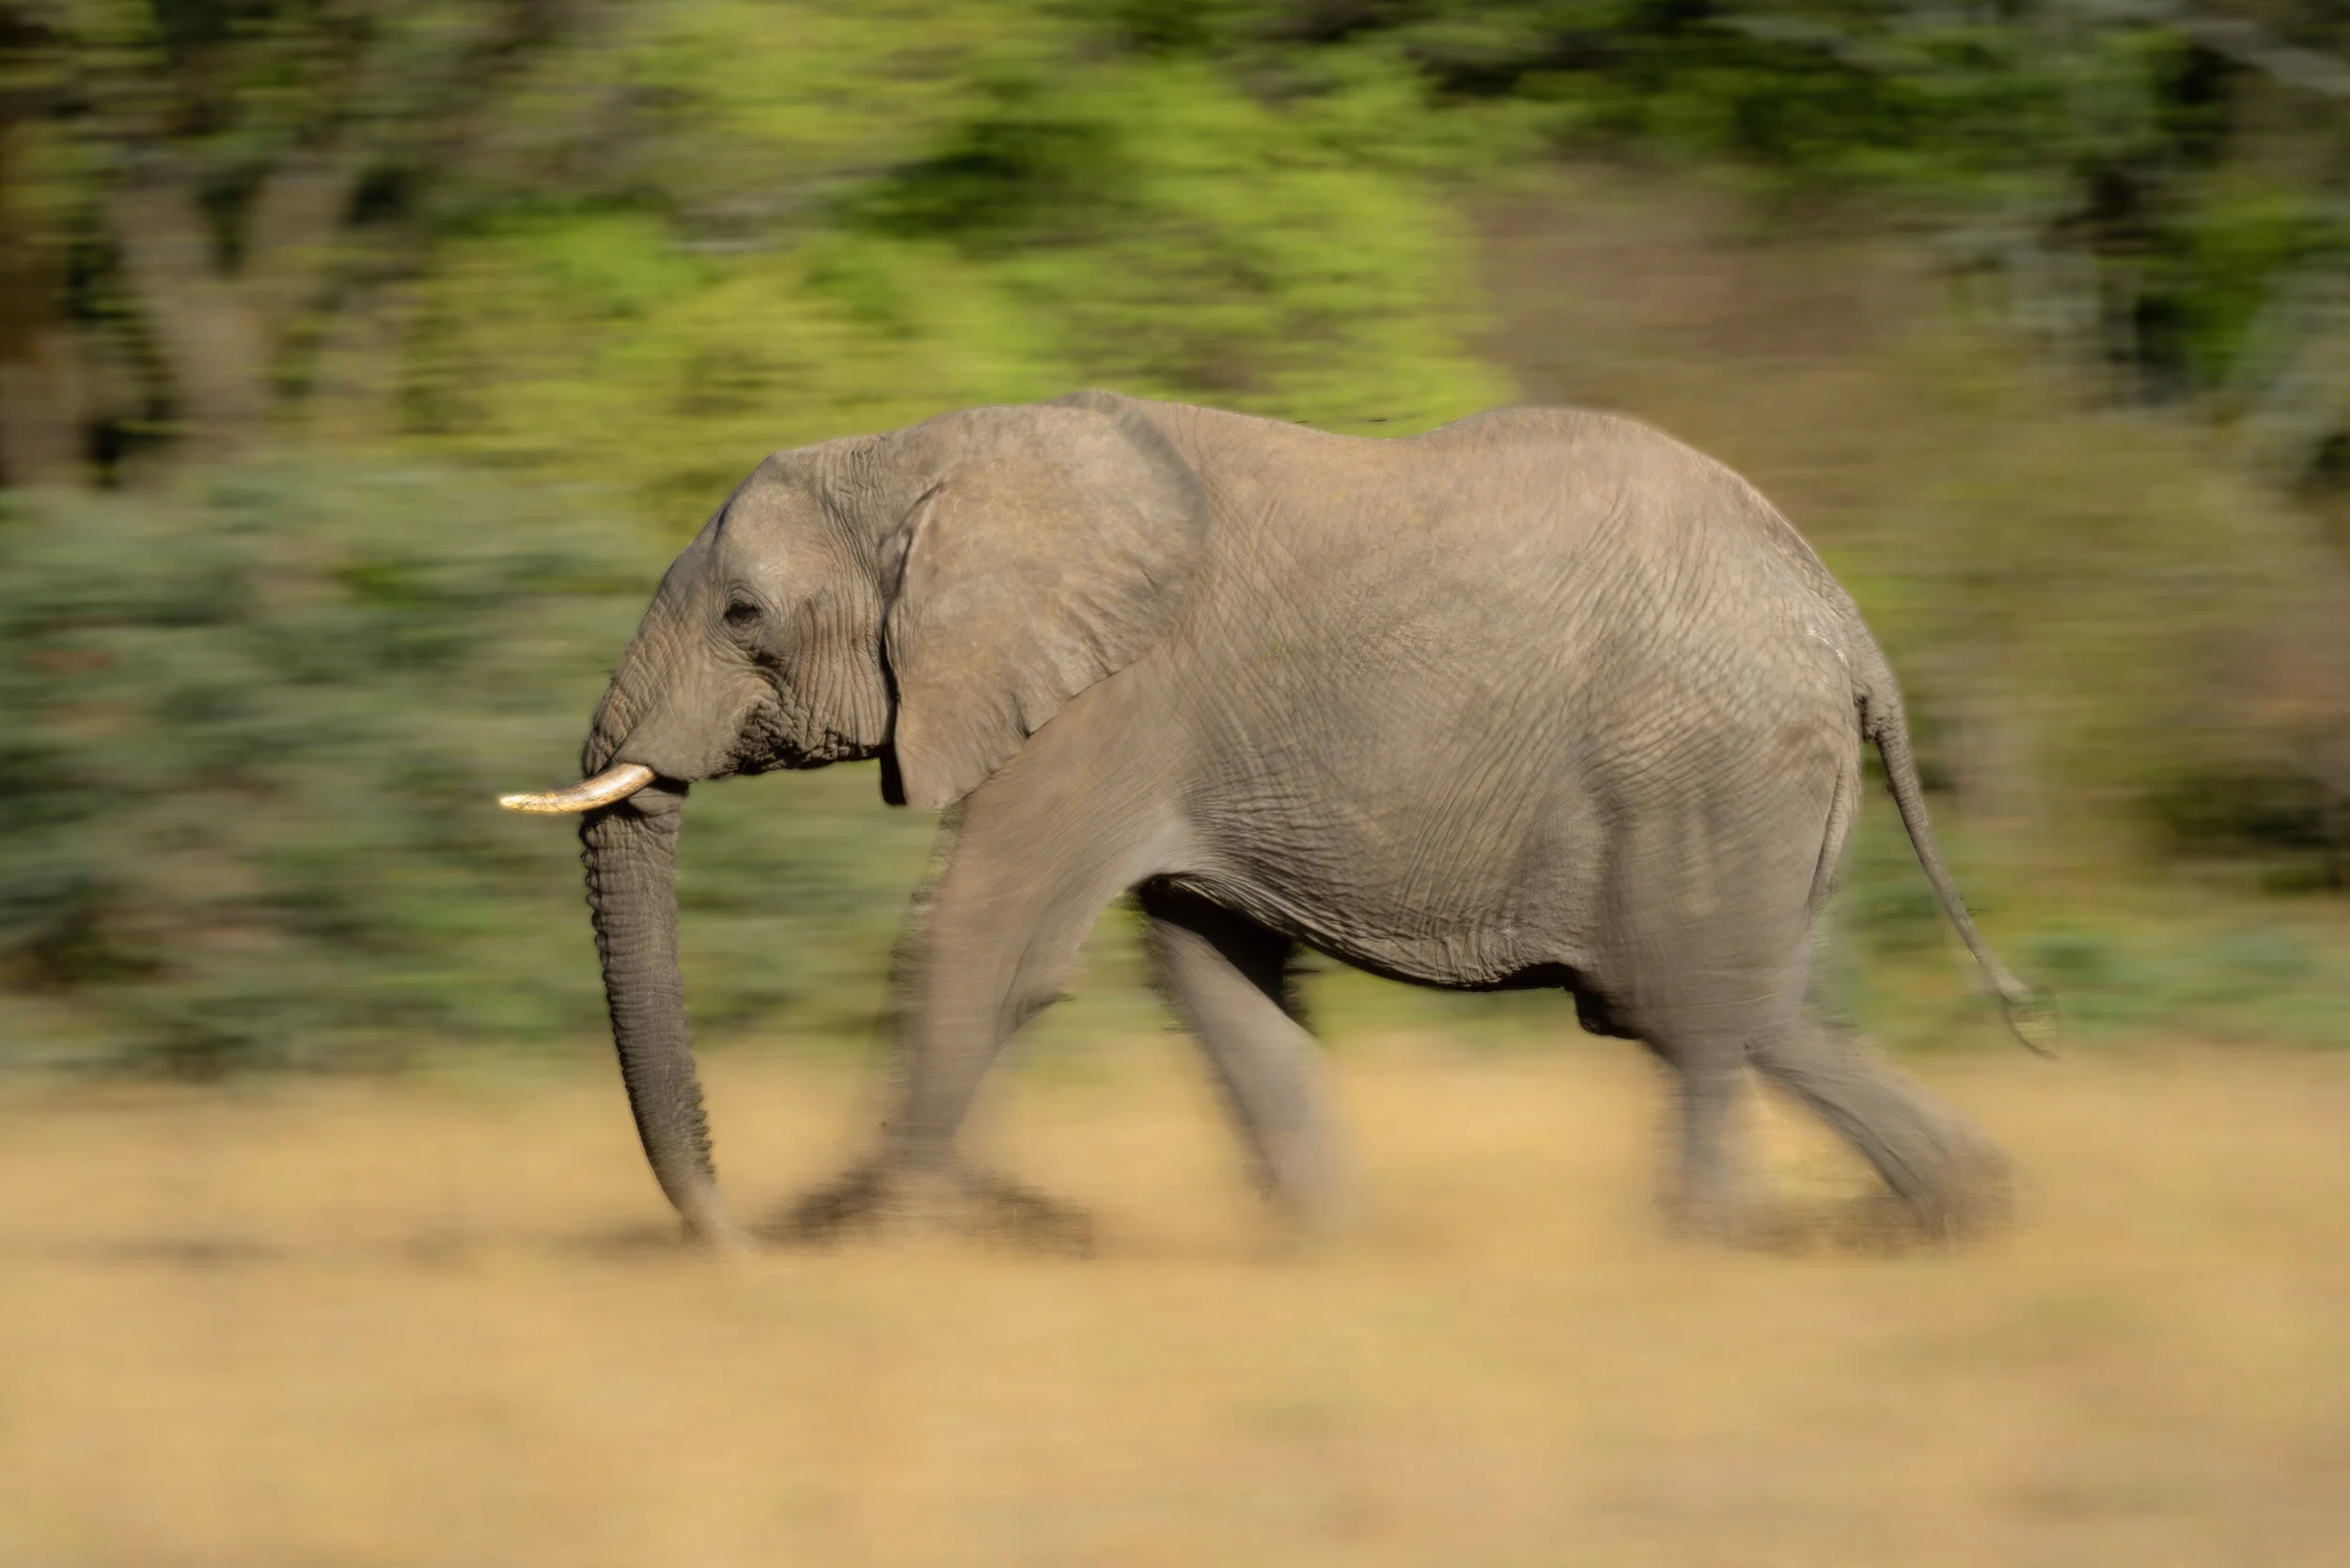
ISO 31, 400mm, f/36, 1/4
ISO 31, 400mm, f/16, 1/8
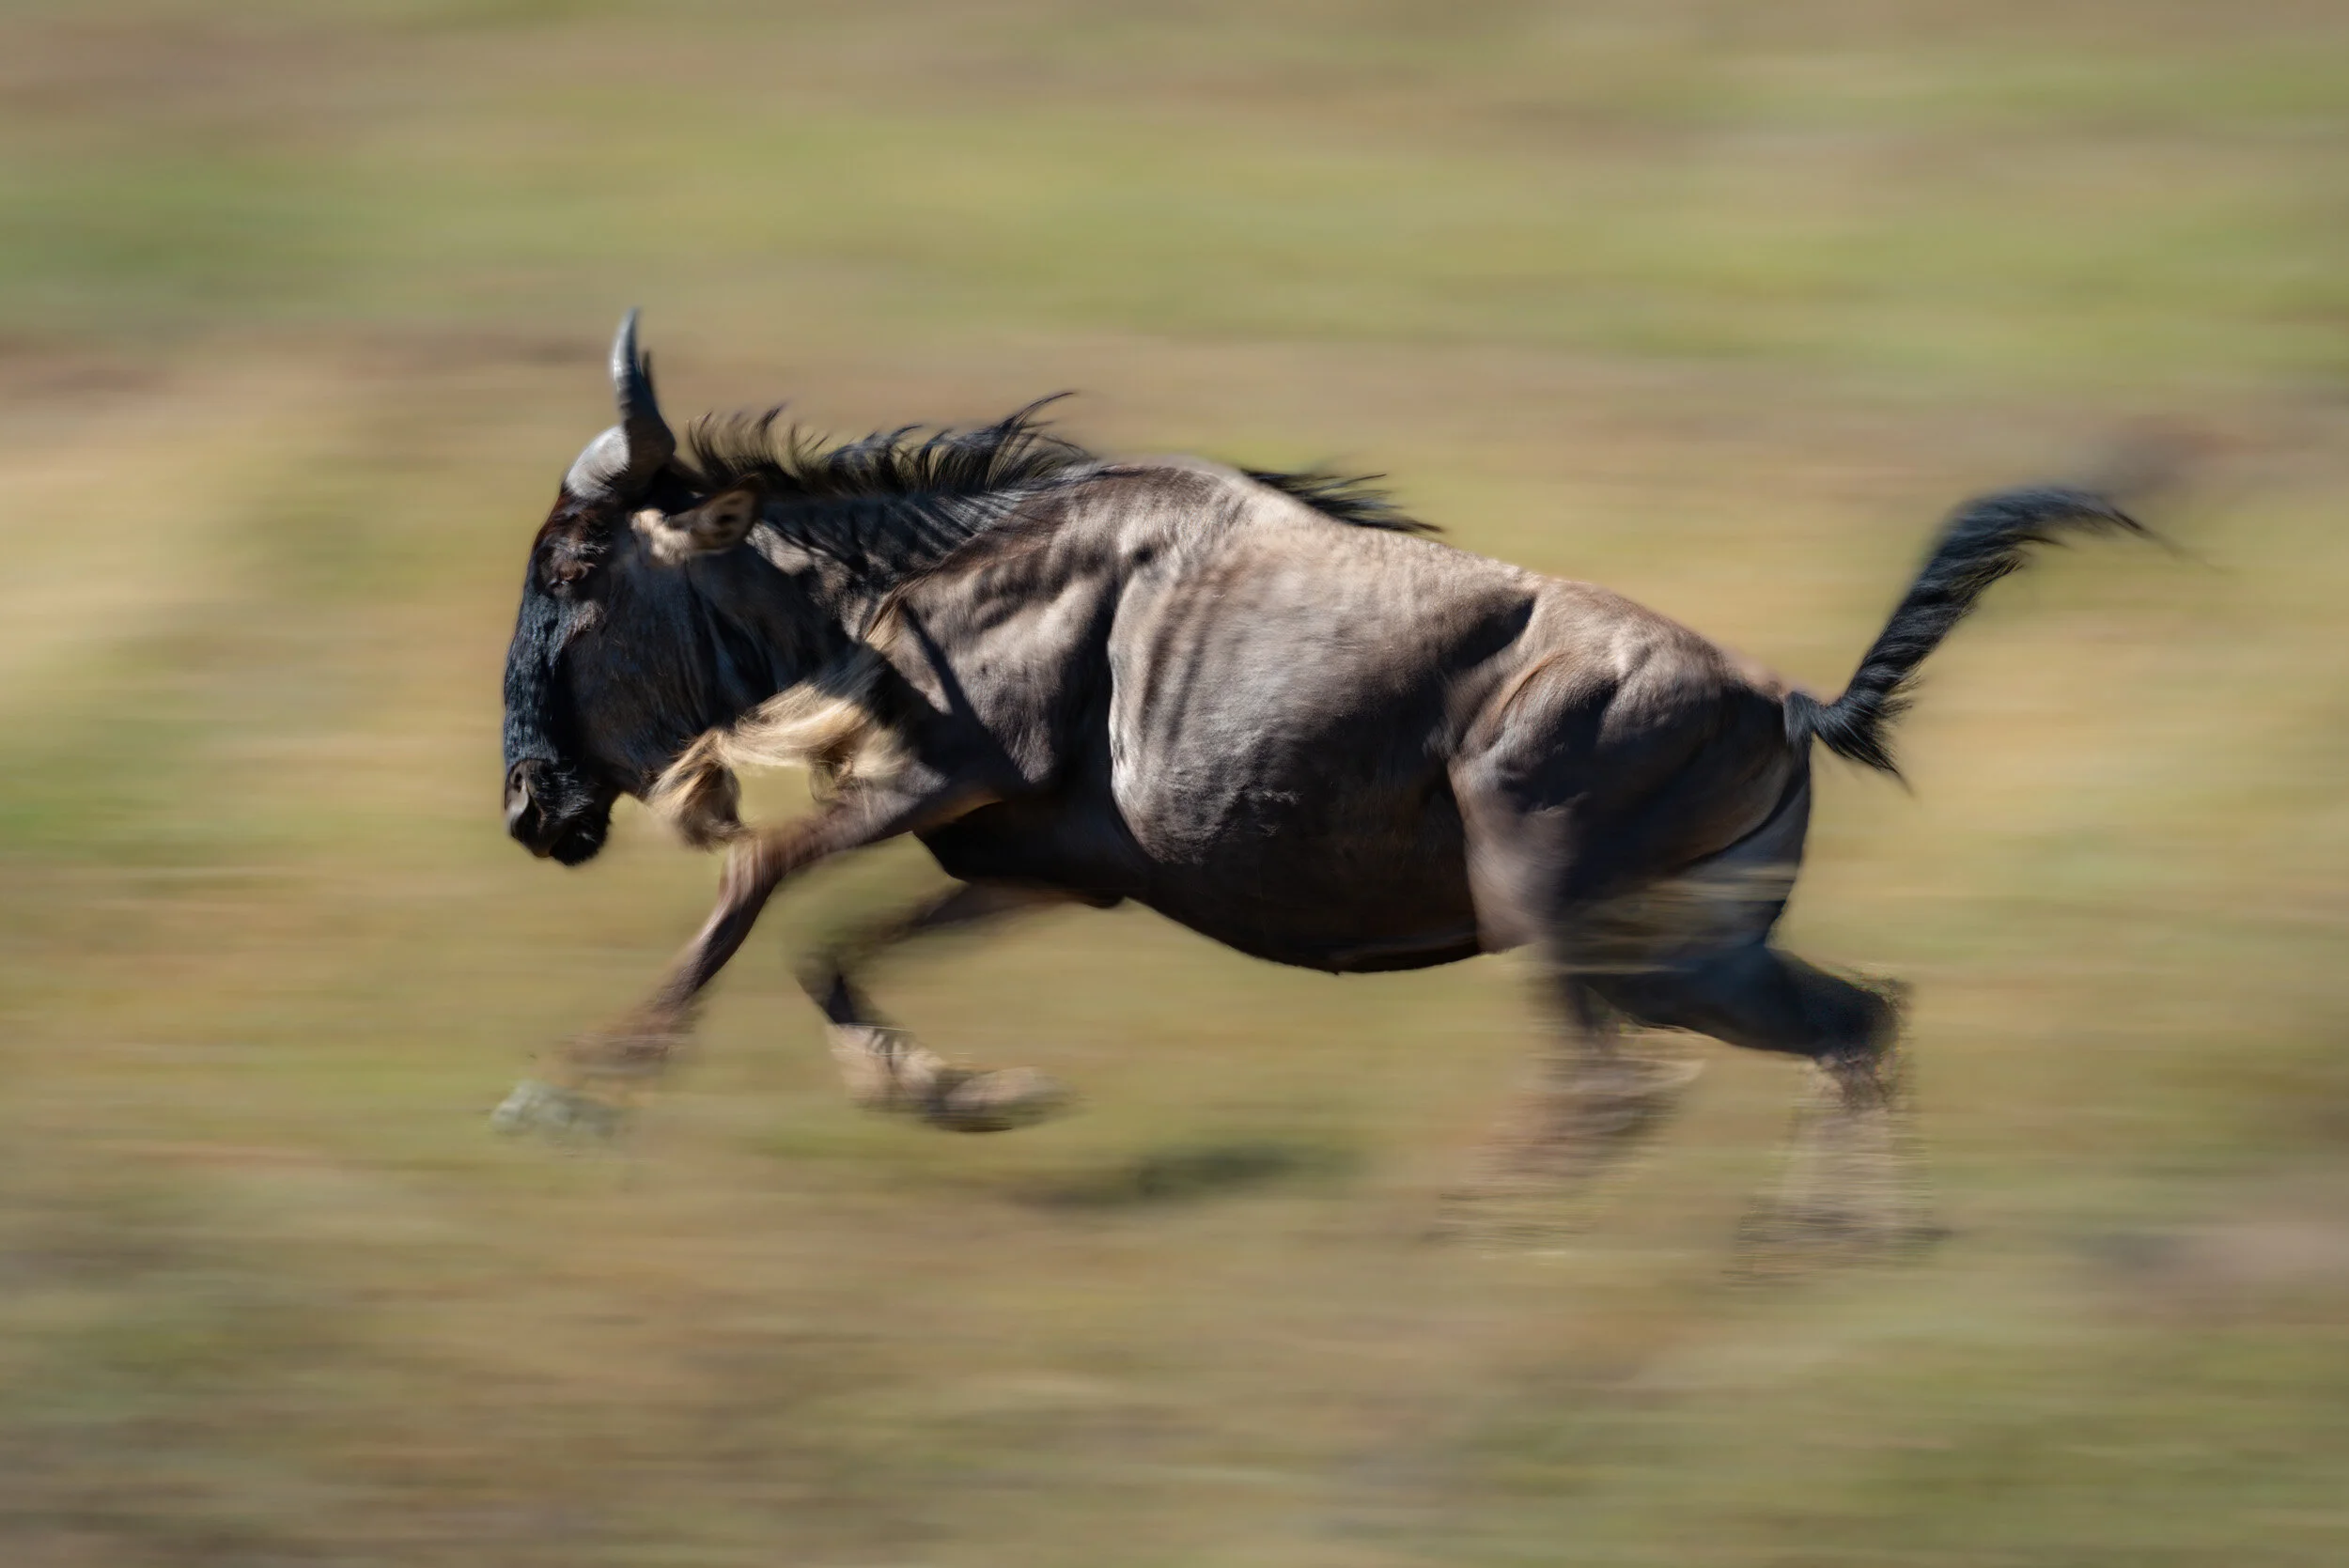
ISO 31, 400mm, f/9, 1/50
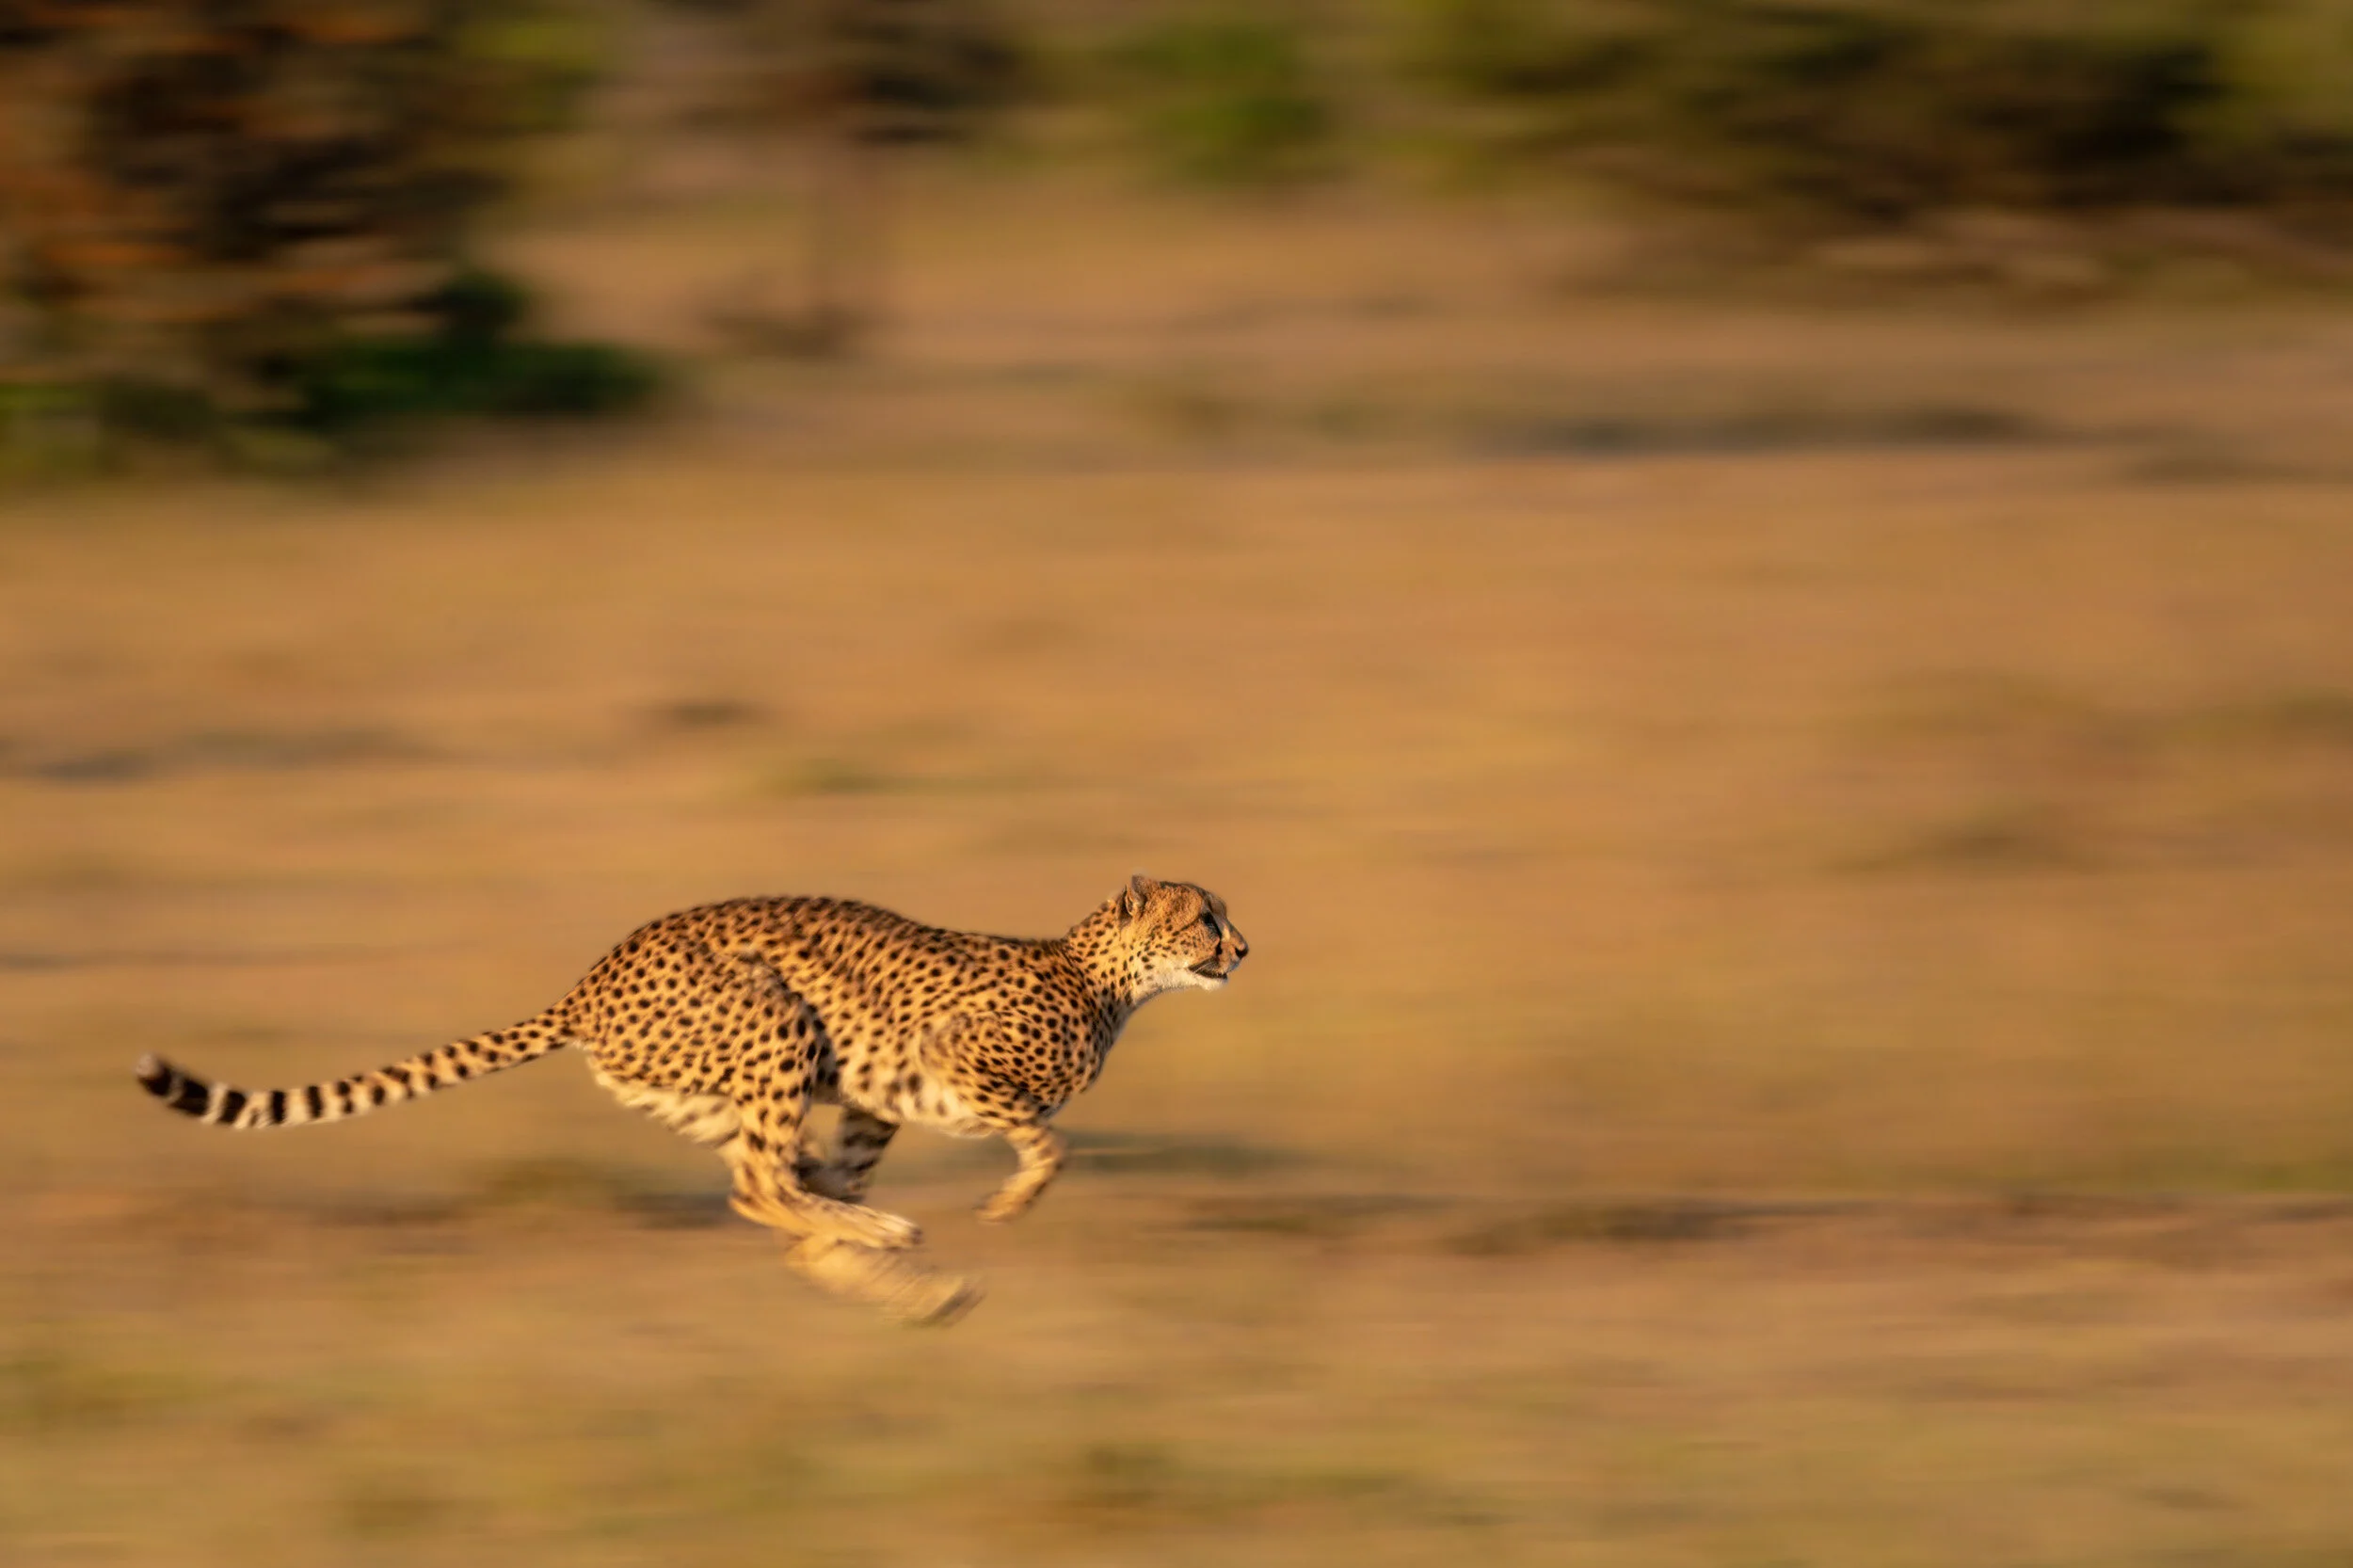
ISO 250, 800mm, f/16, 1/100
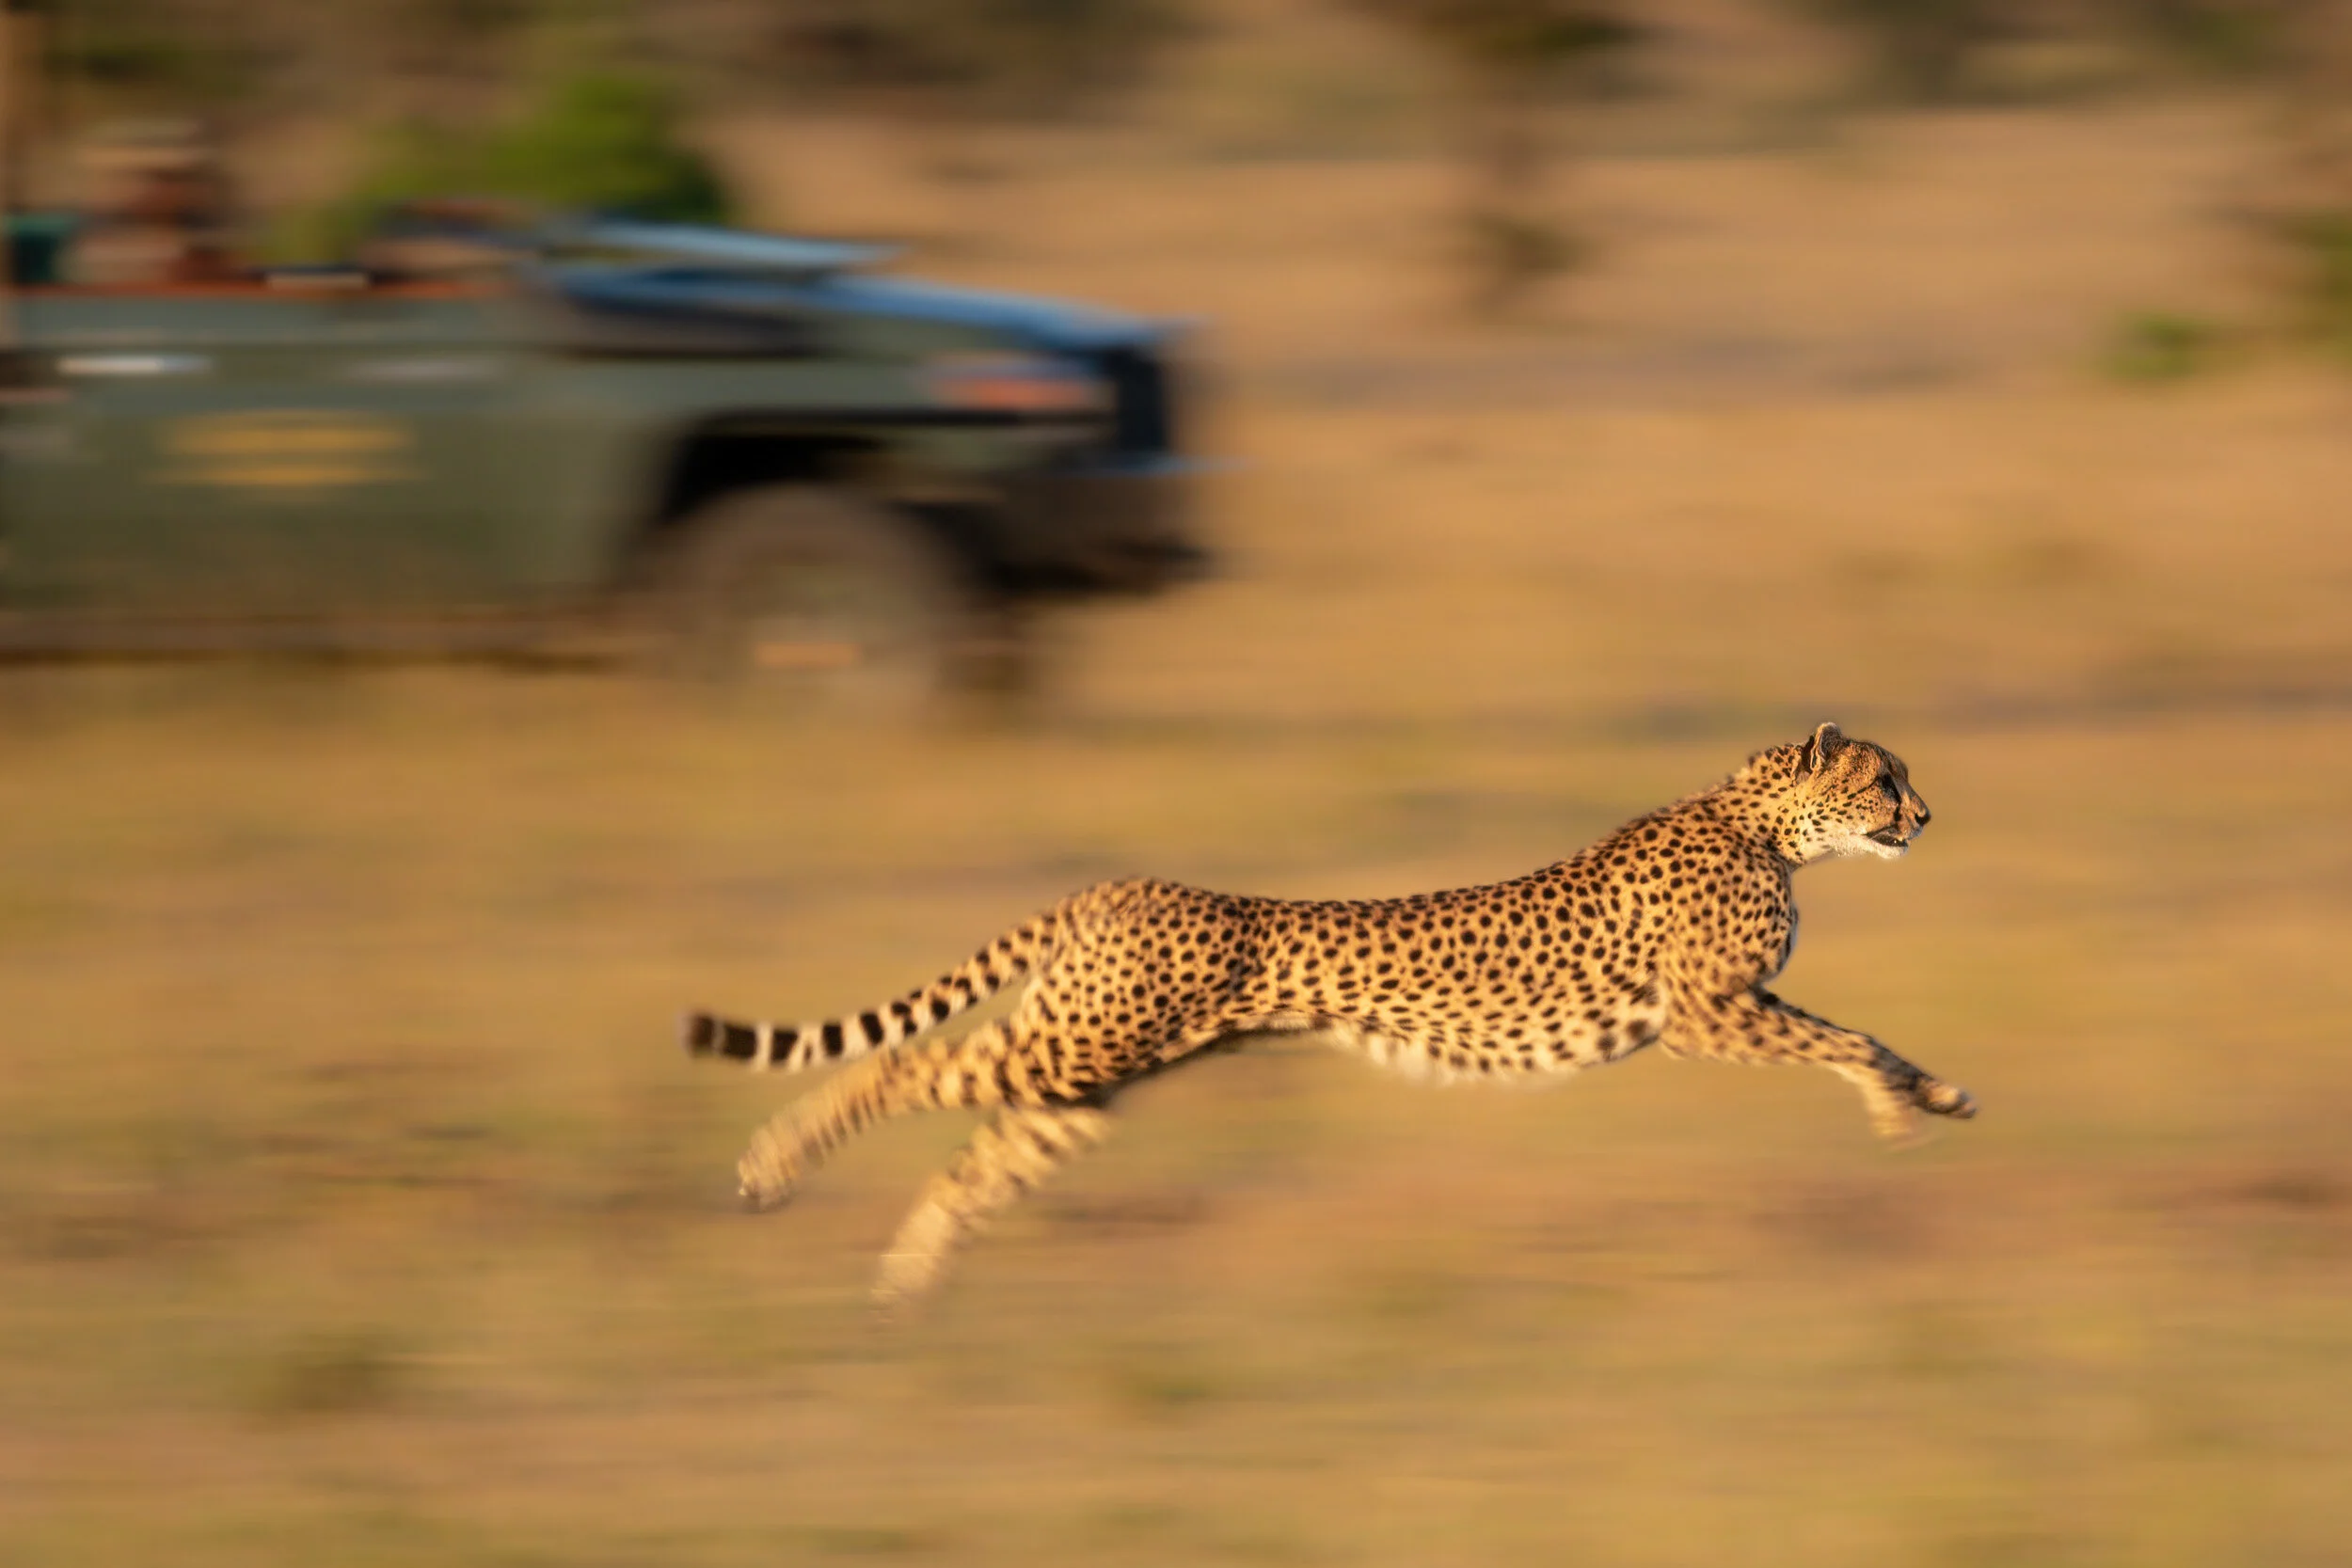
ISO 280, 800mm, f/16, 1/100
Medium (1/125-1/1000 of a second)
If you simply want to produce sharp portraits of stationary animals, then you’ll probably end up with what I’ve classed as a ‘medium’ shutter speed from around 1/125 to 1/1000 of a second.
My default shutter speed is 1/1000 when I’m on a game drive, and the only reason I change it is if I’m about to take a slow pan shot or if I think the animals or birds I’m shooting are about to move very fast or if it’s getting dark.
This shutter speed works for a number of reasons:
In Africa, the light is usually good enough during the day that 1/1000 is easily achievable at relatively low ISOs.
I’m usually shooting wide open (at around f/5.6), too, so that helps.
I generally use two lenses, an 80-400mm and an 800mm, and neither of them is so long that I’m in danger of breaking the rule of thumb that my shutter speed should be at least as fast as the inverse of the focal length - and they both have a few stops of Vibration Reduction in any case.
It’s fast enough to ‘freeze’ most moving animals - unless it’s a cheetah going full chat!
I’ll almost always be in a safari vehicle, resting my lens on a beanbag, which gives a really stable platform.
The only useful thing I can really say about portrait settings is that you’ll often find yourself in less than ideal lighting conditions, so if you have time, it’s worth reducing your ISO by choosing a slower shutter speed.
Just because 1/1000 is my default setting doesn’t mean that I don’t spin the dial down to 1/250 or 1/125 if I think I can get away with it.
I’m a big fan of Topaz Labs DeNoise AI and Sharpen AI, but I’d still rather do my noise reduction in camera by reducing my ISO as far as it’ll go…
Here are a few examples of wildlife portraits taken at ‘medium’ shutter speeds.
ISO 250, 300mm, f/11, 1/125
ISO 1100, 400mm, f/5.6, 1/250
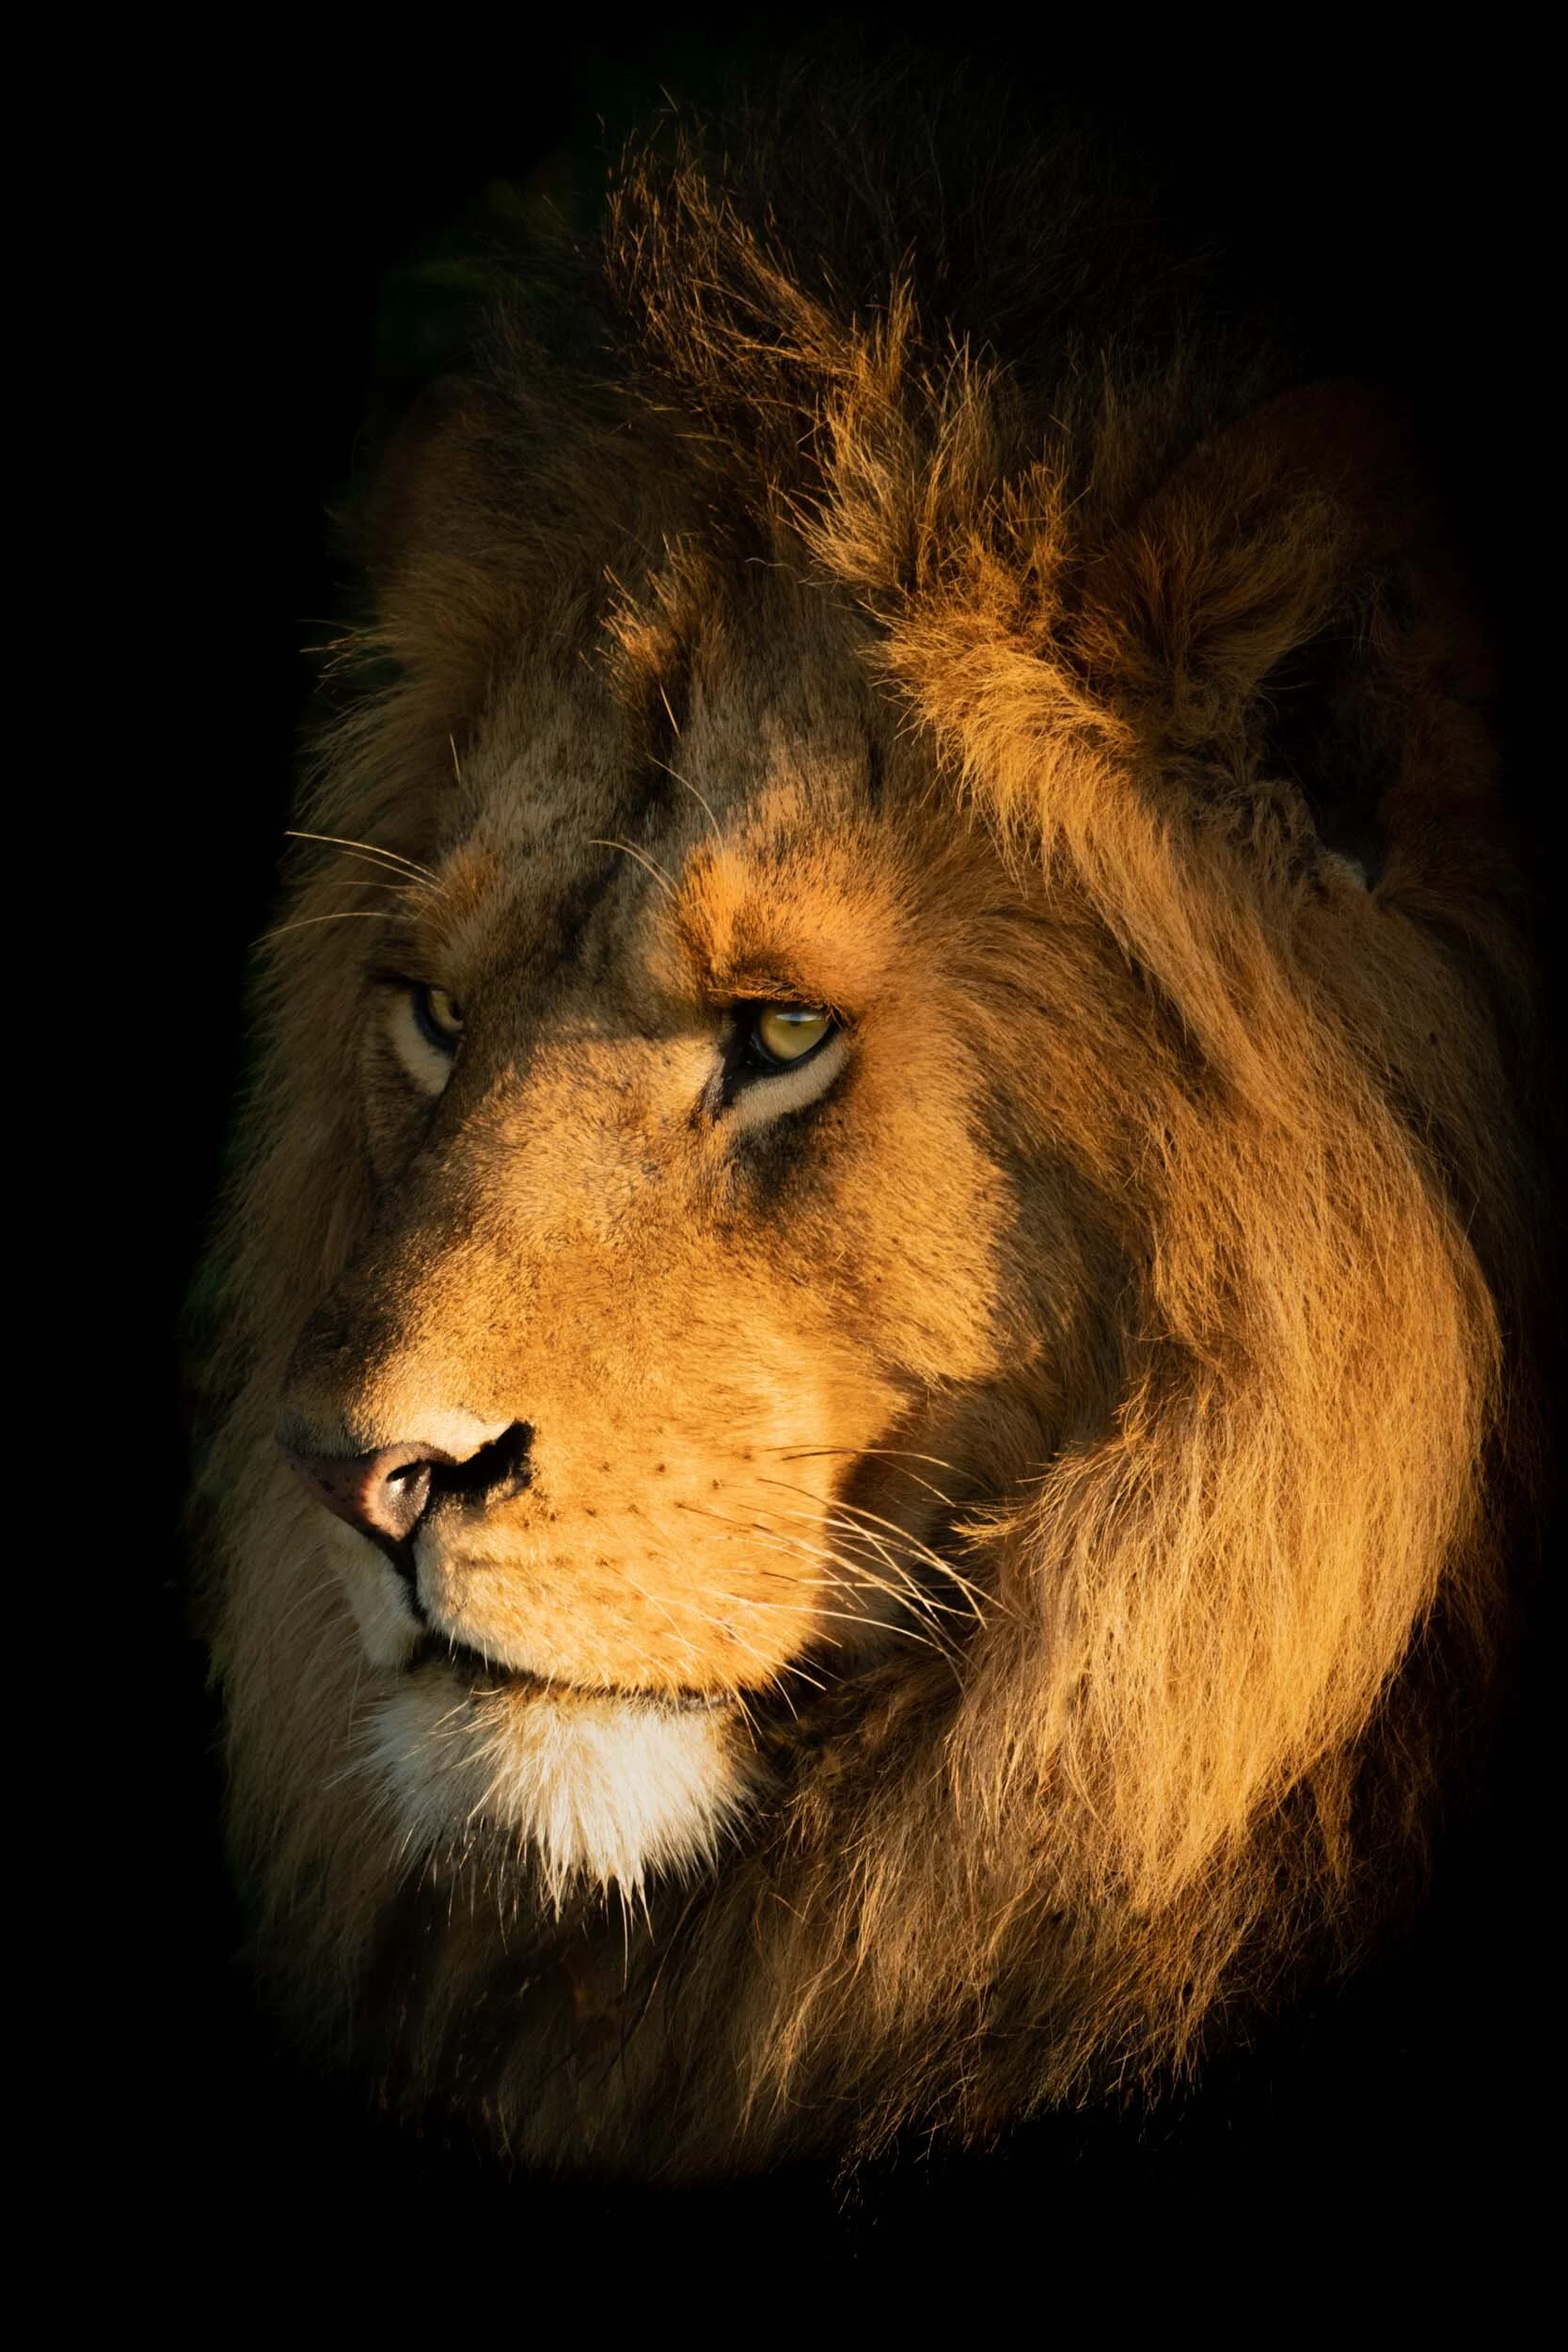
ISO 280, 1000mm, f/7.1, 1/500
ISO 90, 800mm, f/5.6, 1/1000
Fast (1/1250 of a second or shorter)
Certain wildlife subjects need very fast shutter speeds.
There’s no doubt about that, but it’s very tempting sometimes to think that 1/1000 of a second will be ‘good enough’.
No it won’t - at least not if you’re shooting birds in flight or bears catching salmon!
It’s true that there are long periods when nothing much seems to be happening, but wildlife photography is a bit like being a soldier: 99% boredom and 1% panic!
You never know when an animal or bird will do something unexpected, so you have to be prepared.
Being able to predict wildlife behaviour is difficult, but experience helps.
I’ve been on over 250 game drives in Africa, for example, so I’d like to think I have a bit more of an idea of what a lion is likely to do than when I was fresh off the boat!
The problem to some extent is that we’re obsessed with noise and getting the lowest possible ISO.
That’s fine when it comes to portraits, but what about action shots?
Surely that’s what we should be focusing on, and that means choosing settings that are right for what might happen, not what’s actually happening.
Noise can be fixed, but motion blur can’t.
That means we need to think ahead and imagine what’s likely to happen:
What if the leopard jumps down from the tree?
What if the lions start mating?
What if the cheetah cub jumps over the puddle?
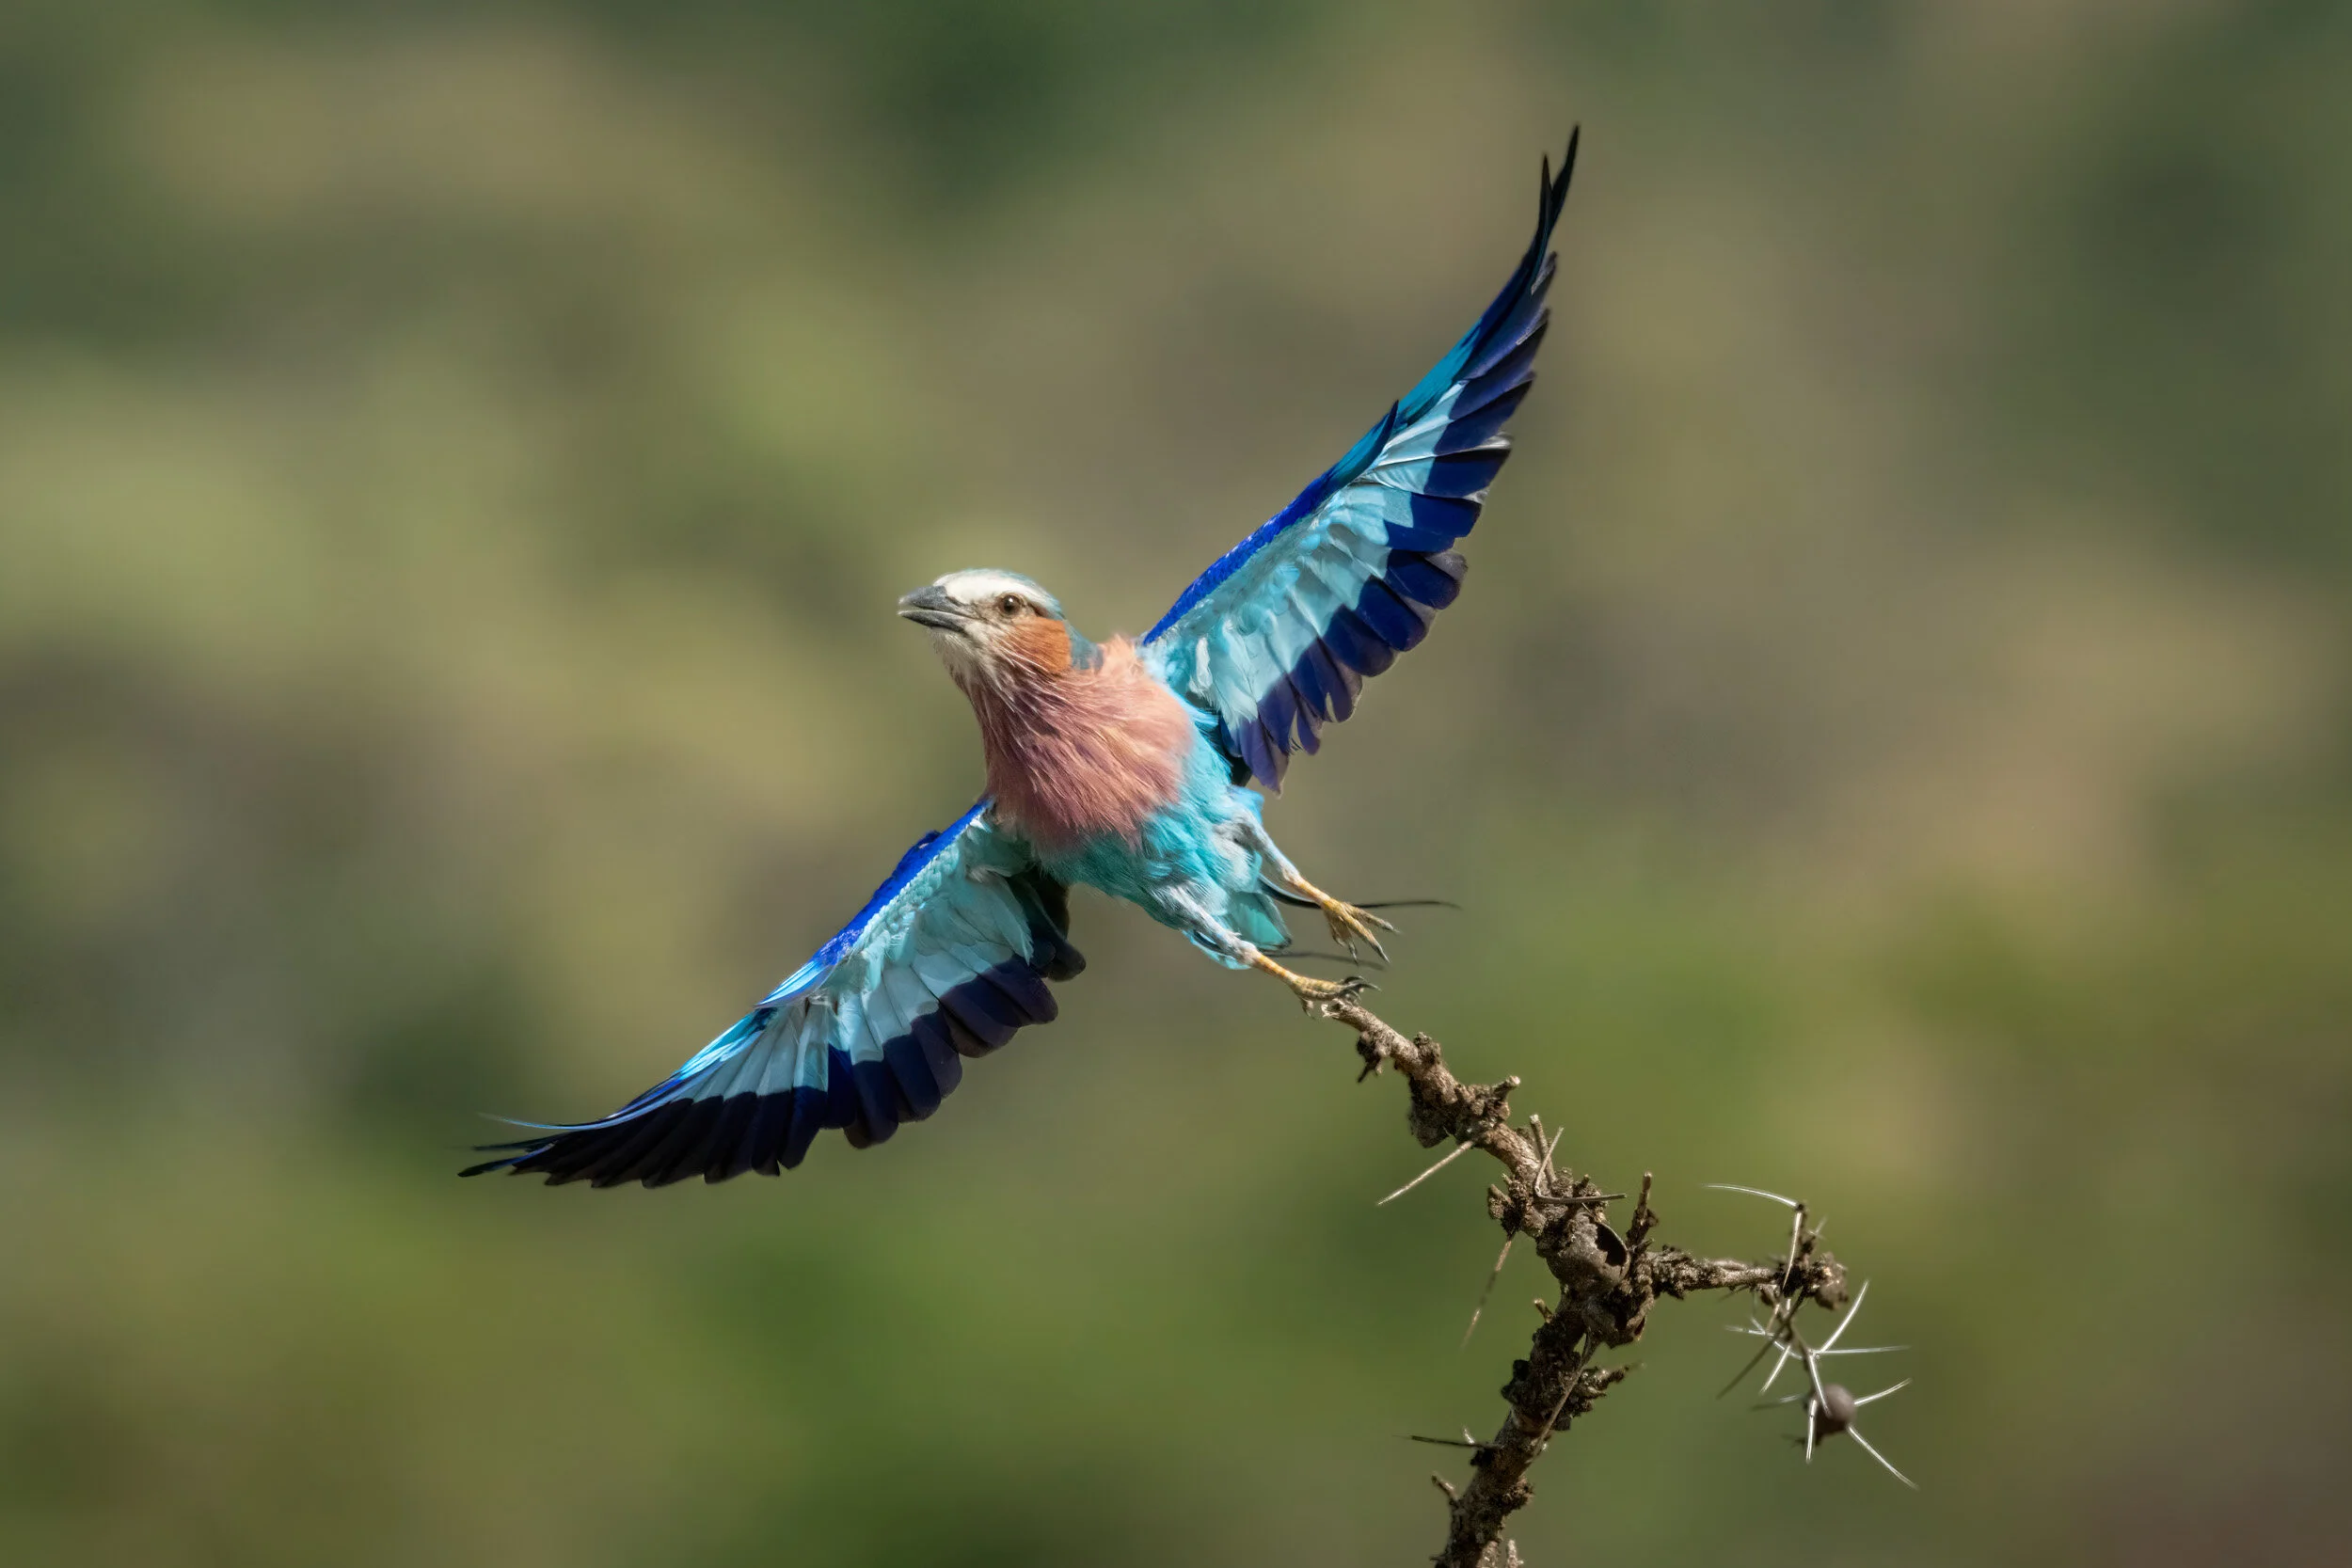
What if the lilac-breasted roller takes off?
Birds in flight
Of all the ‘action shots’ in wildlife photography, birds in flight (or BIF) are one of the most sought after.
You basically have two options: slow or fast:
If you choose a slow shutter speed, you can create slow pan shots.
If you choose a fast shutter speed, you can freeze the action.
I’ve already, talked about slow pan shutter speeds, so I’m going to concentrate here on the settings you’ll typically need to freeze birds in flight.
As with slow pan shots, there are a number of things to take into account:
The faster (and more unpredictably) the animal is moving, the faster your shutter speed should be.
The smaller the bird, the faster your shutter speed should be.
The closer the animal is to moving directly across in front of you (ie at 90 degrees to your line of sight), the faster your shutter speed should be.
The further away the animal, the slower your shutter speed needs to be.
The wider your lens, the slower your shutter speed needs be.
Feel free to experiment to see what works, but here’s a quick reference guide:
Large birds (eg eagles and vultures): 1/1000 upwards
Medium birds (eg lilac-breasted roller): 1/2000 upwards
Small birds (eg swallows): 1/3250 upwards
There’s obviously more to shooting birds in flight than choosing the right shutter speed, but don’t be afraid to err on the safe side.
These days, most DSLRs can manage 1/4000 or even 1/8000 of a second, so feel free to push the limits of your camera.
Your reward should be a far higher percentage of sharp shots of birds in flight.
Here are a few examples of wildlife action shots taken at high shutter speeds.
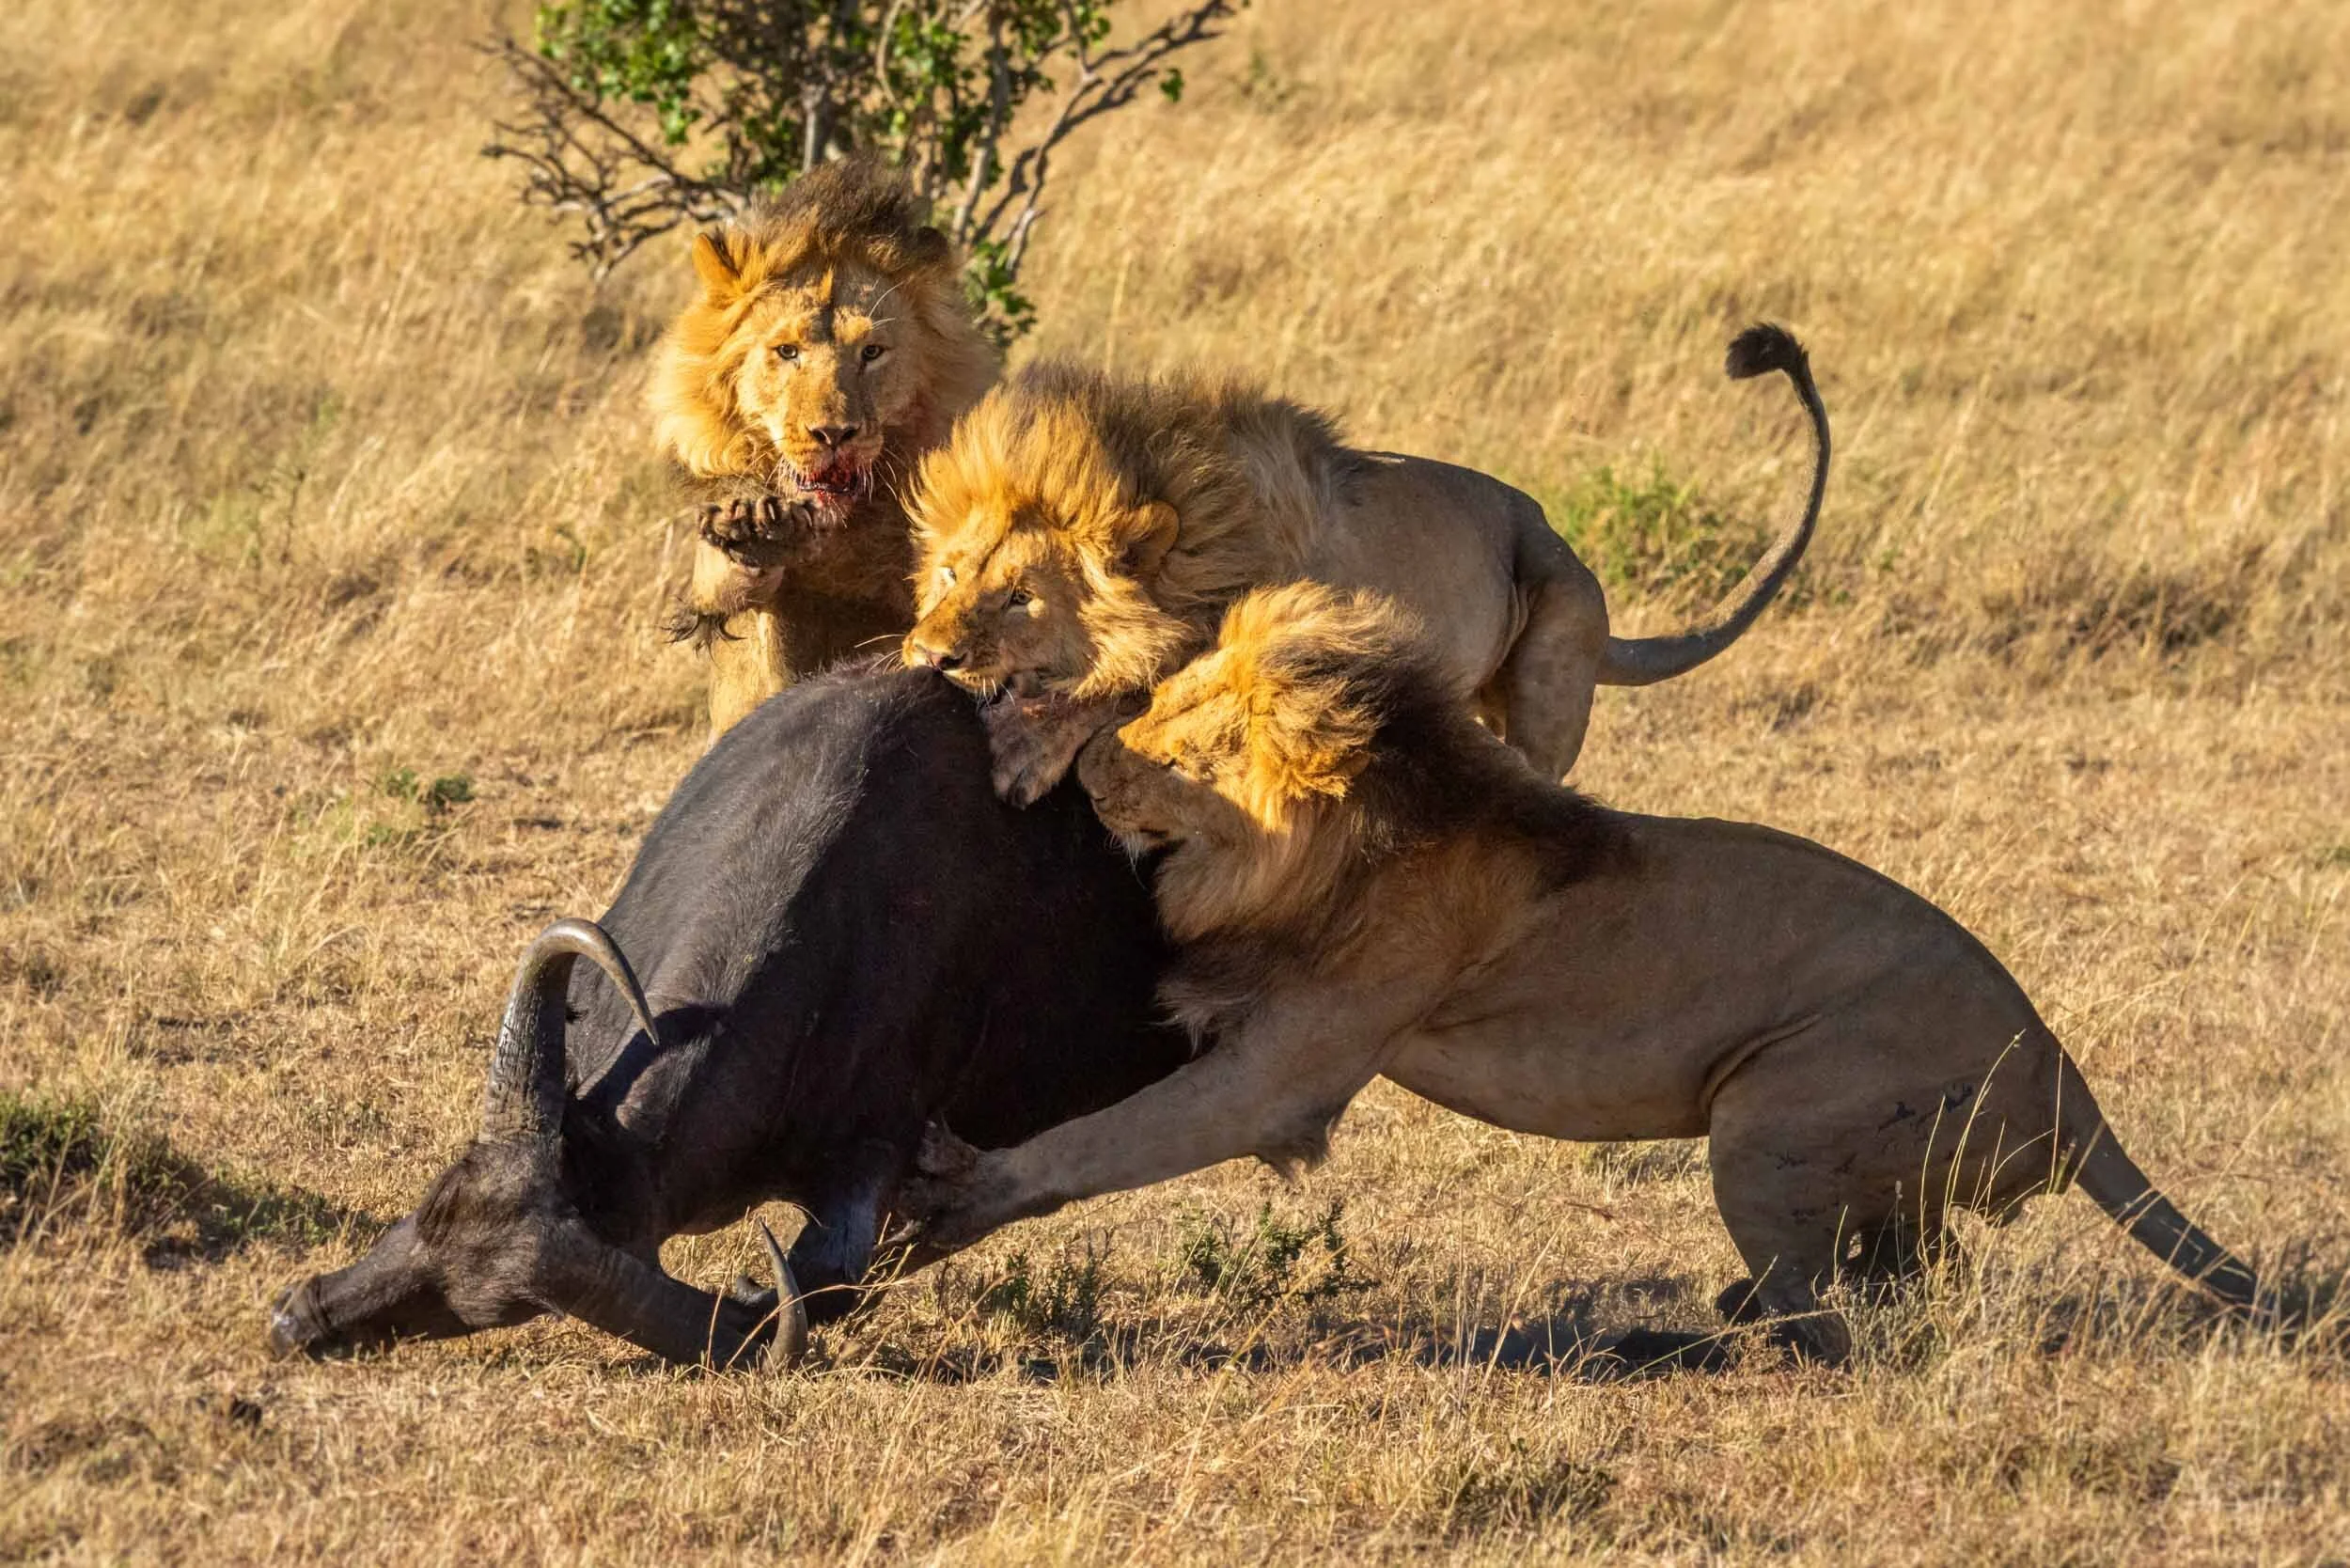
ISO 1250, 260mm, f/11, 1/1250

ISO 320, 800mm, f/8, 1/1600
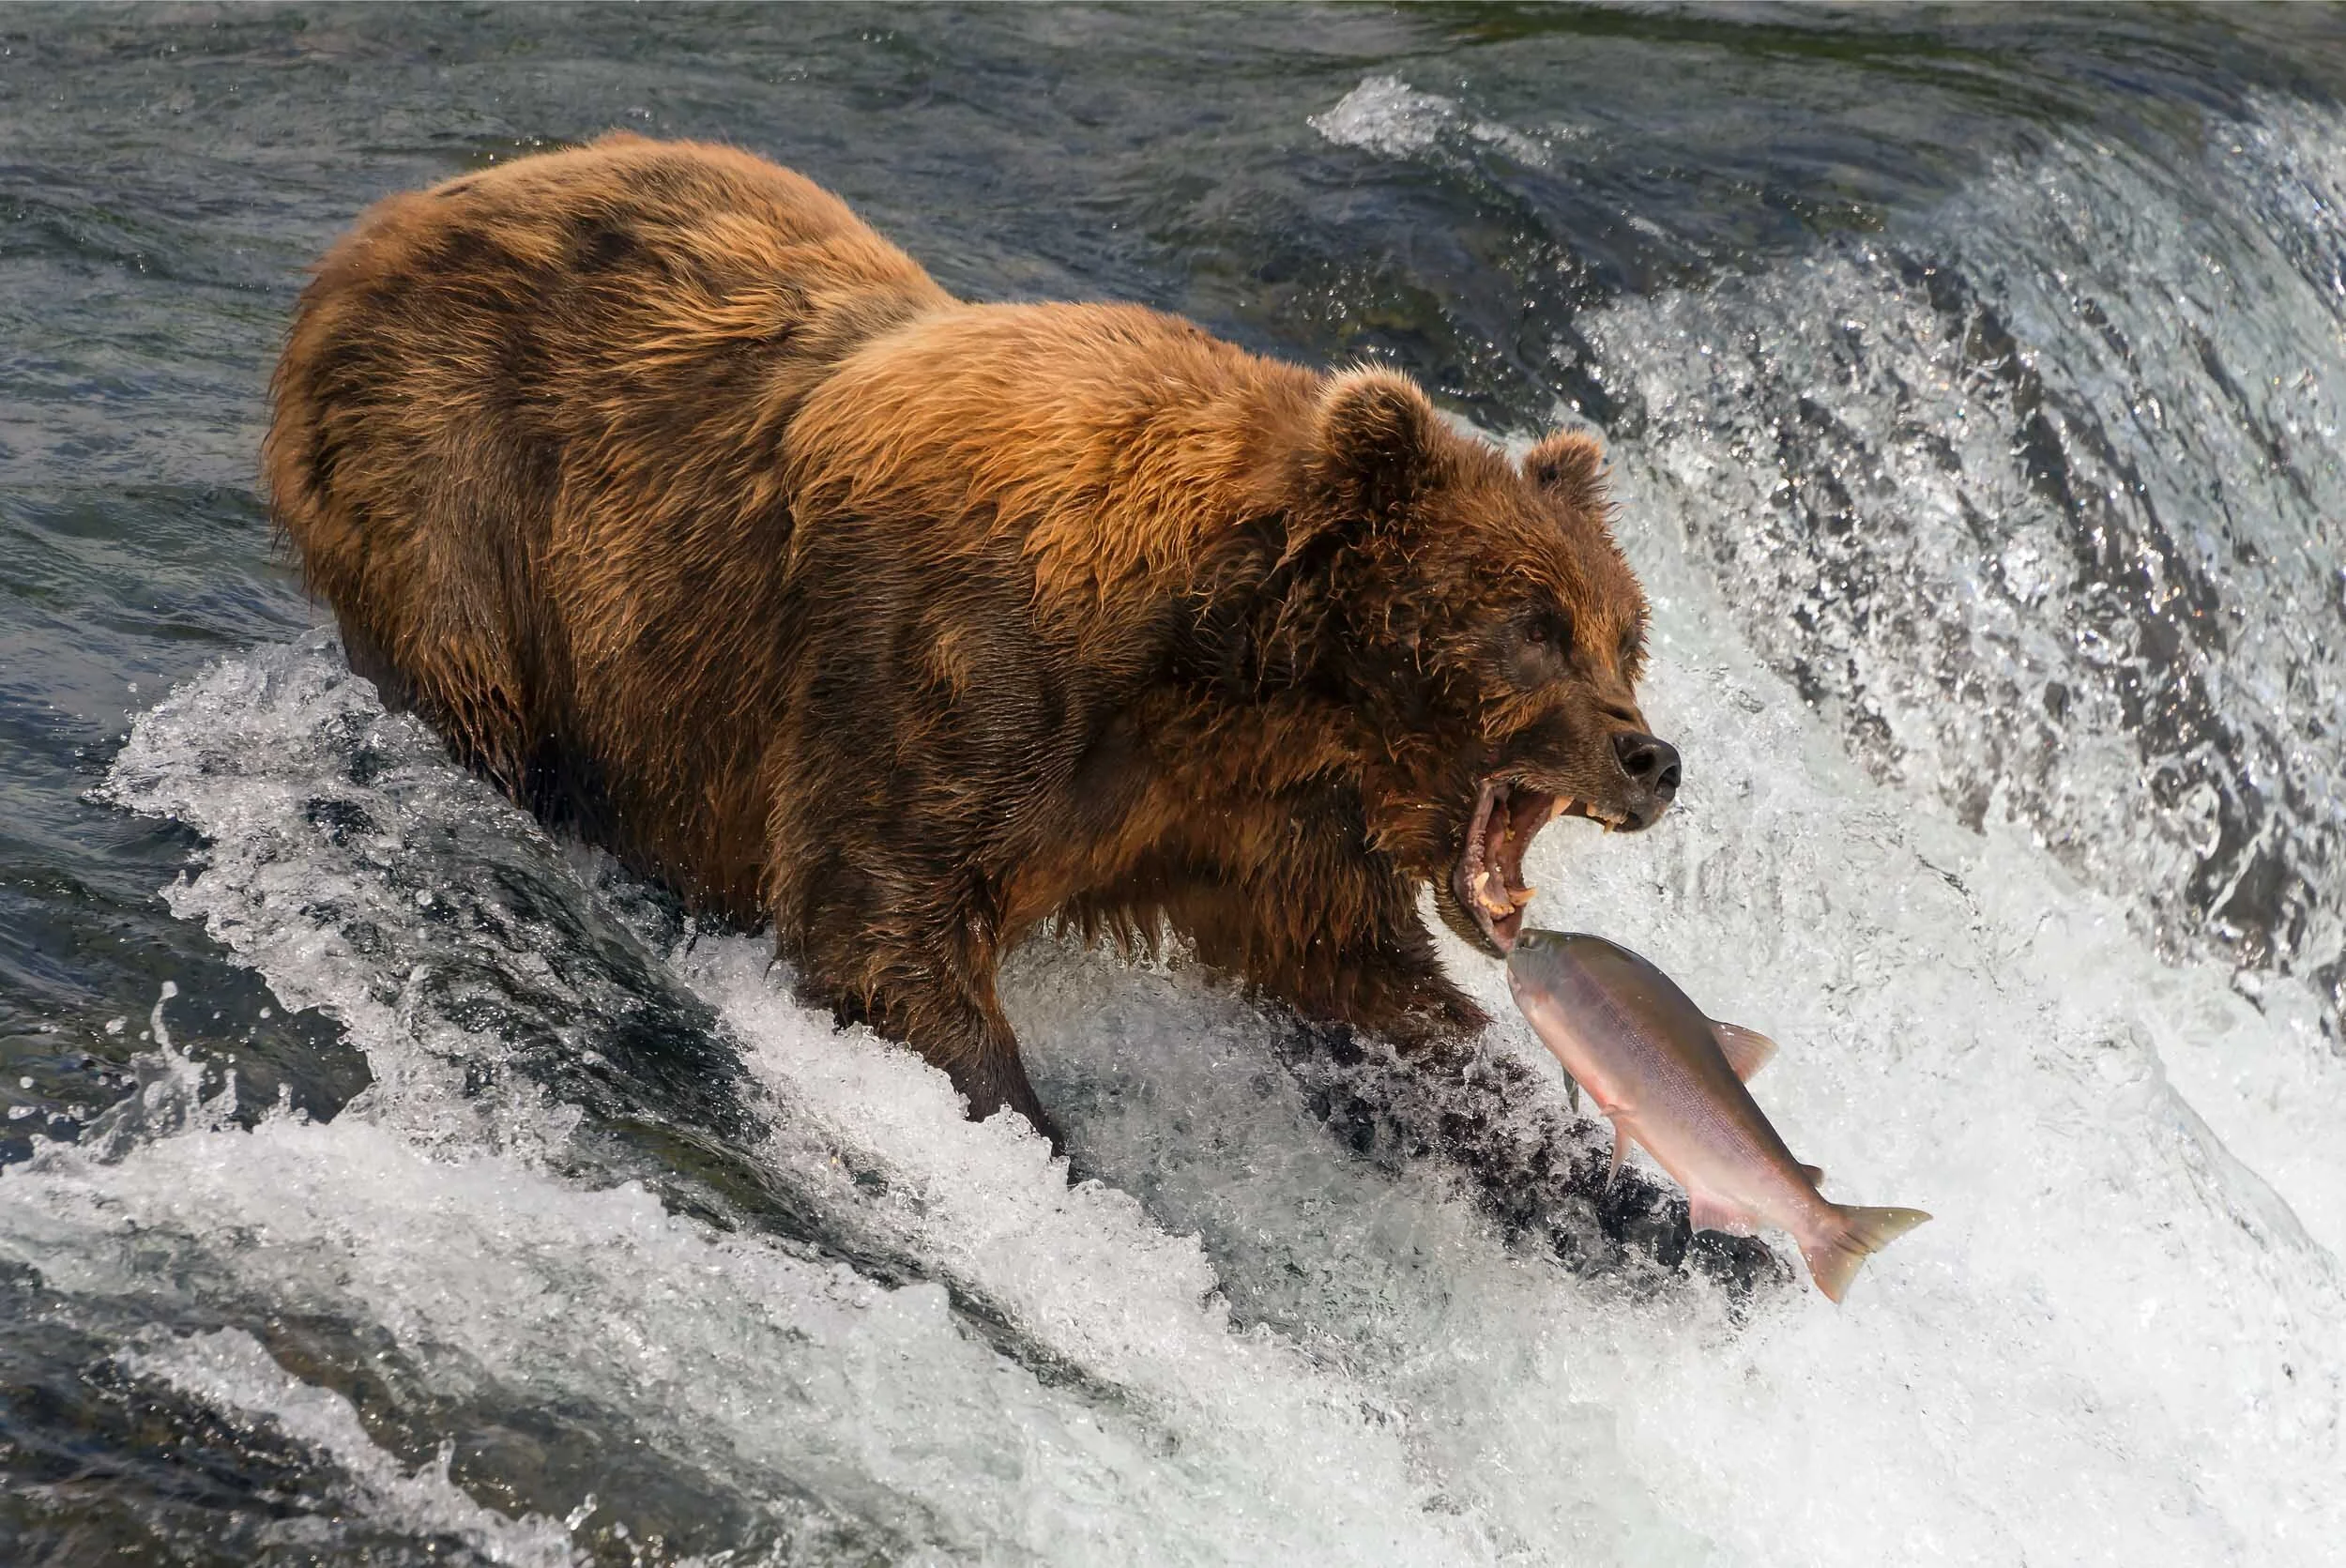
ISO 400, 300mm, f/9.0, 1/1600
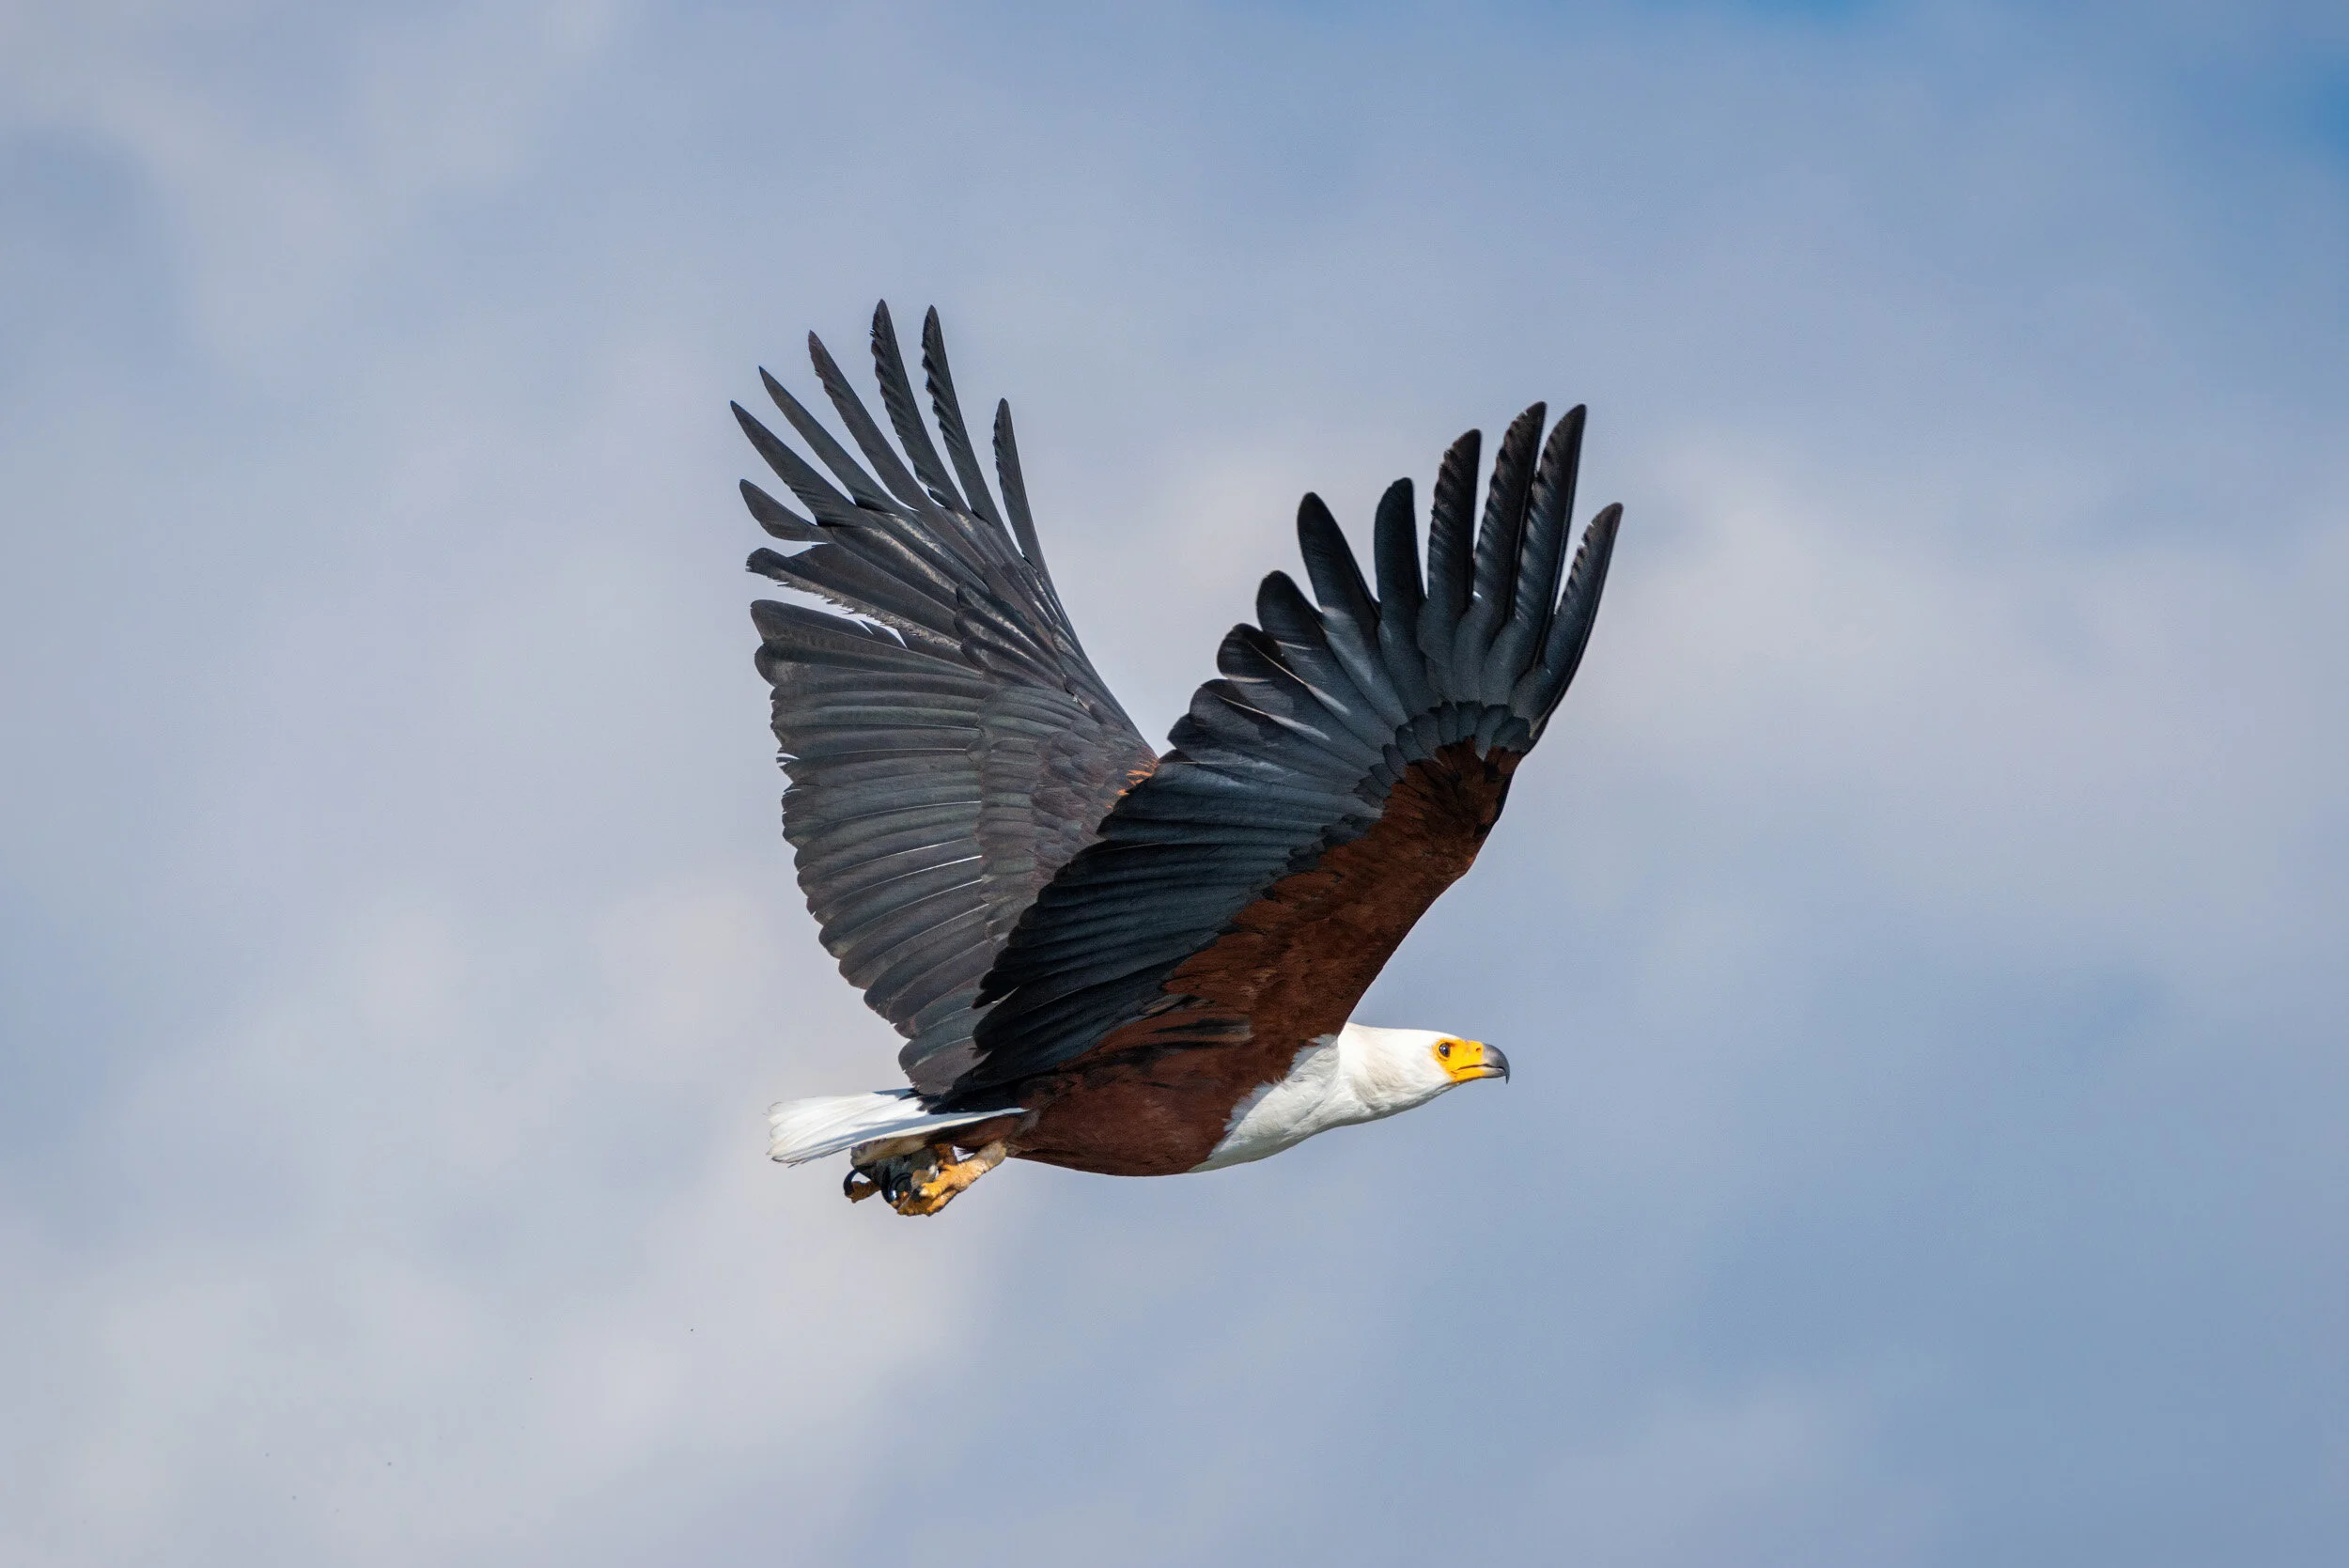
ISO 1000, 550mm, f/11, 1/2000
ISO 360, 300mm, f/5.6, 1/4000