
Addicted to AUTO...?
“It’s photography, Jim, but not as we know it…”

Exposure mode dial
Are you addicted to AUTO? Do you leave your camera in AUTO mode without ever trying aperture or shutter priority, let alone manual? If so, let me be your sponsor! I can help you improve your photography by encouraging you to use different cameras, lenses, settings and rules of composition—and you won’t even need to go cold turkey!
Cameras
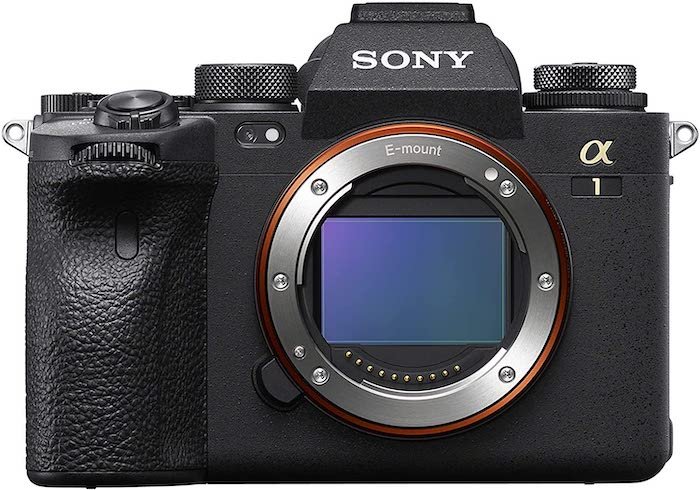
The Sony ⍺1
If you love photography but don’t have the budget to spend thousands on an all-singing, all-dancing Sony ⍺1, Nikon Z9 or Canon R5, there is a solution. Just take it slowly. There are many different types of cameras, each offering a different trade-off between convenience and control:
Compact (or ‘point-and-shoot’) cameras have a fixed lens with either a fixed focal length or a limited zoom range. They’re handy and portable, but they have a tiny sensor that limits image quality and low-light performance and don’t give you many options to experiment with different camera settings, such as aperture, shutter speed, ISO or exposure compensation.
Bridge cameras have similar pros and cons to compacts, but they have an enormous zoom range. On the other hand, they’re generally bigger and heavier.
DSLRs are interchangeable lens cameras with larger sensors that let you take control of all the major camera settings. This gives them a big advantage in flexibility and image quality over compacts or bridge cameras. However, they’re larger and heavier and don’t offer silent or blackout-free shooting.
Mirrorless cameras have all the benefits of DSLRs with the addition of eye detection and tracking, a WYSIWYG electronic viewfinder (or EVF) and silent and blackout-free shooting. However, some people prefer the DSLR’s optical viewfinder.
Medium-format cameras can be DSLRs or mirrorless models, but they have larger sensors. However, the camera bodies are generally larger and heavier.
If you want to take better pictures, you can easily move to the next rung on the ladder without spending a fortune—and there’ll always be an AUTO setting on the main dial if you need it!
Switching from a compact to a bridge camera, from a bridge camera to a DSLR or from a DSLR to a mirrorless camera is not a big deal. There’s a huge range of different models in each range, and the entry-level models won’t break the bank. In addition, you can sometimes cover part of the cost of any upgrade by trading in your current camera and/or getting a bank loan.
Most serious photographers will end up with a mirrorless camera, but there’s no hurry! You don’t have to skip to the latest and greatest Canon, Nikon or Sony if you don’t want to. And even if you do decide to go mirrorless, you can always start with a crop sensor model rather than a full-frame one.
OM System and Panasonic offer a range of Micro Four Thirds mirrorless cameras, and there are plenty of models from all the major manufacturers with the slightly larger APS-C sensor.
The advantage of crop-sensor formats is that the cameras and lenses tend to be smaller and lighter, and you get extra reach and magnification from any given focal length. On the other hand, a full-frame camera with a 24 x 36mm sensor will generally give you better low-light performance and higher image quality.
Finally, it’s worth mentioning that having two camera bodies is a huge advantage in the field. It means you can instantly reach for the most appropriate focal length and don’t have to worry half as much about getting sensor spots when swapping lenses in wet or dusty conditions.
Again, that doesn’t mean you have to go out right now and buy two new cameras! It can simply be a long-term goal. If and when you start to earn a bit more money or decide you want to invest more in your hobby, you can take the plunge. You can also save money by keeping your old camera.
I started out with a Nikon D800 DSLR, and I hung on to it when I bought my D810. When I bought my D850, I sold the D800 but kept the D810. When I bought my first Sony ⍺1, I kept my D850. It was only when I got my second ⍺1 that I finally had two identical cameras!
Lenses

Sony 600mm f/4 G Master lens
A good lens has far more of an impact on the quality of your photos than a good camera, so that’s what you should spend most of your budget on. However, good lenses can be very expensive, especially ‘fast’ telephoto primes.
As a wildlife photographer, I wanted the best I could afford, but my Sony 400mm f/2.8 G Master lens cost over £10,000, and my Sony 600mm f/4 G Master lens cost over £15,000!
That’s far too expensive for most people, but, again, there’s a step-by-step solution. Zooms are generally cheaper than primes, as are lenses with shorter focal lengths and narrower maximum apertures, such as f/5.6 or f/6.3.
If you’re on a limited budget, you might start out with an f/5.6 zoom, such as a 100-400mm. You might then upgrade it as and when you can afford to.
One of the other problems is compatibility. You can’t simply pick and choose your lenses. Once you buy an interchangeable lens camera, the mount locks you in to a certain range, depending on the brand and whether it’s a DSLR or mirrorless camera.
Yes, third-party manufacturers make lenses for Canon, Nikon and Sony cameras, and they’re usually a bit cheaper, but they don’t usually offer the same image quality. (I learned that lesson the hard way on a trip to Svalbard with a Sigma lens!).
You can also buy adaptors that let you fit your old, DSLR lenses to your new mirrorless camera. However, adaptors are inconvenient, and you won’t get the benefit of native mirrorless lenses in terms of size, weight and autofocus performance.
So what can you do? Well, you can once again take a step-by-step approach. If you’ve decided to switch from your DSLR to a mirrorless camera, you could stick with the same brand so that you can keep using all your lenses.
I was in the same boat a few years ago. I wanted to buy a Nikon mirrorless camera so that I didn’t have to trade in all my old Nikon gear. However, the Z9 wasn’t out yet, and I wanted to get a new camera before going to Canada to see the polar bears. In the end, I decided to plump for the Sony ⍺1, but it did mean I made a big loss on my old lenses!
Settings

Could you have taken this in AUTO…?!
There’s a certain comfort and convenience to using the AUTO setting or one of the scene modes. At least, you know the camera’s not going to get things dramatically wrong.
The problem is that by giving up control of the settings, you risk spoiling your photos. It probably won’t happen very often, but the risk increases if you’re trying to shoot moving subjects and/or in difficult light.
That’s because the camera never knows what’s in front of it, so it has to guess. The manufacturers program their cameras on the assumption that the world reflects 18% of the light that falls on it. That may be true on average, but it’s not always the case.
In addition, a camera can’t possibly know if the subject is moving or stationary. That means it has to guess the right shutter speed. If it guesses too low, then you’ll end up with motion blur.
As in so many aspects of photography, there’s a trade-off. The more inconvenient decisions you make about your camera settings, the less likely you are to end up with blurred subjects and over- or underexposed images.
The major reason why most people are ‘addicted to AUTO’ is that they don’t know any better. They’re worried that they might screw up the settings and end up with rubbish pictures.
That’s certainly a risk, but at least you can shorten the odds of getting good results by investing a little time and effort in learning the right camera settings and understanding when problems are likely to occur.
Again, there’s an incremental approach that might help. The two major groups of settings involve exposure and focus. Let’s start with exposure.
Exposure

Would the shutter speed have been right for this shot in AUTO…?!
On most cameras, you can choose between lots of different exposure modes. These are the most common ones (in ascending order of control):
AUTO controls the aperture, shutter speed and ISO automatically.
Scene modes guess aperture, shutter speed and ISO based on the chosen mode, such as night, macro, sports, portrait or landscape.
Program mode usually controls the shutter speed and aperture but lets you pick the ISO and a few other settings, depending on the particular camera.
Aperture priority lets you pick the aperture while the camera chooses the right shutter speed.
Shutter priority lets you pick the shutter speed while the camera chooses the right aperture.
Manual puts you in complete control of the aperture and shutter speed.
In addition, most DSLRs and mirrorless cameras let you choose between manual and auto ISO. This can work in aperture or shutter priority mode, but you’ll never be quite sure how the camera brightens or darkens the image. It might be through the ISO, but it might also be through the aperture/shutter speed.
Auto ISO is most valuable in manual mode. I almost always shoot in manual with auto ISO because it guarantees the right exposure (in most circumstances!) but lets me control the aperture and shutter speed.
These are the most creative camera settings. The aperture controls the depth of field while the shutter speed controls motion blur. There are times when the aperture is more important and times when the shutter speed is. Either way, you’re covered.
Now, you could simply use aperture priority if you’re more worried about the aperture or shutter priority if you’re more worried about the shutter speed. However, photography is full of trade-offs, and there are plenty of times when you need to control both.
If you don’t want to be ‘addicted to AUTO’, you could start by trying program mode. The brightness will still be calculated automatically by your camera’s built-in exposure meter, but you’ll at least be able to change the ISO to control the noise level.
Once you’re happy with program mode, you can graduate to aperture or shutter priority—depending on which setting is more important to your photography. Most wildlife photographers shoot wide open, but there are times when you need more depth of field. However, if you’re shooting moving subjects, you’ll need total control over your shutter speed.
Finally, you can experiment with manual mode—both with and without auto ISO. Manual with auto ISO is a very convenient yet flexible setting, but there are times when you might want to set the ISO manually, such as when there’s plenty of light and you want to use the lowest native value to reduce noise.
Cameras often make exposure mistakes when their 18% guess turns out to be wrong. However, if you shoot in manual with auto ISO, it’s the simplest thing in the world to use exposure compensation to make your images brighter or darker. My Sony ⍺1 even has a dedicated dial on the top plate…
Focus

Would the focus have been right for this shot in AUTO…?!
The other aspect you might choose to control manually is focus. Modern cameras have astonishingly good autofocus systems, and mirrorless models offer eye detection and tracking for humans, animals, birds and even insects!
However, there are times when your AF system might get confused. There might be leaves or branches in the foreground, or you might be shooting in very low light. If the AF system isn’t working properly, you can always switch to manual.
This is not something I’d recommend unless you’re really desperate, but at least it gives you total control over what the camera is focusing on. If your subject still ends up blurred, you’ll only have yourself to blame…!
Assuming you stick to using autofocus, there are still options that you might have to select manually, and these can get very complicated! There are various ways to ‘help’ the AF system acquire focus and track your subject.
With compact and bridge cameras, you’ll have very limited options. However, DSLRs let you choose the focus mode:
AF-S is only really good for single shots as the camera only focuses once. This isn’t realistic for wildlife photography
AF-C instead continuously refocuses on the subject—whether it’s moving or not. This is great for wildlife photography, so it’s the one I’d recommend.
AF-A lets the camera decide whether your subject is moving or stationary and pick the right focus mode. This is often the default focus mode (if available) but is best avoided as it’s based on guesswork!
The next AF option you need to know about is tracking. This is when the camera follows whatever object happens to be in focus, and it’s especially useful for birds in flight and other moving subjects.
There are several other AF options available, depending on the camera, but the main ones are the number of focus points and the ‘stickiness’ of the AF system.
If you have a DSLR, it’s generally a good idea to stick with the fewest focus points possible. In most cases, you’ll only need one, and you can plant that right over the eye of your subject to guarantee pin-sharp focus.
However, if you’re trying to focus on a ‘difficult’ subject, such as a bird in flight, you might need to use a few more points. That might mean nine or 25 or some other number. The benefit of having more points is that your camera is more likely to acquire focus. The disadvantage is that it’s more likely to focus on something other than your subject’s eye, such as a wing or a shoulder.
Most high-end DSLRs have a ‘stickiness’ control that lets you specify how hard and how long the camera tries to hold on to a given subject. The classic example is a bird flying behind a tree. You obviously don’t want the camera to focus on the tree, so it pays to be on a high stickiness setting so that it ignores the tree and immediately reacquires focus on the bird when it reappears.
However, if you’re photographing a flock of birds, you might want to take shots of different ones at different times. In that case, you might want to reduce the stickiness setting so that your camera immediately refocuses on whichever bird happens to be in the frame.
Unlike DSLRs, mirrorless cameras have focus areas rather than focus points. That means the camera automatically focuses on whatever happens to come into that part of the frame. My Sony ⍺1 has several different focus areas:
Wide covers the whole frame.
Zone covers around a third of the frame.
Centre fix focuses automatically on a subject in the centre of the image.
Spot S/M/L covers a small/medium/large portion of the frame.
Expand Spot covers a small spot but uses the surrounding focus points if necessary.
I generally find Zone works best, but I occasionally switch to Expand Spot if there’s a cluttered foreground.
Finally, the big advantage of mirrorless cameras over DSLRs is that they can offer eye detection. That means there are even more AF options for you to worry about! Fortunately, they’re fairly straightforward.
The first thing you have to do is tell your camera what type of subject you’re photographing:
human
animal
bird
insect
vehicle
train
aircraft
etc
Not all mirrorless cameras offer every single option, but as AF technology improves, the list is getting longer by the day!
If you’re a wildlife photographer, it’s annoying to have to tell your camera what you’re shooting. You’d think with such sophisticated AF systems, it would know that already! Let’s just hope the manufacturers get their act together soon…
Back Button Focus (or BBF)

Shot of a Dalmatian pelican taken with BBF—like all my shots…
One important limitation of any DSLR’s AF system is that the focus points are concentrated in a small, central section of the frame. That means it literally can’t focus on anything outside that area!
As a result, camera manufacturers gave DSLR owners the option of using Back Button Focus so they could ‘focus and recompose’. What this means is that you select options from the menu system that mean you can no longer activate the AF system by half-pressing the shutter. Instead, you have to press a button on the back of the camera—usually the AF-ON button.
This is very useful for wildlife photography as it means you can focus on your subject and then take your thumb off the back button and move your camera to get the exact composition you want. The focus is locked, so it doesn’t matter if your subject is now outside the central focus area.
The other advantage is that you can keep focusing on your subject whether or not you’re taking pictures (as long as you’re in AF-C mode). All you need to do is keep your thumb on the back button.
With mirrorless cameras, there’s less need to focus and recompose as the focus points cover over 90% of the frame, and eye detection does the job for you. However, BBF still has its uses, and I personally like the flexibility it gives me.
Rules of Composition

The rule of thirds in action
If you want to improve your photography, one of the easiest ways is to learn the rules of composition (see article). You don’t need to be an expert photographer to be able to tell whether a photo is good or bad, but it helps to know why!
Professionals use the rules of composition to help their images look balanced, dramatic and impactful. They’re useful because they’re based on human physiology and psychology. That doesn’t mean there aren’t times when you should ‘break the rules’, but they go a long way toward ensuring the quality of your photos.
When I lead photography workshops, I always ask my students to pick a theme to explore. Here are a few sample concepts:
The rule of thirds involves dividing the frame into three equal parts, both horizontally and vertically. The idea is that you’ll get a more balanced image if you put your subject on one of the lines or crossing points.
The decisive moment is a concept invented by Henri Cartier-Bresson to express the combination of viewpoint, framing and timing that lead to outstanding composition.
Framing refers to the objects within a picture that appear to frame the subject, such as grass or branches.
Negative space is a way of providing balance to an image by including space opposite the main subject—as opposed to plonking it right in the middle of the frame.
Leading lines ‘lead’ the eyes of the viewer towards the subject. The classic example is a railway track getting narrower and narrower as it recedes into the distance.
Symmetry can often be best shown by centring the subject horizontally and/or vertically in the frame.
Point of view refers to the height of your vantage point and is especially important in wildlife photography. If your camera is at the same level as your subject’s eyes, the viewer ‘enters its world’ and experiences it as would a member of the same species. If you’re higher up, it’ll seem smaller. If you’re lower down, it’ll seem bigger.
Motion blur is a great way to show energy and movement in an action shot. In a slow pan (see article), the idea is to keep your subject’s head sharp while blurring the background and its legs or wings.
Depth of field refers to the amount of the image from front to back that’s ‘acceptably sharp’. In wildlife photography, you can separate your subject from the foreground and background by keeping it sharp while limiting the depth of field.
Odd numbers are somehow more visually pleasing than even ones. Just don’t ask me why…!
Filling the frame means making sure your subject is large enough to be easily visible in the image, allowing viewers to appreciate every single detail.
Aspect ratios can enhance the composition by ‘going with the flow’. For example, if there are many vertical lines in an image, you might want to use portrait format, but if there are many horizontal lines, you might want to use landscape. You can also customise the aspect ratio (either in camera or using editing software) to create squares, panoramas or any other shape.
Foreground interest provides depth to an image.
Balance can be achieved by having two similar subjects, one mirroring the other.
Juxtaposition puts contrasting elements next to each other to emphasise the differences between them, such as Man vs Nature or warm vs cool colours.
Patterns, textures and colours can often be the ‘subject’ of a photo all by themselves if they’re strong and dramatic enough.
Simplicity is a great way to elevate an everyday image by limiting distractions and perhaps concentrating on one or two main colours.
Backgrounds should add to your subjects, not distract from them. That means you need to look for smooth washes of colour without any annoying branches or leaves.
Humour can be a great way to engage the viewer. Animals and birds often do some pretty crazy things, so it’s your job to capture that in camera!
Verdict

Eye of the Rhino
Photography can be a money pit, and it can also be very technically challenging. That puts many people off investing in new equipment or trying to learn the right settings or rules of composition.
However, if you want to improve your photography, you don’t have to jump in at the deep end. You can take an incremental approach, buying the odd camera or lens when you can afford it and maybe learning one or two new concepts at a time.
There are plenty of YouTube videos and online articles (like this one!), and you can always invest in a photography lesson or workshop. Every little counts, and you should soon see the difference in the quality of your pictures.
If you’d like to order a framed print of one of my wildlife photographs, please visit the Prints page.
If you’d like to book a lesson or order an online photography course, please visit my Lessons and Courses pages.