
How to Photograph in the Rain
You can get very wet in the rain…
It’s Raining, it’s Pouring
Not many people like being out in the rain, and I’ve even been on a game drive with a guide who immediately turned round and went back to camp as soon as it started raining—even though we were only 20 yards down the road!
However, bad weather makes good photographs. That’s why you need a set of good waterproofs (for yourself and your cameras!) and make the most of it. Here are a few tips I picked up on my recent visit to the Masai Mara, where it rained every single day…!
Buy Rainproof Covers
The first and most important point is that you need protection for your cameras and lenses. A lens hood is a good start, but photographic equipment and water don’t mix (even if your camera is supposed to be ‘weather-sealed’), so there’s no point charging off into a thunderstorm if you don’t have rainproof covers.
I have two sets: one cheap and one expensive. The cheap, transparent ones are fine for most purposes, but they do rustle quite loudly—which is not ideal for wildlife photography!
The expensive ones are grey and black and are specifically designed to fit my Sony ⍺1 camera bodies and lenses. However, they’re a pain to put on, and the hole for the viewfinder is too small! That’s why I hardly ever use them…
You can also get camouflage covers with different sections that are custom-fitted for each individual lens, but they generally aren’t waterproof, so that’s not the ideal solution. If you want camouflage, it’s better to buy an all-in-one cover that will protect the whole camera and lens.
Wear the Right Gear
As Alfred Wainwright once wrote, “There's no such thing as bad weather, only unsuitable clothing.” That’s as true for wildlife photographers as it is for everyone else—and safari trucks provide less protection than you might think! There’s always a leak or a drip coming from somewhere, and even ponchos don’t really help as the water just dribbles down onto your legs.
It’s not much fun taking pictures if you’re getting soaked, so you need a decent set of waterproofs. That means a jacket and trousers that are genuinely waterproof, not just ‘shower-proof’ or ‘water-resistant’. Yes, you’ll have to pay a bit more, but it’s worth it—believe me!
I used to play a lot of golf, so I have a set of GORE-TEX waterproofs by Galvin Greene. The idea was that they’d be breathable as well as waterproof, but that, er, hasn’t been my experience!
I need new waterproofs, but I can’t find a jacket with a wrap-around internal pocket. That’s crucial for stowing all my clothes when I travel by plane, so I’m still on the lookout…
Take Portraits of Wet Animals
Slippery When Wet
Once you and your equipment are properly protected, you can venture out into the wilds. One of the obvious things to do is to photograph bedraggled animals. If the rain is heavy and prolonged enough, you should be able to find subjects that are thoroughly soaked and looking suitably miserable!
Julie Andrews sang about ‘raindrops on noses and whiskers on kittens’ (I think), and they’re some of my favourite things, too…
Photograph cats shaking their heads
A Good Shake
Another classic is the shot of a lion, leopard or cheetah shaking its head in the rain. This is as inevitable as night following day, so you’ll definitely get a chance to see it, but you do need to be alert. It can happen out of the blue, and it doesn’t last very long!
When you’re setting up for this shot, you should think about the best shutter speed to use. There’s no right or wrong answer—it depends on the effect you’re trying to achieve.
At a fast shutter speed (1/1000+ of a second), the cat’s head and the water drops will be frozen, so everything will be sharp. At a slow shutter speed (1/30-1/250), you’ll get varying degrees of motion blur. If you’re not sure what will work best, just try it out a few times and see what you prefer.
Photograph Animals Splashing Through Puddles
Wet and Wild
During and after heavy rain, you’ll almost always get puddles on the ground that can prove very useful to photographers. If you can capture a big cat chasing through standing water, for instance, you’re guaranteed great plumes of spray that add to the excitement.
Just make sure you use a fast enough shutter speed to freeze the action. That generally means 1/2000 or above—unless you’re attempting a slow pan.
Use the Right Shutter Speed for Raindrops
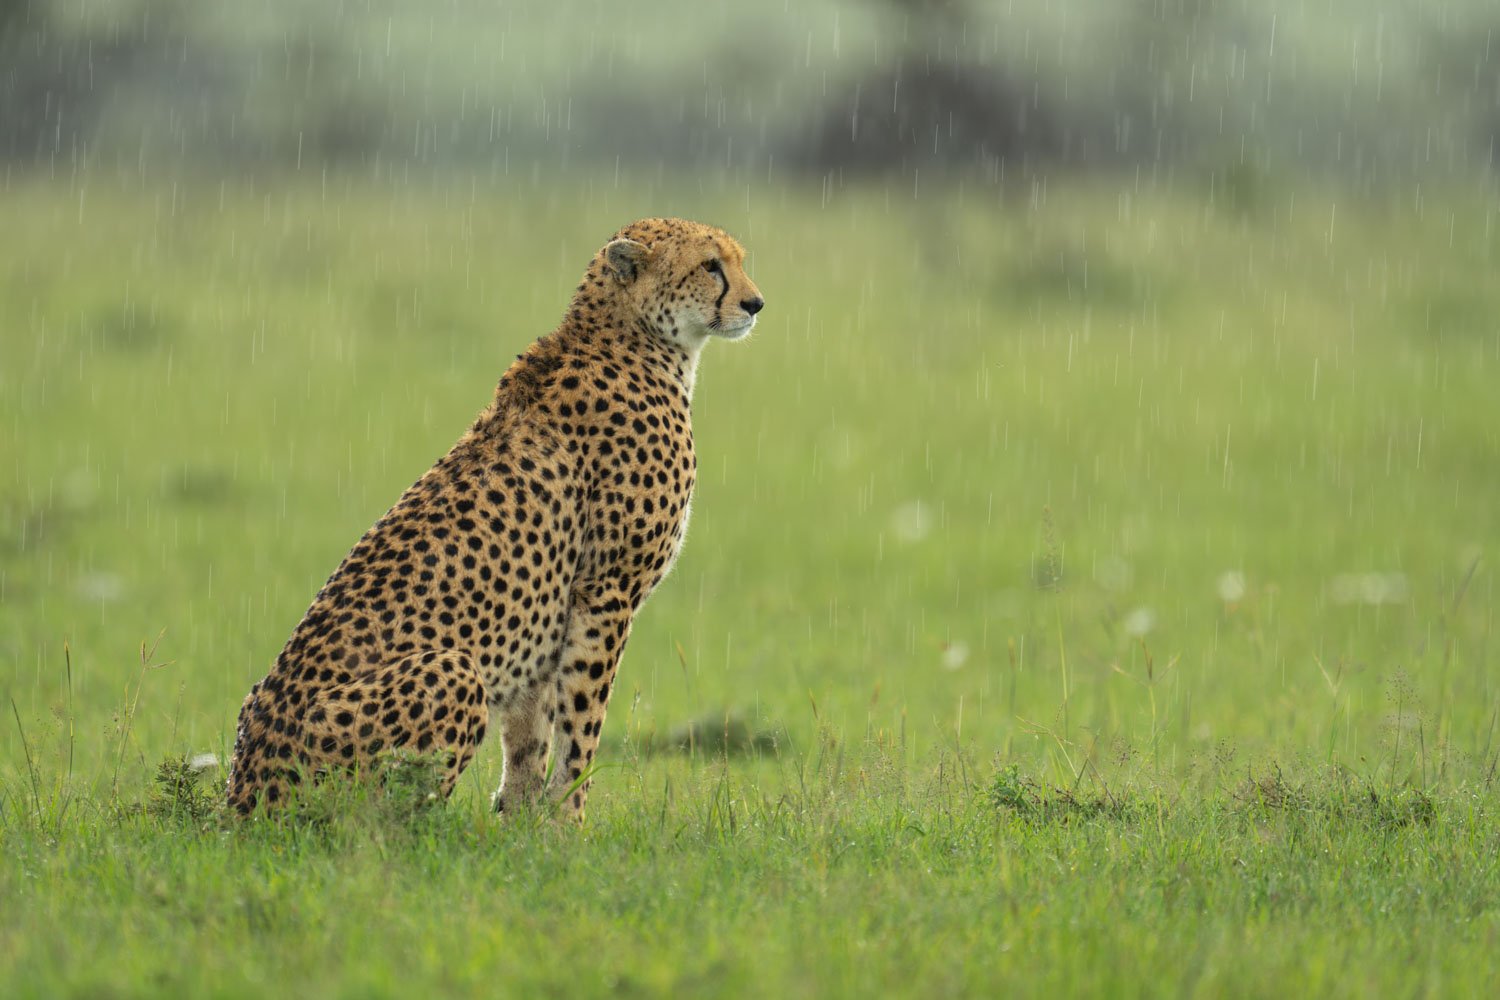
It's Raining Again (at 1/160)
Pictures of animals in the rain aren’t really complete unless you can show the raindrops themselves. The key to this is the shutter speed, which controls the shape, the blur and the length of the streaks.
At high shutter speeds (1/500+), the drops will be frozen, so they’ll appear small and round. At slow shutter speeds (anything less than 1/100), you’ll get long, blurred streaks that are quite faint. Somewhere in the middle (around 1/160) is the sweet spot, where you get streaks that are long enough to suggest movement but still clearly visible.
Use the Right Aperture for Raindrops
It Never Rains but it Pours (at f/8)
Another factor is the aperture. Again, following the Goldilocks principle, you don’t want it to be too wide or too narrow. If it’s too wide (f/2.8 or f/4), the depth of field will be too shallow, so you’ll only be able to see a thin sliver of raindrops in the plane of focus. If it’s too narrow (f/11+), the background will probably become too sharp and therefore too distracting. The sweet spot is probably around f/8, but you’ll have to try it out for yourself.
Backlight the Subject
“I knew this would happen…”
Streaks of rain catch the light, so you make them more visible by shooting into the sun (or any available light). Backlighting will help illuminate the raindrops, so they’ll stand out against the background.
Find a Dark Background
Raindrops Keep Falling on my Head
Finally, raindrops are quite light in colour, so a dark background will help them stand out. If you can get that tonal separation in camera, you can then play around with the sliders in Lightroom or Photoshop to make it even more obvious.
Add Drama with Storm Clouds
Gnu Horizons
With rain, you often get dramatic storm clouds, and these can look great in a black-and-white environmental portrait of an elephant, say. They also work well if you can show the contrast between a sunlit landscape and dark, threatening skies in the background.
The cool hues of the clouds and the warm tones of the grass are basically blue and yellow, which are complementary colours. This maximises the colour contrast, and you can make your image even punchier by boosting the Blue Primary Saturation slider in Lightroom.
Catch a Rainbow
Rainbow Warrior
Rainbows don’t come along very often, and I’ve very rarely seen one on a photography trip (except at Victoria Falls) even though I’m always looking out for them. The only time I ever missed a game drive (due to a misunderstanding), one of the guests came back and showed me a shot of a pride of lions under a double rainbow! Thanks, mate…
Capturing the fully glory of a rainbow is tricky, but there are a few things you can do to make life easier. The first is to use a polarising filter. This gives you clearer and more vivid images, so the colours should stand out more.
Another useful tip is to use a narrow aperture. This increases the depth of field, which means the rainbow is likely to be sharper and more defined.
Finally, you can always fix it in post! If you create a brush mask in Lightroom or Photoshop, you can brush over the rainbow and play around with the highlights, shadows, clarity, saturation and colour temperature to your heart’s content.
Used carefully, Photoshop AI tools can also speed up selective masking and minor clean-up—as long as you keep the final image looking natural rather than over-processed.
Verdict
So there you have it. If you can somehow persuade yourself that rain is an opportunity rather than an inconvenience, you should be able to take some unique pictures.
All you need to do is invest in the right protective gear (both for yourself and your cameras) and pay attention to your shutter speed, aperture and other settings.
You can then confidently document the interaction between wildlife and the rain, from portraits of bedraggled animals to photos of cats shaking their heads or splashing through puddles—with the odd storm cloud and rainbow thrown in for good measure!
PS When shooting outdoors in the rain, photographers often carry multiple dry bags and backup equipment. Custom Keychains printed with their name or studio name can be attached to different photography bags to help quickly distinguish which gear belongs where, preventing any confusion or frantic searching during urgent shooting moments.
If you’d like to order a framed print of one of my wildlife photographs, please visit the Prints page.
If you’d like to book a lesson or order an online photography course, please visit my Lessons and Courses pages.