
Types of Light for Wildlife Photography
So which one is this, then…?
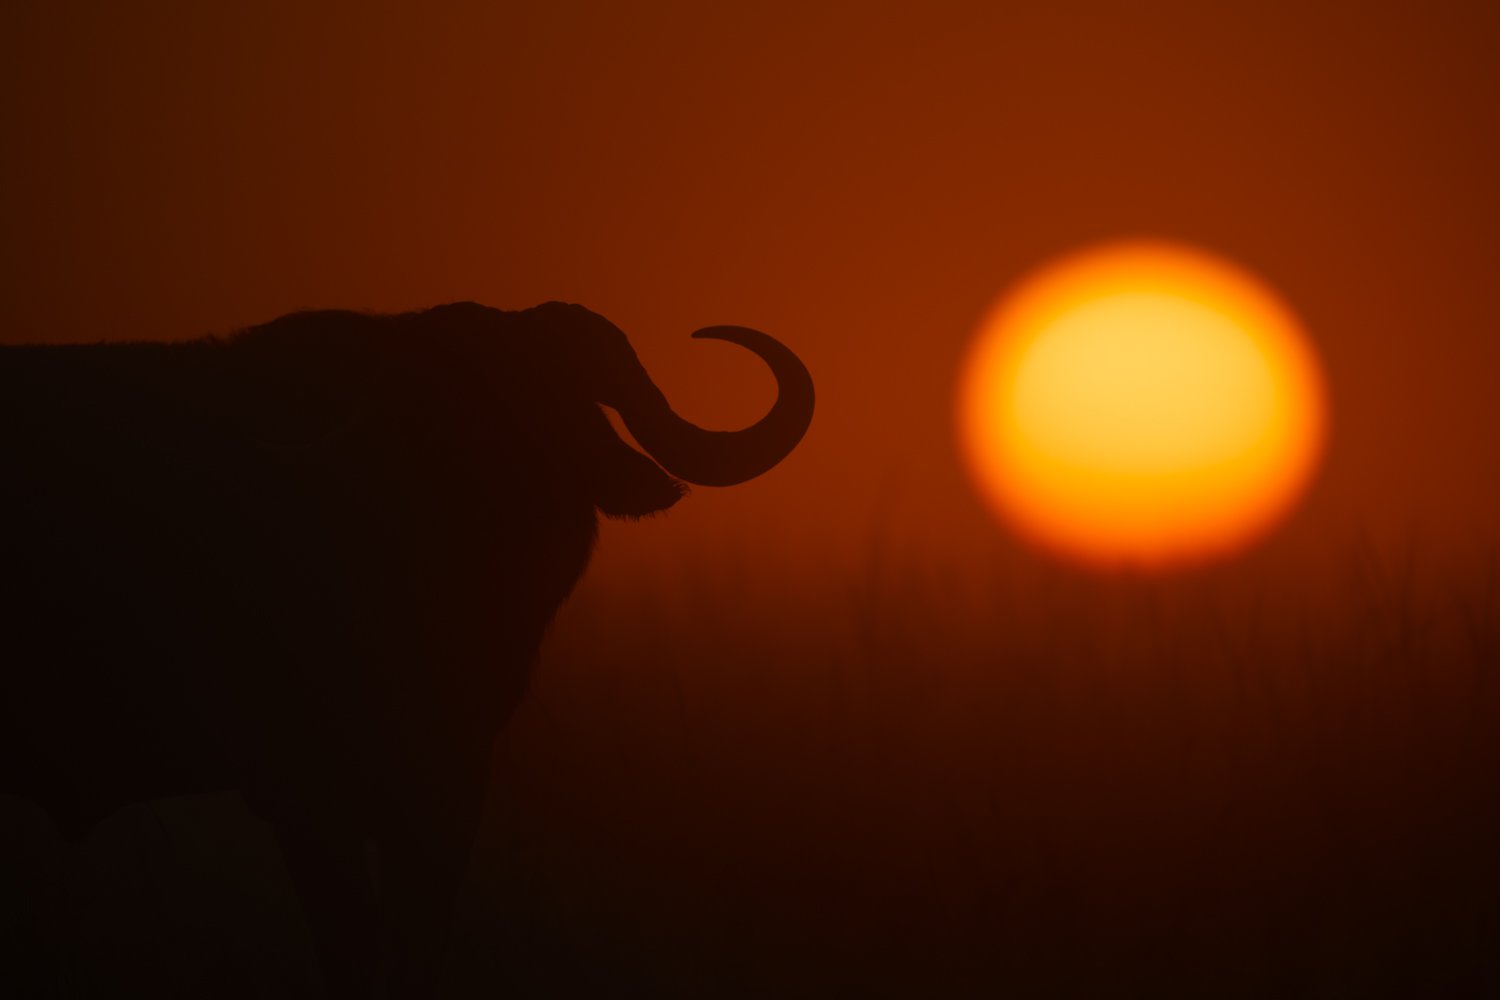
Horn of Africa
Light is light, right? Wrong!
Light varies in colour, direction, brightness and softness throughout the day, and each type makes different demands on the photographer. You need to know how to guarantee good light and how to cope with bad light by using the right camera settings and editing techniques.
Colour

The colour spectrum
Light from the sun is a mixture of different wavelengths and energy levels that we perceive as the colours of the spectrum: red, orange, yellow, green, blue, indigo and violet. Colours at the red end have longer wavelengths and less energy; colours at the violet end have shorter wavelengths and more energy. Outside the visible spectrum, there are various other types of light that we know as ultraviolet, infrared and even X-rays.
The colour of an object in a photograph depends on what colour it is (obvs!), but also on what colour the light is. Red light will produce a redder image, for example, and blue light a bluer image.
This colour cast is what you’re correcting for when you change the white balance. Every hue has a ‘colour temperature’, which is the temperature an object needs to be to emit that colour light. (This object is supposed to be ‘an idealized opaque, non-reflective body’—whatever that might be!)
Typical colour temperatures range from 2,000 to 6,500 Kelvin. The Kelvin scale measures temperature from absolute zero (-273° Centigrade) rather than the freezing point of water (0° C), but a degree is exactly the same on both scales.
This is where it gets confusing. ‘Warm’ colours, such as reds and yellows are actually emitted at a lower temperature than ‘cool’ colours, such as blues! Yes, that’s right. If you ever used a Bunsen burner in science at school, you might remember that it started out with a yellow flame, but as you added more air by opening the vent at the bottom, the flame turned blue or even white. That’s because it was getting hotter and hotter.
It’s exactly the same with the different white balance settings. The warmer the light, the cooler the temperature:
Colour Temperature Light Source
2,500-3,500 K Tungsten
4,000-5,000 K Fluorescent
5,000-5,500 K Flash
5,000-6,500 K Daylight
6,500-8,000 K Cloudy
9,000-10,000 K Shade
That’s why getting the wrong white balance might give your photos a colour cast. If you use Shade on a sunny day, for instance, your photos will look too warm; if you use Tungsten, they’ll look too cool.
Traditionally, the warm light at sunrise or sunset (2,000-3,000 K) is much prized by photographers. In fact, many will deliberately go out during the golden hour just after dawn or just before dusk to take advantage of the warm, soft light at a low angle, causing long shadows.
If you want a cooler, more mysterious look, you can shoot during the blue hour, which comes just before sunrise and just after sunset. Light levels will be very low, so it helps to have a fast lens with a wide maximum aperture, but this is the best time to capture images with a blue colour cast.
During the middle of the day and in overcast conditions, the light is cooler than in the golden hour but warmer than during the blue hour. This is not ideal, but it depends on the kind of shot you’re taking, and you can always change things in post.
One thing you can do to ‘warm up’ an image is change the white balance to Shade. If the picture wasn’t actually taken in the shade, the new setting will emphasise the reds, oranges and yellows. This is especially useful for shots taken at sunrise or sunset and/or for shots of the big cats with their golden coats.
Another possibility is to play around with the vibrance and saturation sliders in the Basic panel and the Blue Primary Saturation slider in the Calibration panel in Lightroom. Just make sure you don’t go overboard and make the whole picture look unnatural!
Finally, you can always switch to black and white. By removing the colour altogether, you can get people to focus their attention on shapes, patterns and textures.
Direction
The direction of light is very important in most photographs. There are two aspects to this: the altitude of the sun and where you are in relation to your subject. You can’t change the angle of the sun (unless you choose a different time of day), but you can opt for front lighting, backlighting or side lighting by moving around your subject.
Angle of Light
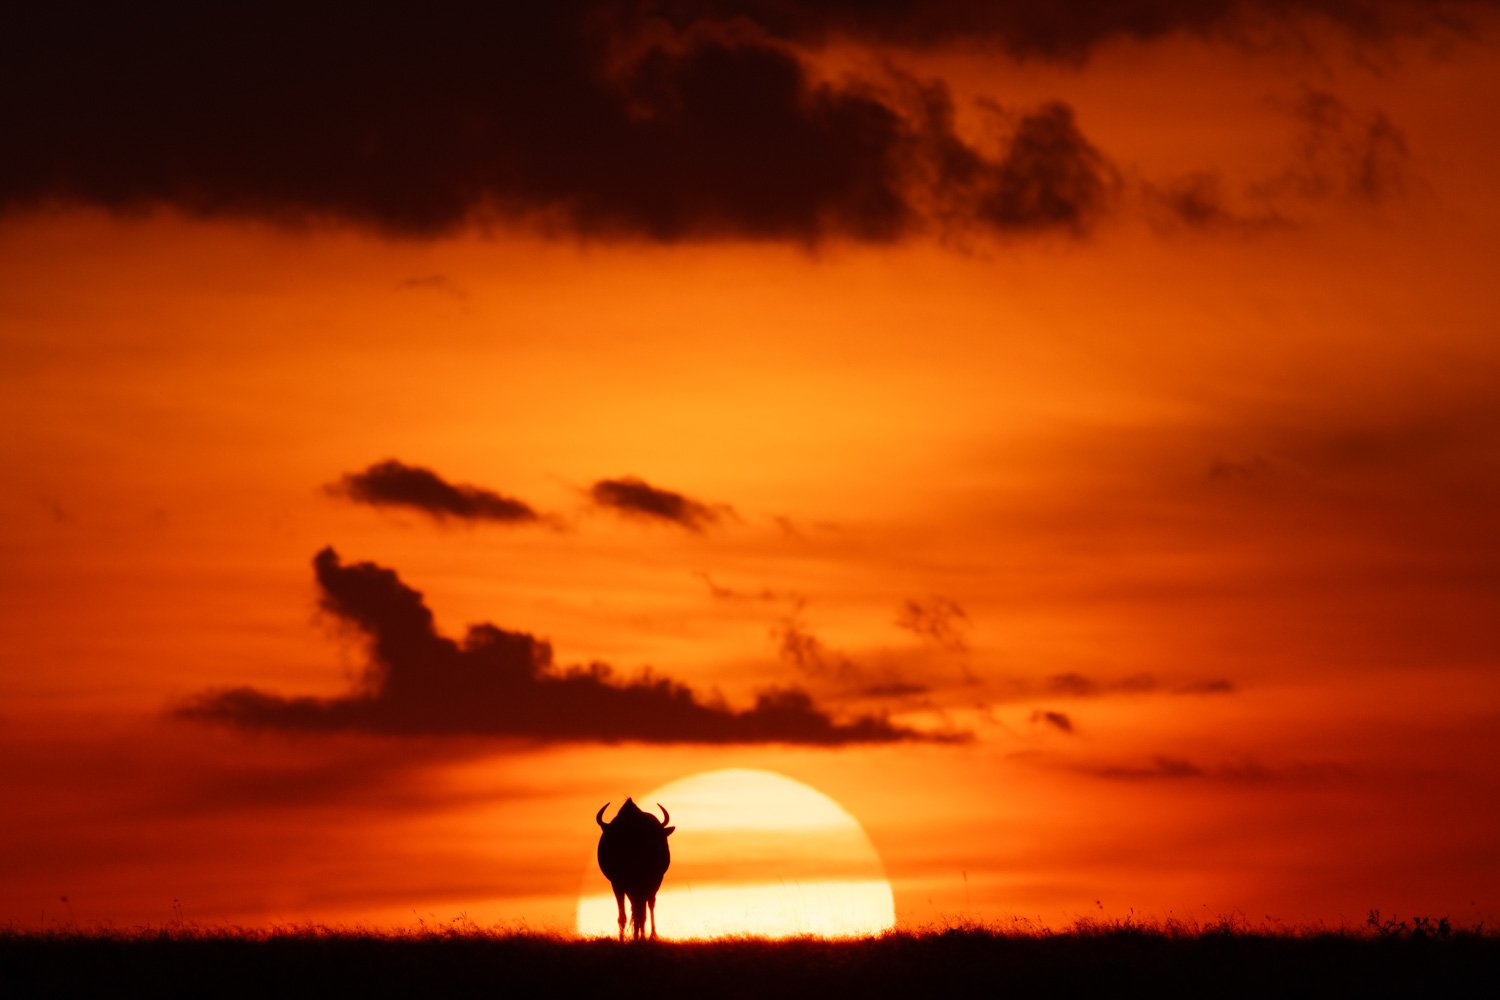
Take Me Home
The angle of light is important because it determines where shadows are cast. Shadows are often the bane of wildlife photographers, and it’s easy to ruin a picture by letting a distracting shadow appear on the face or body of your subject.
If you photograph at sunrise or sunset, the sun is just above the horizon, so the angle of light will be almost horizontal. This creates long shadows, which can look very attractive. However, if you don’t want any shadows, it’s a good idea to stand with the sun directly behind you. That way, your subject will be perfectly lit from the front, and any shadows will be behind it and therefore hidden from view.
If you shoot during the middle of the day, the sun is generally near its zenith. It obviously depends on your latitude and the time of year, but the sun is usually high in the sky. This means you’re in danger of capturing shadows underneath the chin of your subject, and if the sun is behind you, it might very well be squinting—which is not a good look!
Unfortunately, there’s not much you can do about that…
Front Lighting

"Ah, grasshopper..."
Front lighting is the traditional way of taking pictures. The light is in front of your subject, so it’s evenly illuminated without too many shadows, and you might be able to capture catchlights in its eyes. Again, though, it depends on what type of shot you’re trying to take.
With front lighting, the main danger is that your images will look a bit boring! Used creatively, shadows can add drama, but you won’t get that. You also won’t get any rim lighting effects or the chance to create silhouettes.
In short, front lighting ‘works’ if all you want is a picture postcard image of an animal or bird, but it’s not very likely to have the ‘Wow!’ factor.
Backlighting
Miss Saigon
Backlighting is more difficult to pull off successfully, but the potential rewards are probably greater. The main difficulty is getting the right exposure. Your subject will inevitably be in shadow, so how do you solve the problem of having more light on the background than on your subject?!
One option is the silhouette. This is a great way to take pictures at sunrise and sunset. Most exposure modes (apart from full manual) will automatically turn animals into silhouettes against a bright sky—with or without the sun in the frame. If you can photograph something with a recognisable silhouette in profile on the horizon, you’ll have an image to treasure.

Mother’s Pride
Another option is rim lighting. This is when you try to create a golden halo around your subject, caused by the sun catching the fur or feathers. You can choose whether to turn your subject into a silhouette or add positive exposure compensation to illuminate it a bit more. You can also move around to change the angle of the sunlight. Apparently, David Yarrow likes to photograph animals with the sun 45° behind them, but it’s up to you.
Side Lighting

Eye of the Rhino
Side lighting is no good if you want to show detail across your entire subject, but it offers the potential for a dramatic contrast between highlights and shadows—or ‘chiaroscuro’, if you happen to be a Caravaggio fan! In the extreme case, one side of the animal is brilliantly lit, but the other side is in complete darkness. If you like contrast, this one’s for you!
Brightness
Mug Shots
The brightness of the ambient light is again something you can’t control, and low light is often a challenge for wildlife photographers, who like to shoot at sunrise and sunset. That’s why they tend to invest thousands in fast, prime lenses with apertures of f/4 or even f/2.8.
On the other hand, shooting at midday means having to deal with harsh, bright, overhead light. This is not flattering for most subjects—unless you’re taking slow pans!
However, there’s another side to brightness, which is the brightness of your photographs. In the search for novelty, one simple technique is to create high- or low-key images deliberately.
Pure white or black backgrounds can simplify the composition and make it much more dramatic. It helps if you over- or underexpose the image in camera, but you can also play around with the exposure and masking in Lightroom or Photoshop.
If you turn your picture into black and white, you can even make it look a bit like a pen-and-ink drawing…
Softness

"Is this close enough...?"
The softness of light is simply a function of the relative size of the light source. A small or ‘point’ source creates harsh light with stark shadows. This can be true even with a giant celestial object like the sun, which seems small because it’s 92 million miles away!
On the other hand, a large, diffuse light source creates soft light with gentle shadows. This is more flattering when taking portraits, and studio photographers deliberately use giant softboxes or ‘beauty dishes’ to achieve this effect.
If you’re in the bush, the easiest way to find soft light is to go out on a cloudy day. The clouds diffuse the light and become a kind of enormous softbox that eliminates any shadows.
You can also get soft light at sunrise or sunset. Yes, the sun is still the same size as it is at midday, but the point is that so much light is scattered and refracted by the atmosphere that you get the same effect.
Verdict
So there you have it. There are many different types of light, and they all offer their own unique challenges and opportunities. If you take account of the colour, direction, brightness and softness of the light, you’ll be more likely to take great pictures!
If you’d like to order a framed print of one of my wildlife photographs, please visit the Prints page.
If you’d like to book a lesson or order an online photography course, please visit my Lessons and Courses pages.